Cortana Memory Crystal Chip - HD Build

Status
Not open for further replies.

Ckesner

New Member
Cortana Memory Crystal Chip - HD Build

Cortana_Chip_2_zps2dgdzqaq.jpg

Introduction:


There is no denying that Master Chief is the leading protagonist of the Halo series. His story is one that spans almost the entirety of humanity's contact with alien species. However, there is something about the Cortana / Master Chief, Cortana / Halsey relationship that is so very integral to the series. Add to that the work and emotional investment that Jen Taylor has brought to the Cortana character, and it is no wonder Cortana elicits such an emotional connection from so many fans. All this to say that Cortana is one of my favorite characters from the series and deserves some cosplay love. I'm not dressing up in blue lycra, not happening, but I can craft a small part of her that I carry with me. Ok, project motivations done, now for the good stuff.

Concept:


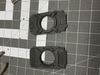
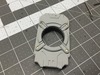
This project got it's start when I found dylanismyname 's "Halo Cortana Chip" on Thingiverse. I immediately wanted to print one, but then the temptation to step it up kicked in. It seemed neat to have a print of the chip hanging out in my pocket, but kinda seemed like a disservice to Cortana to have some cheap plastic knockoff. I also saw this as a good proof of process opportunity for my upcoming 3d printed armor build. Thus, the plan of creating the closest thing to a functional Cortana chip was hatched.

Goals for the Project:

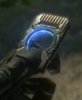
  1. Accurate reproduction of the game aesthetics
  2. Functional lighting
  3. Functional memory storage
  4. Semi-accurate dimensions (components allowing)
  5. Develop processes and standards for upcoming armor build.
  6. Design a functional display plinth
  7. Possibly incorporate autorun routines to heighten experience

I may add more to that list as the project progresses, but I have only really been at it for about a day, so we will see how it goes. So, after all that introduction, lets dive right in.
 

Attachments

  • Cortana_Chip_2.jpg
    Cortana_Chip_2.jpg
    25 KB · Views: 2,434
  • Cortana_Chip_2_zps2dgdzqaq.jpg
    Cortana_Chip_2_zps2dgdzqaq.jpg
    24.4 KB · Views: 8,728
Build Update:

The build has started with the need to fulfill the lighting and memory storage requirements for the project. For simplicity sake, I wanted to combine the two functions. A little Amazon-foo brought this little beauty into my possession:

IMG_6380.JPG

In the picture is a 8GB usb flash drive with a block of crystal attached and a blue LED. The crystal is meant to be engraved, but is going to be removed for this project, so who cares. This package allows me to have on-board memory, granted 8GB is not great, but way more than I'll need for any part of this project and plenty enough for other uses, and a light source and controller. It also has the added benefit of being constantly lit when plugged in, but flickering during access/transfer, a feature I really wanted.

The dimensions of the flash drive were modeled, as well as the clearance needed for the usb cord that would form the display base. I am using a 6' usb extension cable. This will allow me to build a desktop display base, and will allow me to plug the chip in internally, removing the need for a usb plug to jut out from the end of the chip. The cable has a very narrow metal tip that lets me make the chip as small as possible. The cable looks like this:

IMG_6383.JPG

I'm going to try not to overfill any one post, but break it up so it is easier to read. Moving on...
 
Build update:

Sizing:

Thefirst step was to model the usb drive and other internal components and clearances. Then I could scale the chip file appropriately to enclose the components.

interior.jpg

New realization: this thing is going to be huge. Not huge in a bad way, just bigger than normal. People are used to seeing the keychain version released a few years ago, which was pretty tiny. From screen grabs it looks pretty fair sized in MC's hand. Now MC is in armor, and is a really big guy to boot, after enhancements, so lets just think that maybe he has NBA sized hands. I'm sure he could palm a basketball if he wanted to. Anyway, then there is this pic from Halo 1:

Data_chip.jpg

In a human hand the chip is pretty big, so I am ok with the chip being substantial. In the end, the final dimensions will be:

3.75" x 2.125" x .5"

Big, but in a really pleasing kinda way.
 
Build Update:

Modeling:

The files provided by dylanismyname are very good. Highly accurate as far as I can tell, and more than accurate enough to suit my taste. Part of me wanted to model it from scratch, but I am trying to focus on model gathering for my suit build, and these files were already so good, I decided to let it be. The first step was to model the necessary clearances for the usb drive, Lexan inserts, and the screw details i plan to add.
Pre Cut Cut.jpg

The blue posts are just there to serve as subtraction tools to make way for these little guys:

IMG_6382.JPG

I would much rather use hex head metric cap screws, and I still may, if I can find them that small, but these served well as a stand in. They will obviously be painted silver. I am modeling it so that the screws can actually hold the two halves together, but I am not sure if I will be gluing as well. Time will tell.

The yellow chunk at the bottom is a placeholder for the usb female plug and the green is a placeholder for the Lexan. After all the subtractions and a couple additions to fill in some critical areas are done, this is what I am left with:

Post Cut.jpg

Now for sourcing bits and pieces.
 
definitely going to follow your progress, working on my first halo suit, but I am fascinated by some of the props to go along with it. I love seeing your planning and how you are approaching the challenges of this. Thank you for sharing.
 
Build update:

Printer is now hard at work. Will have pics in the morn. Speaking of... Can anyone tell me how to make images larger in a post like I have seen in other threads? All mine seem to be small and you have to click to enlarge. Thanks.
 
Build Update:

Printing:


The first prints came off the bed last night. Here they are:
IMG_6387.JPG

Printed in Black ABS. - 0.1mm layer height. 20% infill.

I am happy with the print quality and the build size. However, I am not happy with a few things:

First - My support structures are adhering too well in some areas and making clean out a pain. This is my fault for not checking my settings.

Second - The recesses I included for the internal pars could use a bit looser tolerance. That, coupled with the support material, is making for a tight fit.

Now, I am not against going crazy with a dremmel, especially on the inside of a piece. So I did:

IMG_6391.JPG

But then I said to myself: "Self, filament is cheap, and nobody likes ugly" So I did a test fit, remeasured, and adjusted my model, this time adding a small bezel ring that I had been wishing for.

IMG_6388.JPGIMG_6392.JPG

Back to the printer we go:

IMG_6393.JPG

In the mean time, I used a little, umm, persuasion, to separate the crystal from the flash drive:

IMG_6390.JPG


Now I just have to see what the printer has waiting for me when I get home.

On a side note, I hit the reject prints with a coat or two of high build primer, looking really good. I may get through this project with only the minimal amount of sanding.
 
Cool ! I especially like the insight in the printer story as stuff like this harbors valueble tips for anyone interested in that subject.
I like that.
May I ask ? Resolution ? Print speed ? Temperature ?
 
Cool ! I especially like the insight in the printer story as stuff like this harbors valueble tips for anyone interested in that subject.
I like that.
May I ask ? Resolution ? Print speed ? Temperature ?


No problem.

I'm printing on a Lulzbot Taz 5 with a .5mm nozzle. I printed these parts at 0.1mm layer height using 3mm ABS with a 240 C hotend and a 110 C print bed. I print the first layer at .4mm and at 250 C for better adhesion. Speeds were pretty low for this one. I think it was 15mm/s for the top and bottom layer, 35mm/s for perimeters, and 70mm/s for infill. I used 20% infill for these parts, but have since increased it to 50% infill for the new prints in an effort to improve top surface finish. There really isn't that much infill anyway. I am still getting the hang of printing. I am trying to use this project as a test bed to develop procedures for when I start printing my armor. If anybody has some suggestions for improvement, I'm all ears.
 
Speaking of... Can anyone tell me how to make images larger in a post like I have seen in other threads? All mine seem to be small and you have to click to enlarge. Thanks.

Host them off-site instead of attaching them to your post. Thumbnails are obnoxious, having to click them to see the actual photo (after a long wait for them to load due to slow 405th server), then close the photo pop up to resume reading the thread hidden behind the pop up. If you host elsewhere then you can link directly to the images.
 
Host them off-site instead of attaching them to your post. Thumbnails are obnoxious, having to click them to see the actual photo (after a long wait for them to load due to slow 405th server), then close the photo pop up to resume reading the thread hidden behind the pop up. If you host elsewhere then you can link directly to the images.


Ah, makes sense. I'll try that, thanks. Is there a particular hosting site that seems to work well here. I do hate that older threads are just a useless collection of missing image links though.
 
I was using Google Photos which is free and claims unlimited storage so long as file sizes are within a limit, but they've recently overhauled their site making it now a royal pain in the space diaper to navigate, upload, link, or anything so I've ditched them and gone back to Photobucket which is also free. Typing "free image hosting" into Google yields many options, but I haven't done the research for comparing capacity and duration specs.
 
Ah, makes sense. I'll try that, thanks. Is there a particular hosting site that seems to work well here. I do hate that older threads are just a useless collection of missing image links though.
I've been using photobucket too and it makes my pictures size to the viewer's screen I think. Lots of storage space. Free and they have a nifty little mobile app. I can upload them to the site straight from the camera mode on my phone. :)

Great build idea. Keep up the great work!
 
Testing photo hosting:

Not a lot of time to work tonight. Did come home to these though:

8041E87F-A6D2-4F48-AC9C-84937EEE23F1_zpscpp76e6q.jpg
 

Attachments

  • 8041E87F-A6D2-4F48-AC9C-84937EEE23F1_zpscpp76e6q.jpg
    8041E87F-A6D2-4F48-AC9C-84937EEE23F1_zpscpp76e6q.jpg
    224.9 KB · Views: 324
Looks like you got photos figured out! This is looking awesome and I'll bet I'm in the same boat as a lot of other members wondering if you're going to upload the printer file and parts list so we may make one too!
 
Looks like you got photos figured out! This is looking awesome and I'll bet I'm in the same boat as a lot of other members wondering if you're going to upload the printer file and parts list so we may make one too!

Once I get all the kinks worked out, I'll do a full summary, parts list, and post the files.

On a side note, I used the prints I didn't like to do a screw test and a quick shot of high fill primer:

42BBC021-2EB1-47B2-8224-22F2AA09FAED_zpswxcqtnx0.jpg
 

Attachments

  • 42BBC021-2EB1-47B2-8224-22F2AA09FAED_zpswxcqtnx0.jpg
    42BBC021-2EB1-47B2-8224-22F2AA09FAED_zpswxcqtnx0.jpg
    226.2 KB · Views: 224
I've been using photobucket too and it makes my pictures size to the viewer's screen I think. Lots of storage space. Free and they have a nifty little mobile app. I can upload them to the site straight from the camera mode on my phone. :)

Great build idea. Keep up the great work!

Of course now that I tell you that, I haven't been able to log onto Photobucket all morning and none of my pictures are showing up on my threads. :facepalm
 
Status
Not open for further replies.
Back
Top