I use two different types of bondo.
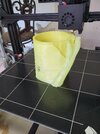
The first one I use is the standard body filler. You should wear a respirator to use it though. If you’re confidant that you can work fast, then go for quick set, but if you want to take your time, DO NOT get quick set. It will be hard as a rock in 15 mins. I use this to fill the big gaps in the pieces.
Next I do an initial coat of filler primer over the bondo and sand. Then sand some more, and sand a little more. After that, I check first big gaps. If there are big gaps, then I repeat the process. Do not go full perfectionist with this stuff. That’s what we’ll do next.
Now that I’m happy with the big gaps, I move on to spot putty. Everywhere I see small gaps, obvious print lines, and printing artifacts I apply this. After that, spray with filler primer. Then sand, sand, sand. Repeat this until all the small imperfections are gone.
To finish off, I like to do 2 more coats of just filler primer and sanding, plus one more coat of normal primer with no sanding.
I don’t know if this is more information than you were looking for, but I hope it helps.
")