Foam H3 Hornet Pilot - V1 Complete

Status
Not open for further replies.

Fallen

Well-Known Member
Community Staff
Member DIN
S922
Backstory
I've been wanting to remake my first build for awhile now. Back in 2016 I did a speed build DFT Marine. It wasn't too bad considering I was still new to this hobby and had never built a suit to completion. However, it's not very accurate, overweathered, and falling apart. Plus my skills and abilities have grown enormously since doing that project. Awhile ago I decided to pause on my Reach build and tackle this one instead by the next con I planned to attend which is in April.

old_marine.jpg
P1344339.JPG


Table of Contents

Coming Soon

References
H3 Marine Reference Thread
Spidermonkey's Marine Speedbuild
TurboCharizard's Halo 3 Marine
UNSC Marine cosplay
and most importantly game asset files from the Halo Archive

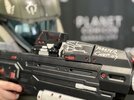
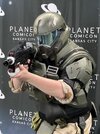
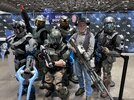
Some Reference Images
I'll include ref images of specifics in their respective threads.

back_full_body.JPG
front_full_body.JPG
full_body_top.JPG
left_full_body.JPG
right_full_body.JPG
2022-02-13 11-39-28.00_03_40_56.Still003.jpg

Links
Turbo's Pilot Helmet and Chest Attachment
JohnsonArmsProps Marine Helmet - non-pilot option I've had for a few years
Materials and Supplies
Coming Soon
 
Last edited:
Chest and Back
Step one was getting the chest and back completed. One key thing that I'm wanting to accomplish is that this build should be able to easily shift between standard Marine and Hornet Pilot. The other is that it needs to look ok even with weight loss/gain. A major reason why I've paused my reach build is because I want to get to or near my goal weight before completing it. This one I want to mostly work during that process, so it needs to adjust to fluctuations, especially considering I've lost ~20lbs since starting this build and plan/hope to continue that trend.

2022-01-10 12.18.53.jpg
2022-01-10 12.27.41.jpg
2022-01-25 13.01.27.jpg
2022-01-25 13.02.05.jpg
2022-01-25 13.02.31.jpg

Based on reference images, I think using roller blade ratchet straps could work to help pull the chest and back together and still look ok assuming I cut an opening for the excess strap when ratcheted to slide underneath the other side of the attachment point. My plan is to use roller skate straps I found on Amazon for the connection points.

1644866339639.png


I have the 2 halves of the chest attachment printed but need to print the additional detail pieces and assemble before I post any pics.
 
I really need to get some pics taken to update this with the rest of the armor parts. Only one piece remains on my list of must-haves by deadline before I can go in and add details (read rivets) and seal for paint.

In the meantime I need yall's feedback on something. Assuming all goes well, I do plan to submit this build for deployment, so attention to detail matters. I do have concerns that b/c I want this suit to adjust to body dimension changes that I'll only be able to get T1 out of it since the scaling should fit me well in the height direction but potentially not in width and depth directions.

Either way, going with that thinking I'm trying to figure out undersuit, especially since shipping delays could make it a nightmare to get everything in time if I wait too long.

Spidermonkey60 I believe got some urban camo that were dyed taupe with a hint of green, but w/ the deadline and my current schedule, I don't think that's going to happen. Plus I've not found an urban camo that I believe has a close enough pattern for me.

1645326342668.png
If you look at the pattern, it seems to have a more angular pattern to it, that American woodland camo uses, ABU pattern might work ok although the color would be off, and the pattern is smaller with a more digital design than the asset appears to have. I did some looking into camo patterns used around the world and came across the M90 pattern as used in Sweden. I think pattern-wise this will work. The debate now is between woodland (M90) which is too green, has black patches and darker to not match the game or the desert variant (M90K) which has brown that the game doesn't, still has sort of charcoal patches to not match, and doesn't really feel like it has enough green tint to it.

1645326786599.png
1645326796425.png
Both options are similar in price and shipping speed, so I have to ask, based on the game asset reference image and the options I'm narrowed down to at this point which do you all think is the better option to make it happen?

Update:
Thanks to Island Hopper who found an even better match for the coloring and pretty good on the pattern, although it has a more digitized look than the source. See here. Unfortunately in my searching I can't find any to purchase.

I've kept looking and noticed several people use the British Desert Disruptive Pattern Material (DDPM) which may be relatively simple to find for purchase. The pattern is good, and it has the benefit of being an only two tone pattern as opposed to the 4 tone of the M90(K). Down side is that it's very brown/tan when compared to the pilot in game, which has a more green tint. Could dye it, but time is not on my side for that.

What I've chosen to do so far is purchase the M90 (and K variant), pick one, and return the other. I plan to revisit the camo pattern later when time is more on my side.
 
Last edited:
Great work so far!
As for the camo, that's a tricky one. The reference to be looks like a white washed version of the two variations combined. Unfortunately, I haven't dived down the Marine rabbit hole so I don't really know what options are out there. Between these two though, I think I'd pick the green one. I feel like it should be possible to wear the dye out of the green one a bit to where it becomes less intense... exactly how I'd go about that without bleach or spending hours simply rubbing it on stuff, I'm not certain.
Hopefully Spoder or someone else from Marine Gang Gang can help out a bit more.
 
Having reached out on the Discord, it seems the consensus is that the Swedish M90K (idk if that's the same as the M90 you show) is the best match for the Halo 3 gear. It was also suggested to fade the fabric, e.g. leaving it in the sun.
 
Moving along at a decent pace. I've got everything except for the spine pieces and a piece to attach the shoulders constructed. Put a bunch of rivets on parts today. As soon as the ice melts on my driveway I'm hoping to get some more Leakseal from the hardware store. My driveway is steep, backs onto the main road of my neighborhood, and I ran out of rock salt, so not risking it while it's still covered by a sheet of ice. Good news is it's been melting today.

Got more images to go through to figure out what to share, but here's a few:

2022-01-26 15.08.01.jpg
Did a comparison test between two file options for the boot cover. Ended up going with the version on the right. Ended up scaling that one down a bit more as well because my initial look at the reference model I didn't really notice that there's a slight gap between the top of the shin and the boot cover itself.

2022-02-06 20.33.48.jpg
2022-02-07 17.30.37.jpg
One of the upper shin pieces and the knee along with a comparison between the old suit and this one.

2022-02-26 14.25.01.jpg
2022-02-26 14.25.25.jpg

Whenever I don't trust my foamsmithing abilities, I want to try to find a way to bring 3D printing to add those details. Therefore I modeled and printed details for the back of the shins and the fanny pack. I'd love to iterate on the fanny pack by closing it off and adding a zipper to make it a functional pouch, but not at this time. Left a small gap between the two pieces on the back of the shins in order to allow for slight flexing without just breaking the 3D prints. There's still a detail missing that kind of looks like tubes in the reference model. I'm looking for something for those and wondering right now if perhaps the flex rod or hose looking LEGO pieces couldn't serve that purpose dencently well.

2022-02-26 13.55.45.jpg

Attached rivets to a bunch of pieces. I have a set of leather hole punches that range from 1mm-10mm. Used the 8mm w/ a hammer and 2mm foam to cut out 120 rivets.

I've got 2 versions of the thighs that I'm working on. The shape is cut for both, and one is ready for Leakseal. The other I'm looking at if I like it covered in some spare canvas I have to bring in a slightly different texture. I'm fairly certain that the canvas like texture I'm seeing in the model is simply because the bump map for the BDUs is the same across the thigh plates. At the same time I kinda like the thought that it'd be plates inside of canvas pouches in the same way you might see for plate carrier vests.

As of now I have constructed every part except for the spine and the shoulders of the black section of the undersuit.

2022-02-24 15.39.22.jpg
I already have a vest from the first iteration of my ODST, and I've made a template to build the shoulders of the vest using 2mm What the Foam. Going with What the Foam because it has thermoplastic as part of the foam that makes it stronger than regular 2mm foam would be.

Getting closer, but still a lot of work left to do.
 
My timeline to complete has been moved up, so I haven't been pausing to take progress photos and update very often.

Every piece of armor has either been constructed from foam or 3d printed. Did a couple of test paints to make sure that my paints wouldn't interact poorly. I tested all of the potential layers of paint I anticipate depending on whether the part is foam or 3d printed. First test did react, so I had to find another silver paint option. Thankfully there's a miniatures store nearby where I found some metal plate colored paint/primer that didn't have issues with any variants.

2022-03-07 07.26.53.jpg
Foam pieces were coated with LeakSeal and have a base silver coat while the main 3D printed parts were sanded to 600 grit before hitting them w/ a black primer and a silver coat.

As for the thigh plates, I decided to try out wrapping in canvas after looking at the bump map for the model. I still think that texture is there because who expects anyone to look THAT closely at a model to compare textures. But I also like how they came out wrapping them. I think it brings a nice, different texture to the whole suit.

2022-03-05 14.52.10.jpg

I've also been gathering my assortment of misc. buckles, straps, attachments, etc. that I need for the final build and am compiling a list of what's still missing. My hope is to be ready to start strapping everything by the end of this week. My mom is on spring break next week and has promised to help me alter my undersuit by removing the sleeves from a black t-shirt and sewing on the sleeves from by BDUs.

2022-03-05 14.39.23.jpg

Some things that I know won't be completed before my updated deadline include:
- Audio system - I should be able to still utilize my current audio system from my ODST, but I have plans for a better one that won't be complete in time
- Ideal undersuit/camo - going w/ the M90K BDU's but want to try out the DDPM pattern
- Helmet visor - well the vacuumformed version. For now I'm using a clear sheet that I'll cut to size and give a mirror coat but probably won't dye it first
- Any kind of lighting - deprioritized to ensure I'm not rushing last minute to finish strapping everything
- Forearm pouches - as temps get warmer I'll probably wear this with sleeves rolled up and not wear the forearm pouches anyway

Barring any major issues from here on out I'm fairly confident that I can get this done in time.
 
That armour is looking mighty fine, cant wait to see it all done with some suit up pics! keep up the good work!
 
Chest and Back
Step one was getting the chest and back completed. One key thing that I'm wanting to accomplish is that this build should be able to easily shift between standard Marine and Hornet Pilot. The other is that it needs to look ok even with weight loss/gain. A major reason why I've paused my reach build is because I want to get to or near my goal weight before completing it. This one I want to mostly work during that process, so it needs to adjust to fluctuations, especially considering I've lost ~20lbs since starting this build and plan/hope to continue that trend.

Based on reference images, I think using roller blade ratchet straps could work to help pull the chest and back together and still look ok assuming I cut an opening for the excess strap when ratcheted to slide underneath the other side of the attachment point. My plan is to use roller skate straps I found on Amazon for the connection points.

View attachment 314202

I have the 2 halves of the chest attachment printed but need to print the additional detail pieces and assemble before I post any pics.
Wow that chest piece is so clean dude
 
Nearing completion. Everything has been painted. It's possible that I missed painting some smaller details, but I decided to move on to strapping and then do weathering. Some things in the strapping phase didn't work out as originally planned such as the roller blade straps that were just too awkward to use when putting on/taking off the armor by myself. I like to do my best to ensure I can do everything alone just in case. Having help is always nice, but I don't want to be unable to suit up/down without it.

2022-03-10 08.03.13.jpg
2022-03-15 06.46.56.jpg

Installed a temporary visor for the time being that's just a clear sheet that I sprayed with some Spaz Stix mirror chrome paint. Yesterday my iDye Poly came in, and I want to see if I can't take a spare face shield replacement, cut it to shape, dye, and chrome it instead. Ultimately I want to vacuumform the actual visor, but that's not happening within my current timeframe.

2022-03-11 12.44.57.jpg

2022-03-15 06.50.26.jpg2022-03-15 06.50.47.jpg2022-03-14 08.03.16.jpg
As of now what remains is primarily sewing things and glueing pieces that I need another set of eyes on:
- Shoulder bells w/ velcro attachment for plates
- Velcro on pants for shins and knees to prevent slipping/rotating
- Harness system for attaching shoulder bells
- Spine
- Ab plate

And lastly to make a decision on how I want to attach the UA Chest Attachment to the main chest plate. I want to keep it removeable, and I both don't have enough strong magnets and don't trust them enough yet for a 3D print without a backup system in place. I'm leaning towards installing straps anchored behind the attachment that I can run around the sides (and maybe over the top sides if I can hide them well) with snaps on the inside of the chest.

Supposed to be going to my parents' house this evening to work on sewing and get another set of hands. From there it's a matter of weathering and finalizing the helmet padding and electronics as they're currently in an experimental setup.
 
Got ~95% of the way there w/ strapping. Was able to take a break from work and head over to my parents' house to get help from my mom in making the shoulder bells. Might seem odd to do just the shoulders and not a full vest, but the armor covers most of the torso, and I can always add the vest a little later. This was really for that bit that the shoulder pieces sit on top of.

2022-03-15 14.15.04.jpg2022-03-15 15.12.05.jpg
Attach the plate pieces with velcro and should be good. I do plan to add a backup strap that uses a buckle to hold the shoulder in place in case the velcro fails, but that's a concern for a later date.

My mom had me go back and cut the sleeves off my BDU jacket rather than seam rip them so that I could keep the nice seam on the main jacket as a vest. No idea what I'd use it for, but if I ever just need the torso of some BDUs I've got 'em. I'll head back over there tomorrow or Saturday to attach the sleeves to my t-shirt as well as pin some velcro to help prevent the knees and upper shins from rotating at all. That hasn't been a problem yet in any of my test fittings, but I'd rather proactively prevent it from happening as much as possible.

Weathered everything and verified that all of the armor pieces can fit in a smallish storage tote, and good news everything does, including the helmet. Not sure if I trust the helmet even if placed surrounded by foam, but good to know it can fit. Boots however will have to be packed w/ my clothes whenever I travel with this suit.

2022-03-17 19.26.11.jpg
Lastly went ahead and test fitted a blue visor instead of the silver one I've been using. This blue is too heavy compared to the game, which looks more foggy grayish blue with maybe a slight lavender tint to me. Not sure which I like better ultimately, but either way I will be vacuum-forming one down the road.

2022-03-17 22.04.38.jpg
Still to do before first outing:
- decals on helmet
- finish undersuit
- finish adding velcro pieces
- attach ab and spine pieces
- mini photoshoot
 
Managed to get everything for MVP done in time. I've got a little under a month for any adjustments, additions, or changes before Planet. I'm also considering doing a few updates, particularly to the strapping system, on my ODST and taking both suits with me to Kansas City. Not ready to call it quits on my ODST yet.

Adjustments to be made by Planet include adding more padding to the top of my helmet. It sat a bit too low for my tastes, and a little extra height will lift it just enough without being too high. I also want to get my lights and audio system set up. Ideally I'll have time to adjust the ab plate. I find it's too big, and the way it's attached felt very awkward. I've already reprinted the belt attachments for the thigh plates, and I'm also going to scale the thighs down ~5-10% for a better fit alongside my knees.

Should I choose to take my ODST with me adjustments for that include redoing the strapping system entirely. Everything on my ODST is attached w/ webbing/elastic and hot glue. With this pilot I didn't use any hot glue that wasn't for an intentionally temporary attachment and would like to bring that over to my ODST. I also need to fix the paint on the lower section of the inner thighs and would like to make new forearms as my existing ones are 3d printed and too long so as to leave me with bruising on my wrists and elbows by the end of the day. Will still keep them 3d printed but make them shorter and use some flexible filament near my joints.

2022-03-20 17.50.04.jpg 2022-03-23 19.16.53.jpg 2022-03-23 19.52.16-1.jpg 2022-03-23 19.52.22.jpg 2022-03-23 20.03.07.jpg
Even more changes are planned as a suit is never done, just incrementally improved.
 
Did a final tally on my build costs up to this point. Was doing great keeping track early on but as the crunch set in things slid by a bit, so later numbers might be off. It's also worth noting that a lot of the materials I used were things that I already had. I'm also extremely bad at discarding my scap foam if I think I can get even one more piece of a single part out of it, so a lot, if not all, of my foam work was done using scraps from previous projects.

Consumables Requiring Purchase
- Barge Contact Cement - $29.95
- PLA+ - $22.99 ea - used old, partial rolls before buying 1 roll
- E6000 - $4.29
- LeakSeal - $11.36 per can - used already owned cans first but purchased more to complete
- 1" Parachute Clips - $16.99 for 80 buckles - used 16
- 1" Plastic Triglide Slides - Included in 1" Parachute clips pack above - used 24
- 1" Center Release Parachute Clips - $6.96 - used 2 (can find cheaper but purchased during crunch time)
- Plastic Rectangle Rings - $6.69 for 50 - used 8
- Metal Triglide Slides - $7.99 for 30 slides - used 4
- The Army Painter Plate Mail Metal Spray Paint - $13.49 - nothing like running out last minute looking for a metal looking paint

Consumables Owned
- 10mm HD-Foam - managed to use entirely scraps from old projects
- 6mm What the Foam
- 4mm What the Foam
- 2mm What the Foam
- Caulk - for filling seams
- 18mm snap off blades
- 9mm snap off blades
- CA Glue
- CA Glue Accelerant
- Black canvas fabric
- Black thread
- ShoeGoo
- 1" Nylon Webbing
- Bondo Spot Putty
- Sandpaper (various grits)
- Sanding sponges (various grits)
- Snaps
- Paints
- Behr Sample Twilight Forest
- Vallejo Model Color White - 70.919
- Vallejo Model Gunmetal Grey - 70.863
- Vallejo Surface Primer Black - 74.602
- Vallejo Liquid Mask - 70.523
- Winsor & Newton Oil Paint Ivory Black - weathering
- Winsor & Newton Oil Paint Burnt Umber - weathering
- Winsor & Newton Oil Paint Olive Green - weathering
- Spaz Stix Mirror Chrome Spray Paint
- Velcro (various sizes)
- Clear craft plastic - for making visor
- Black vinyl - for making stencils for decals
- iDye Poly Turquoise dye
- Elastic
- Resin - transparent and gray
- Isopropyl alcohol
- Nitrile gloves

Reusable Items Purchased
- M90K BDU Pants
- M90K BDU Jacket
- Blousing Straps
- Airsoft Helmet Pads
- Molle Mag Pouch
- Molle Cell Phone Holster
- Molle Slingshot Balls Pouch

Reusable Items and/or Tools Owned
- Boots
- Black T-shirt
- Helmet fans (pulled from ODST helmet)
- Rechargeable power pack (pulled from ODST Helmet)
- Band saw
- Dremel + Flex shaft
- Detail Sander
- Multi-tool
- Airbrush
- Paint brushes
- CR-10
- Artillery Sidewinder X1
- Elegoo Mars 2 Pro
- Elegoo Mercury Wash and Cure Station
- Respirator and/or dust mask
- Ear protection
- Safety glasses and/or shield
- Cutting mat
- Sewing machine
- 18mm utility knives
- 9mm utility knives
- X-acto knives
- Blade sharpener
- Pens
- Rulers (various types)
- 1-2-3 Blocks
- Silicone pads
- Heat gun
- Probably more that I don't remember if I used or not
*all prices in USD from the time of purchase

I especially want to call out that a major element that kept my costs down significantly is that I have the luxery that I've amassed a number of tools and/or materials over the years from either past costume projects or thanks to other hobbies and have the ability to store them long term. A lot of what I used isn't necessary, but if I used it I tried to call it out.
 
Made minimal changes in the month between LA and Planet Comicon. Mostly adjustments to padding to sit my helmet slightly higher. It's still a little low for comfort, but was definitely an improvement compared to LA where it sat so low I could barely turn my head at all. I didn't get around to replacing my temporary lenses and install lighting and a sound system, so those are things I'm going to want to do. I also want to make some adjustments to how the chest and back come together to make the connection points fit more flush and add 2 more straps to the top of the chest attachment to wrap over and snap behind my chest plate. I tried to avoid doing that due to concerns of visibility of those straps affecting the accuracy of the build, but frankly I can hide them well by running them under the slides that go on top of the chest to not be visible in photos.

For items that I either didn't have time to complete or still lack the skill level to do, I have:
- Add velcro to the inside of the upper shins and outside of my pants to prevent slipping/rotating
- Sew a true flak vest instead of using a t-shirt

I doubt most people looking at my suit will even notice those details, but they will improve comfort and fit for me.


Enjoy some pics from Planet
20220423_113238.jpg
2022-04-23 16.48.08.jpg
2022-04-23 18.51.53.jpg
2022-04-23 18.52.00.jpg
2022-04-23 18.52.10.jpg
2022-04-23 18.52.19.jpg
 

Attachments

  • 2022-04-23 18.52.15.jpg
    2022-04-23 18.52.15.jpg
    3.9 MB · Views: 118
  • 2022-04-23 18.51.47.jpg
    2022-04-23 18.51.47.jpg
    1.4 MB · Views: 107
  • 2022-04-23 16.48.05.jpg
    2022-04-23 16.48.05.jpg
    7.4 MB · Views: 138
Made minimal changes in the month between LA and Planet Comicon. Mostly adjustments to padding to sit my helmet slightly higher. It's still a little low for comfort, but was definitely an improvement compared to LA where it sat so low I could barely turn my head at all. I didn't get around to replacing my temporary lenses and install lighting and a sound system, so those are things I'm going to want to do. I also want to make some adjustments to how the chest and back come together to make the connection points fit more flush and add 2 more straps to the top of the chest attachment to wrap over and snap behind my chest plate. I tried to avoid doing that due to concerns of visibility of those straps affecting the accuracy of the build, but frankly I can hide them well by running them under the slides that go on top of the chest to not be visible in photos.

For items that I either didn't have time to complete or still lack the skill level to do, I have:
- Add velcro to the inside of the upper shins and outside of my pants to prevent slipping/rotating
- Sew a true flak vest instead of using a t-shirt

I doubt most people looking at my suit will even notice those details, but they will improve comfort and fit for me.


Enjoy some pics from Planet
View attachment 317419View attachment 317421View attachment 317423View attachment 317424View attachment 317425View attachment 317427
Didn’t get to see you at the con, but I love your suit! Great job and I hope to meet you someday!
 
Had to do some small updates to my gear to prep for C2E2 and have one more for my pilot/marine in the works. Repairs were inevitable; at Planet I managed to rip a seam on my upper shin pieces causing one of them to slip over my boot cover. So took care of those repairs and/or adding additional strapping/attachment points for pieces to hold them in place better.

Build updates included making a new ab plate that's a bit smaller than my last one and using velcro to attach it to my shirt instead of glueing it directly to the shirt. Also moved my shoulder mounts to the new shirt and added a velcro attachment to prevent them from rotating when I have my shoulders mounted. Probably the biggest change noticeable to others is that I added lights to my helmet and chest attachment 5mm lights make up the majority of them, and (not pictured) 3mm lights went into the little antennae of the UA attachment. Required a little bit of drilling to make them fit, but got it to work.

2022-07-19 17.19.58.jpg
2022-07-20 09.09.42.jpg

Lastly, while I'd originally planned on a BR that I'd printed, that didn't work out. I was bringing it upstairs from the basement "workshop" and accidentally dropped it down the stairs. Rather than rush to try and repair the breaks and still get everything else on my list done I decided to quickly pivot and do a speed repait of the Nerf MA40 using whatever paints I had on hand. Spent a couple of days sanding, priming, and painting, most of it waiting for paint to dry. Overall not my best paint job, but it gets the idea across just fine and is a nice addition of a prop that I don't mind handing off to someone for photos.

2022-07-25 15.04.27.jpg
 
Had to do some small updates to my gear to prep for C2E2 and have one more for my pilot/marine in the works. Repairs were inevitable; at Planet I managed to rip a seam on my upper shin pieces causing one of them to slip over my boot cover. So took care of those repairs and/or adding additional strapping/attachment points for pieces to hold them in place better.

Build updates included making a new ab plate that's a bit smaller than my last one and using velcro to attach it to my shirt instead of glueing it directly to the shirt. Also moved my shoulder mounts to the new shirt and added a velcro attachment to prevent them from rotating when I have my shoulders mounted. Probably the biggest change noticeable to others is that I added lights to my helmet and chest attachment 5mm lights make up the majority of them, and (not pictured) 3mm lights went into the little antennae of the UA attachment. Required a little bit of drilling to make them fit, but got it to work.


Lastly, while I'd originally planned on a BR that I'd printed, that didn't work out. I was bringing it upstairs from the basement "workshop" and accidentally dropped it down the stairs. Rather than rush to try and repair the breaks and still get everything else on my list done I decided to quickly pivot and do a speed repait of the Nerf MA40 using whatever paints I had on hand. Spent a couple of days sanding, priming, and painting, most of it waiting for paint to dry. Overall not my best paint job, but it gets the idea across just fine and is a nice addition of a prop that I don't mind handing off to someone for photos.

Yo! The added lights look so good! This is an exciting update and one step closer to Deploying the Pilot <3
 
Always continuing that incremental improvements journey. This time around I didn't have a lot of changes I wanted to make, but a few comfort improvements and just minor changes.

What I did:

Lighting
- Rewire chest lights to reduce the number of parallel circuits from 5 to 3 and swapped out power source. Mostly this reduced, but didn't eliminate, the rat's nest of wires I had before
- Added better diffusion material for lights

Armor
- Rigged my ab plate w/ straps that run inside my shirt to be able to pull it tighter
- Sewed velcro to my pant legs my upper shin pieces to help keep them in place better throughout the day
- Minor repair to knees
- Modelled, printed, and attached a UNSC logo to a patrol cap for times when I want to go standard marine instead of pilot until I print a new marine helmet

Things I still need to do:
- Dye or find better undersuit option
- Make elbow parts
- Make wrist pouches
- Actually wear my gloves

Then there's the things I'd still like to do.
- Sew vest to replace t-shirt base
- Better visor
- Audio system
- Replace lens covers in helmet
- Build more adjustable sides to chest and back plates.

My plan is to pick 2-4 items for any con that I take this out for and tackle those items. I'm also hoping to finally do a Spartan build soon (still not getting back to Carter yet) and tentatively aiming for Planet in March. Depending on where I get w/ that by mid-February I'll either finish that or update this again.
 

Attachments

  • 1669647153785.png
    1669647153785.png
    3.2 MB · Views: 54
  • 1669647173224.png
    1669647173224.png
    2.3 MB · Views: 71
Status
Not open for further replies.
Back
Top