Mech/Exoskeleton Build (Full-Size )

The government hasn't whisked me away to secret underground labs (yet), I just got a 3d printer and have been goofing off- er, have been exercising my 3d modeling skills in preparation for making unit 02. Dimensions for Unit 01's basic chunky armor have been measured and will be built (hopefully!) this upcoming weekend!

I wonder what sort of bits I could make with my 3d printer that would be handy. Maybe giant robot finger bones (5 1/2" print bed) and joystick grips?

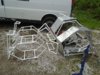
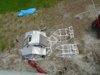
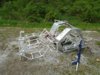
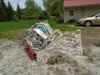
All well, here's some of my first prints! 24 to be exact!
HfAsDnF.jpg
sDEdTqb.jpg


2CeVnEP.jpg
 
So I finally bit the bullet and started riveting. Only problem is the punches that I bought weren't tough enough, so I ended up drilling holes for the rivets instead.

First three seams riveted:
IMG_20170507_150838.jpg

Preparing to fit onto the shin. Approx 28" tall.
IMG_20170507_164239.jpg

Fits a bit oddly. But that's to be expected.
IMG_20170507_164647.jpg

Ankle slots are very handy. If only I thought to put them in!
IMG_20170507_164655.jpg

Riveting was easier than expected. Planning on doing some more mech building later this week after work instead of working on my webcomic. Also need some black plastic to make a dust cover for the frame... so much to do, so much fun.
 
So... turns out the feet are too tiny. To be expected, since they're only 4" wide (13" long) and the torso is 3' wide.

Got some more PVC and with a new design built some new shins. Here's how they compare.
IMG_20170511_194815.jpg IMG_20170511_194827.jpg
Feet are 26" long and 10" wide.
IMG_20170511_201223.jpg IMG_20170511_201235.jpg
Might need cross-baces on the sides.

Gonna mount the straps & tension rods tomorrow night and give 'em a test run this weekend, if all goes to plan.
 
Making a step in the right direction. Ran out of machine screws (aka bolts) so that put a bit of a stop in progress.

IMG_20170513_111208.jpg

IMG_20170513_113230.jpg

Definitely need more crossbeams.
 
Didn't get much work done yesterday 'cause the lawn tractor died and I spent the day diagnosing it. Probably an ignition coil ¯\_(ツ)_/¯

With my residency coming up (meaning some extra $$$ and a groovy workspace) I thought I'd lay things out to see what's what.

01.jpg

Moved my van around and climbed onto the roof get these sort of shots.
02.jpg

03.jpg

Hey, my other car!
04.jpg

05.jpg

It's much bigger than the tractor.
06.jpg
 

Attachments

  • 01.jpg
    01.jpg
    132.6 KB · Views: 501
  • 02.jpg
    02.jpg
    141.7 KB · Views: 562
  • 03.jpg
    03.jpg
    152.6 KB · Views: 509
  • 04.jpg
    04.jpg
    145.5 KB · Views: 505
  • 05.jpg
    05.jpg
    147 KB · Views: 503
Again, the cursed lawn tractor took up my free time. Went to clean the carburetor and it nearly fell apart in my hand. I think I found the problem.

Anyway, had to do some after market mods to the T junctions for the crossbeams.

IMG_20170528_153631.jpg IMG_20170528_153640.jpg
Man, PVC gets everywhere when you're cutting holes in it.

Tada!
20170528_160316.jpg
Gonna be harambe-gluing them together this weekend.

Also finally got around to making a custom T-shirt.

IMG_20170528_123414.jpg 20170528_154422.jpg

This upcoming Thursday is when my residency with the local Makers Guild officially begins, meaning a sweet $500 to invest into it and more progress! Now I just need to get my van on the road to move the big bits...
 
Settled into the maker space and built the boring bit: the Stasis dock to hold the Exo-Mech for display/suiting up.

IMG_20170615_161603.jpg IMG_20170615_161615.jpg

And put the feets in. Arms will probably hang over the sides or something.

IMG_20170615_161913.jpg

The entire thing collapses flat via loose-pin hinges on the back segment so it can fit in my van. Should've taken a pic but didn't :p
 
Sorry for the lack of updates. Had to re-build the stasis dock as the PVC was just too jiggly at 3' segments. Its also wider: 52".

IMG_20170701_172821.jpg

Also built the arm superstructure.

IMG_20170701_172830.jpg IMG_20170623_164915.jpg

Pretty soon I'll have to load the top half into the van and haul it up there. And speaking of the van...

IMG_20170625_094112.jpg
 
Very discussion. Much wow XD

Anywho, been working on some fiddly bits like the arm bowden anchors.
IMG_20170707_165817.jpg

And the foot straps
IMG_20170707_165827.jpg

And some foot extension curves (PVC pits that act like springs)
IMG_20170707_165834.jpg

Edit: I just realized how cool it would be to make extra-large Spartan armor or something for this...
 
Last edited:
Did a quick test of the top half dripping with 80s cheese.


Unfortunately the PVC frame for the arms are too heavy for the current shoulder mechanism and shift the center of gravity drastically (even if the pelvis straps were attached). I'm stripping it down to the bare minimum of just bolting the armor to a single pipe for the arms. Aesthetically there won't be any difference.

Tested the bowden cables yesterday, and they work surprisingly well when you can figure out where to mount them. The other set should arrive tomorrow (monday) so I should have the arms finished by the end of the week.

Meanwhile, I got some 57 lb springs to swap out the ones on bike suspension rated at 1500 lbs. The springs are too narrow to fit over the suspension cylinder, so I have to cut em down and thread 'em on keyring style... after I get the dremel attachment for cutting discs. Should work, I've had to cut a broken bearing out of my scooter before.
 
Finished the ankle stabilizers (the modified bike suspension), which were hard to figure out but fun to do.

Top to bottom: Completed stabilizer, spring partially wound on (keyring style and had to be persuaded with a hammer), cut spring, uncut spring and empty suspension cylinder.

IMG_20170724_175713.jpg

Completed stabilizer

IMG_20170724_175732.jpg

All four stabilizers:

IMG_20170724_182141.jpg
 
Finished the ankle stabilizers (the modified bike suspension), which were hard to figure out but fun to do.

Top to bottom: Completed stabilizer, spring partially wound on (keyring style and had to be persuaded with a hammer), cut spring, uncut spring and empty suspension cylinder.

View attachment 247825

Completed stabilizer

View attachment 247826

All four stabilizers:

View attachment 247827
Whoa, that thing looks HUGE! How are you gonna walk around in it? I feel like it will be very difficult to walk around in.

Nevertheless, it looks Papeesheewoosh! Nice work!
 
I'm not seeing it yet but you are putting a ton of work in to this and its great. Keep up the good work!!!!
 
So I've done a few more tests: hooked up bowden cables, added heels onto the feet and took the feet on their first test run.


At some point during construction a stabilizer bolt on the right hand leg got bent outta shape and a stabilizer mount is on backwards, but even so it is pretty stable. That is and easy fix for this upcoming week (my work schedule changed so I can devote a few hours every day to it now).
Pretty soon the top and bottom half shall meet!
 
Last edited:
So... yeah. The stasis dock is too small and narrow to lift the torso high enough to attach the bottom half. I'll have to build an extension with an engine-lift style attachment.

I also goofed up on the shin armor. All well. Makes great shoulder armor.
IMG_20170805_173002.jpg
And my residency at the local makerspace is coming to a close. Gonna be on display there for a month. Gives me a chance to prepare the extension and negotiate borrowing my parent's cargo trailer to bring it home. Although I seem to be in a similar predicament to that of the man who built a boat in his basement...
 
Yea for going for it, but it looks a little small to me. Where are you going to fit both yourself, an engine, a hydrolic pump, the hydrolic tank, alternater, controll surfaces, screens to see out, or the computer to actually manage everything? I thought you said real functional? Then again, I may just be missing perspective on the pictures. The cabin width you listed seams like it should be wide enough barely, so that might be the case...
 
Yea for going for it, but it looks a little small to me. Where are you going to fit both yourself, an engine, a hydrolic pump, the hydrolic tank, alternater, controll surfaces, screens to see out, or the computer to actually manage everything? I thought you said real functional? Then again, I may just be missing perspective on the pictures. The cabin width you listed seams like it should be wide enough barely, so that might be the case...

You must crawl before you can walk: This is a proof-of-concept for using PVC a building material. I've been researching Pneumatics with some peliminary calculations. My optical system is a tablet and webcam (Will be replaced with Raspberry Pi eventually) that I need to get around to installing.
There is no law saying a Mech has to be powered. Just mechanical. I figure this is a good starting point for... whatever.

Made an additional arm for the stasis dock using some scrap wood:

IMG_20170909_071558.jpg

IMG_20170909_071606.jpg

To raise/lower it I got a lever-action ratcheting winch at Home Depot.
Had a display at an event at the local Maker Space:

Resized_20170909_131211.jpg

IMG_20170909_184737.jpg

Started designing a head.

head.png

And a cardboard mockup. Gonna make a metal version soon.

IMG_20170917_100157.jpg IMG_20170917_100208.jpg
 

Your message may be considered spam for the following reasons:

If you wish to reply despite these issues, check the box below before replying.
Be aware that malicious compliance may result in more severe penalties.
Back
Top