Foam MK VII x MS-06 Zaku II

Crows Carrion

Member
So I was perusing the forums looking for inspiration for my next build and my mind started to wander right into thinking about Gundam, the two ideas naturally combined as one of the MCC seasons or maybe just the exchange, had gundam-esque armor so I did some digging and found this image by posted by reddit user Slakolov.
1747154930378.jpg

The helmet being used is reach CQC with a smart use of the Up-Armor attachment for the mono-eye
I then went through process of finding a Zaku that I could unfold into templates for foam and found this Zaku model that has the waist as multiple separate pieces as well as the spiked shoulder. I then custom made the shield as I wanted one that was more angular
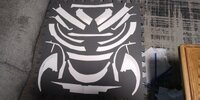
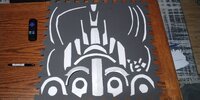
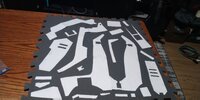
After all that I went to town unfolding them, the spiked shoulder was the absolute worst one to unfold because of it's curves but it got done.
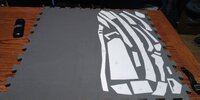
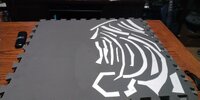
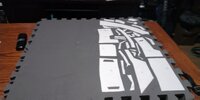
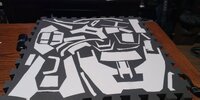
Here's the pieces.
IMG_20250513_183206.jpg
Screenshot 2025-05-14 101734.png
Screenshot 2025-05-14 101746.png
Screenshot 2025-05-14 101803.png
Screenshot 2025-05-14 101826.png
5.jpg


The rest is just the Mk VII, also may or may not make some cat ears for the helmet. No set deadline for this just when or if I can.
 
Last edited:
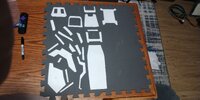
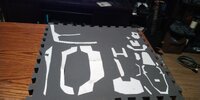
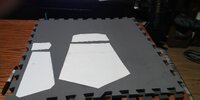
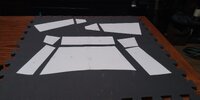
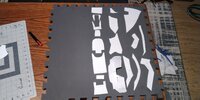
Small update I've used a small forests worth of paper for all the parts.
IMG_20250515_212718.jpg
IMG_20250515_212634.jpg

Looking at the pieces, the thighs, chest and shins might be to big so i'll have to resize them when I get the time. The reason I'm using cardstock dividers is because I don't have a printer, I also have to scale by eye because i don't have Armorsmith so any scaling mistakes can only be seen when I have fully cut the pieces out, so that's fun. Other than that things are going smooth see you at the next one!.
 
Ayy small update haven't gotten to foam working yet, I don't have much on hand, but I have started on the weapon I'm trying to make a combination between the Spnkr and the standard Zaku missile launcher, it does not look good at all but it could look somewhat decent who knows. \_o_/ I'll try to get progress pics when I can, schools ending here soon so I'll get more time to work pretty soon.
 
Hey so I finished the base of the Rocket Launcher. The box in the back is made up of 1/8in thick 14 ga plate while the pipes are galvanized steel, I don't know what the other specifics are but it weighs somewhere from 10 to 15 pounds according to others who have carried it. It is very rough but with some padding and work it will be perfectly viable to carry around cons if I want. What do you guys think?
IMG_20250606_154523.jpg

Edit: I checked with a scale the whole thing weighs around 30 pounds...so...yeah.
 
Last edited:
I'm back and able to start work again.
As of right now I only have four sheets of 1/2" thick foam but I took my templates and used them to judge how many I would need and how much it will cost me.

For reference I buy my foam fro Harbour Freight: here for about $10 per pack of four sheets
IMG_20250728_192849.jpgIMG_20250728_192901.jpgIMG_20250728_192911.jpgIMG_20250728_192927.jpgIMG_20250728_195521.jpgIMG_20250728_195527.jpgIMG_20250728_200123.jpgIMG_20250728_203526.jpgIMG_20250728_203712.jpgIMG_20250728_205959.jpgIMG_20250728_210043.jpgIMG_20250728_221057.jpg
Using this I determined that I need 20 sheets of foam to complete my armor which is around $50 dollars of foam. Not as bad as I thought it would be, it seems like the majority of my expenses will be for the contact cement and various paints.
(I'm trying to be more organized in this thread and keep track of numbers, that's why i'm listing prices and item counts.)
 
I'm back with actual build progress this time. I managed to buy all the foam I need to work on everything with some leftovers.
---------------------------------------------------------------------------------------------------------------------------------------------------
The first thing I decided to build was the helmet, a pretty integral part of this suit as it's one of the modified pieces to fit a Zaku II estetic, which I'm waiting to build. As I want to, you know, see, where I'm going, I made the up-armor attachment hinge up and down for ease of use. I also added a comparison to my original helmet for size, if I had a banana I would have used that instead.
Here's how it looks:
IMG_20250820_234724.jpg
IMG_20250820_234729.jpg
IMG_20250820_234735.jpg
IMG_20250820_234757.jpg
IMG_20250820_234820.jpg

-----------------------------------------------------------------------------------
My next step was the chest. My last attempt turned out pretty poorly due to inexperience, rushing, and two separate types of foam being used one being 1/2in thick while the other was 1in thick, so this time I took it slower and planed out how I would put it on rather than just contorting myself into a small hole. And I have to say that despite the fact that MkV (B) is my favorite chest MkVII looks absolutely beautiful in hand. The thrusters were a bit of a chore to attach and build, but overall a mostly seamless experience. I am going to take the time and shoutout N8TEBB for his tutorial video here, for being a major help in the process of making this suit, especially since it is a MKVII. If you're new to the 405th I'd say it's a must watch.

To latch the front to the back I used these buckles which pivot around so even if the connecters are misaligned they can still be clipped together. I did something unusual to put on the chest, (at least I think it's unusual) is the ring that you put your arms through doesn't split like the under-arm armor and the parts that rest on your shoulders. Instead I kept it intact so everything is still loosely connected to each other with the clips aligning most of the parts. The under-arm armor aligns itself by just resting against me while the parts of the ring that aren't connected to anything are aligned by using apart of it that sticks up from the rest. So just by pulling the ring out a little, fixes any alignment issues that pop up. In the image that shows how the chest looks like when it's unlatched the red is the part that sticks up and is placed behind the blue that way it can be pulled out to properly align it.
-------------------------------------------------------------------
Hopefully that explanation made some sort of sense, if clarification is needed I'll add it in the next update. Let me know what you think, the biceps and forearms are up next.

Here are the images:
IMG_20250820_234113.2.jpg

IMG_20250820_234003.jpg
IMG_20250820_233952.jpg
IMG_20250820_234023.jpg
IMG_20250820_234042.jpg
 

Your message may be considered spam for the following reasons:

If you wish to reply despite these issues, check the box below before replying.
Be aware that malicious compliance may result in more severe penalties.
Back
Top