You are using an out of date browser. It may not display this or other websites correctly.
You should upgrade or use an alternative browser.
You should upgrade or use an alternative browser.
MrJamin's 3D Printed MK VI Master Chief
- Thread starter MrJamin
- Start date
- Member DIN
- S118
dude that chest is just awesome i mean WOW
- Member DIN
- S829
More Updates on weathering of the chest:
Going heavier on the black, getting silver added in, and starting on some brown

Making it look more dirty! Adding in more brown, dirtying up some unblemished surfaces, adding in some "rust" color


I *Think* I am getting close to calling this one weathered. Going to try to get some pictures tonight with the helmet, chest, and cod piece.
Going heavier on the black, getting silver added in, and starting on some brown
Making it look more dirty! Adding in more brown, dirtying up some unblemished surfaces, adding in some "rust" color
I *Think* I am getting close to calling this one weathered. Going to try to get some pictures tonight with the helmet, chest, and cod piece.
- Member DIN
- S829
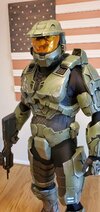
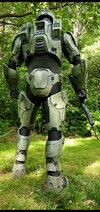
I managed to get the wife to help me take some pictures tonight!
(Note: this is literally held on / together with duct tape on the inside. The chest is rotated a bit too far forward but overall fits well)
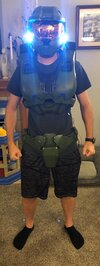
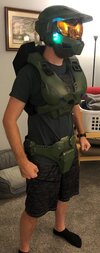
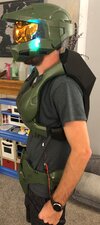
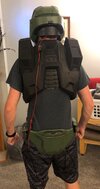
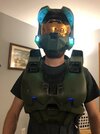
After this was all done I put all the pieces together for one last final picture

As much fun as this was tonight I did discover one problem..
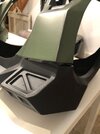
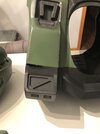
The bottom pieces fit together perfectly. However, the top pieces do not align as nicely.
(Guessing this was from when I had a mishap painting in the hot sun - MrJamin's 3D Printed MK VI Master Chief)
Guess I need to figure out how to fix that.
(Note: this is literally held on / together with duct tape on the inside. The chest is rotated a bit too far forward but overall fits well)


After this was all done I put all the pieces together for one last final picture
As much fun as this was tonight I did discover one problem..


The bottom pieces fit together perfectly. However, the top pieces do not align as nicely.
(Guessing this was from when I had a mishap painting in the hot sun - MrJamin's 3D Printed MK VI Master Chief)
Guess I need to figure out how to fix that.
- Member DIN
- S118
you could take some stiff foam and fill the gaps and then repaint that part i would be afraid to heat that up it might get worse, just my two cents. other than that i did not even notice it till you said something. brovo my good man great job on the armorI managed to get the wife to help me take some pictures tonight!
(Note: this is literally held on / together with duct tape on the inside. The chest is rotated a bit too far forward but overall fits well)
View attachment 297836View attachment 297837View attachment 297838View attachment 297840View attachment 297839
After this was all done I put all the pieces together for one last final picture
View attachment 297841
As much fun as this was tonight I did discover one problem..
View attachment 297842View attachment 297843
The bottom pieces fit together perfectly. However, the top pieces do not align as nicely.
(Guessing this was from when I had a mishap painting in the hot sun - MrJamin's 3D Printed MK VI Master Chief)
Guess I need to figure out how to fix that.
- Member DIN
- S829
Ok so it has been a few days since I have made any progress here. (Lots of stuff going on and haven't been in the mood to do some crafting)
Before I could even start working on some stuff tonight I had to spend ~30 minutes cleaning up my work area. (Pro tip - clean stuff when you are done so you don't get a mountain of stuff to clean up later. it can really kill motivation)
The next thing on my list is to get the lights install in the back. Once that is done it will be ready for final paint.
First thing to do is cut some holes. As I was measuring to do this I noticed something off.


The left and right spots are not the same shapes. MoeSizzlac - any ideas why this would be? (your MK VI files)
Once I determined how big I wanted the holes it was time to bust out the Dremel and cut. This felt way less wrong than when I did it on the chest and in the end turned out much neater. (something something learning experience)

Now that these are cut out I can prep the opaque acrylic to be inserted.


(bonus of holding up the LEDs behind to see how it will look)
I only got one of the pieces of acrylic completed tonight. I should be able to finish the other one quite quickly and then move onto prep for paint!

Bonus Bonus pic of the new power bank that I got on prime day! It is much larger than my old one and will be able to power my entire suit for way longer than I would probably wear it at a pop.
(I love mocking up even simple circuits on my breadboard. As TurboCharizard said on Discord "Breadboards are the Armorsmith of electronics")
Before I could even start working on some stuff tonight I had to spend ~30 minutes cleaning up my work area. (Pro tip - clean stuff when you are done so you don't get a mountain of stuff to clean up later. it can really kill motivation)
The next thing on my list is to get the lights install in the back. Once that is done it will be ready for final paint.
First thing to do is cut some holes. As I was measuring to do this I noticed something off.
The left and right spots are not the same shapes. MoeSizzlac - any ideas why this would be? (your MK VI files)
Once I determined how big I wanted the holes it was time to bust out the Dremel and cut. This felt way less wrong than when I did it on the chest and in the end turned out much neater. (something something learning experience)
Now that these are cut out I can prep the opaque acrylic to be inserted.
(bonus of holding up the LEDs behind to see how it will look)
I only got one of the pieces of acrylic completed tonight. I should be able to finish the other one quite quickly and then move onto prep for paint!
Bonus Bonus pic of the new power bank that I got on prime day! It is much larger than my old one and will be able to power my entire suit for way longer than I would probably wear it at a pop.
(I love mocking up even simple circuits on my breadboard. As TurboCharizard said on Discord "Breadboards are the Armorsmith of electronics")
View attachment 298606View attachment 298607
The left and right spots are not the same shapes. MoeSizzlac - any ideas why this would be? (your MK VI files)
Oh that's an easy one. That's a feature!
Or, this was my first 3D project. It's just a mistake. If it helps, my armor has it too! We are brothers now.
- Member DIN
- S829
Progress has been slow going lately. (My workspace is in my garage and I have a lot less motivation to go out there and work when it is cold out)
Finally got both pieces of acrylic fit in for the back and filled in the gaps with some filler putty. Overall this process was much easier on the back then when I did the chest. I learned a ton this time around and it shows by just how little of gaps I needed to fill in. If I had a few other tools this could be even better and might be able to get away without even needing filler!


Now time to get this fully cleaned up and ready for paint! (we are supposed to get into the mid 60s this weekend so I might actually be able to paint!)
Finally got both pieces of acrylic fit in for the back and filled in the gaps with some filler putty. Overall this process was much easier on the back then when I did the chest. I learned a ton this time around and it shows by just how little of gaps I needed to fill in. If I had a few other tools this could be even better and might be able to get away without even needing filler!
Now time to get this fully cleaned up and ready for paint! (we are supposed to get into the mid 60s this weekend so I might actually be able to paint!)
- Member DIN
- S829
Made some more progress on the back

both sides look so much cleaner than the spots on the chest!

I couldn't resist taking advantage of the nice weather and started to get some paint down today.
I've also started to prep the remaining LEDs for my suit. (20 more)

In the end I will have 24 Blue LEDs, 2 White, 2 RGB, and a tiny Arduino in my suit
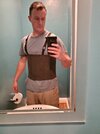
I also got a really awesome package today from EVAkura!

I opened it up and can't believe how good the ab wrap looks! Now I need to get it put together.
master_colt_117 - Any guidance you have since I know you have one of these too?
both sides look so much cleaner than the spots on the chest!
I couldn't resist taking advantage of the nice weather and started to get some paint down today.
I've also started to prep the remaining LEDs for my suit. (20 more)
In the end I will have 24 Blue LEDs, 2 White, 2 RGB, and a tiny Arduino in my suit
I also got a really awesome package today from EVAkura!
I opened it up and can't believe how good the ab wrap looks! Now I need to get it put together.
master_colt_117 - Any guidance you have since I know you have one of these too?
- Member DIN
- S018
Can we all just appreciate the reflections on the back piece? It's that smooth.
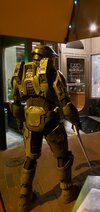
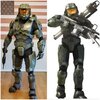
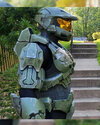
Hey man, sorry for the delay, been a crazy week! Yes so you will definitely have to trim the front and back panel down so the total length fits around your body perfectly. Have to be very careful to get this perfectly equal on both pieces so the front and back waffle line up centered. Youll have to trim both side of each panel to keep it equal, this part takes time to get right. A tape measure helps alot. From there, join your panels, you can use the latex he gives you to join the panels, it works great. Leave one part open so you can take on and off. E6000 also works well. I then use a 12" sports zipper on one side between the front panel where it mates up to the left side panel. I join the zipper to the mid section using e6000 and clamps/weight till its totally cure. It's extremely strong and bonds to the latex very well. I then put elastic shoulder straps on it help keep it up so it doesn't ride down over time, also use e6000. The straps are very important in my opinion because the weight of the COD will seal and grab onto the midsection and want to pull it down. Here are some pics. Where its showing in the pics, by itself on me, is how high it will need to ride on your body. Its more if a sternum/mid section/ back wrap honestly cause halo 3 cods have to ride very high to be game accurate.Made some more progress on the back
View attachment 298920
both sides look so much cleaner than the spots on the chest!
View attachment 298922
I couldn't resist taking advantage of the nice weather and started to get some paint down today.
I've also started to prep the remaining LEDs for my suit. (20 more)
View attachment 298921
In the end I will have 24 Blue LEDs, 2 White, 2 RGB, and a tiny Arduino in my suit
I also got a really awesome package today from EVAkura!
View attachment 298923
I opened it up and can't believe how good the ab wrap looks! Now I need to get it put together.
master_colt_117 - Any guidance you have since I know you have one of these too?
- Member DIN
- S829
Made some more painting progress over the past few days. (have to love 60's+ in November)

It looks so clean and needs some weathering now! (hopefully I can make some progress on this later this week)
I also got a fun delivery!

Now I just need to figure out how to get these attached to the armor. I plan on using these for the shoulder region of the chest. (I'll use simple clips in the lower connection)
I've also been playing around with my soldering iron too!
(Always test along the way)

It looks so clean and needs some weathering now! (hopefully I can make some progress on this later this week)
I also got a fun delivery!
Now I just need to figure out how to get these attached to the armor. I plan on using these for the shoulder region of the chest. (I'll use simple clips in the lower connection)
I've also been playing around with my soldering iron too!
(Always test along the way)
Xtremenoob
Active Member
What's the name of those clips? They look stylish!!!
- Member DIN
- S118
i think they are called cobra clipsWhat's the name of those clips? They look stylish!!!
What's the name of those clips? They look stylish!!!
 www.instagram.com
Here are the clips in action, theyre amazing to use on a torso
Xtremenoob
Active Member
Cheerswww.instagram.com
Here are the clips in action, theyre amazing to use on a torso
- Member DIN
- S829
Xtremenoob - they are cobra buckles. Specifically the plastic variantCheersthey look really nice.
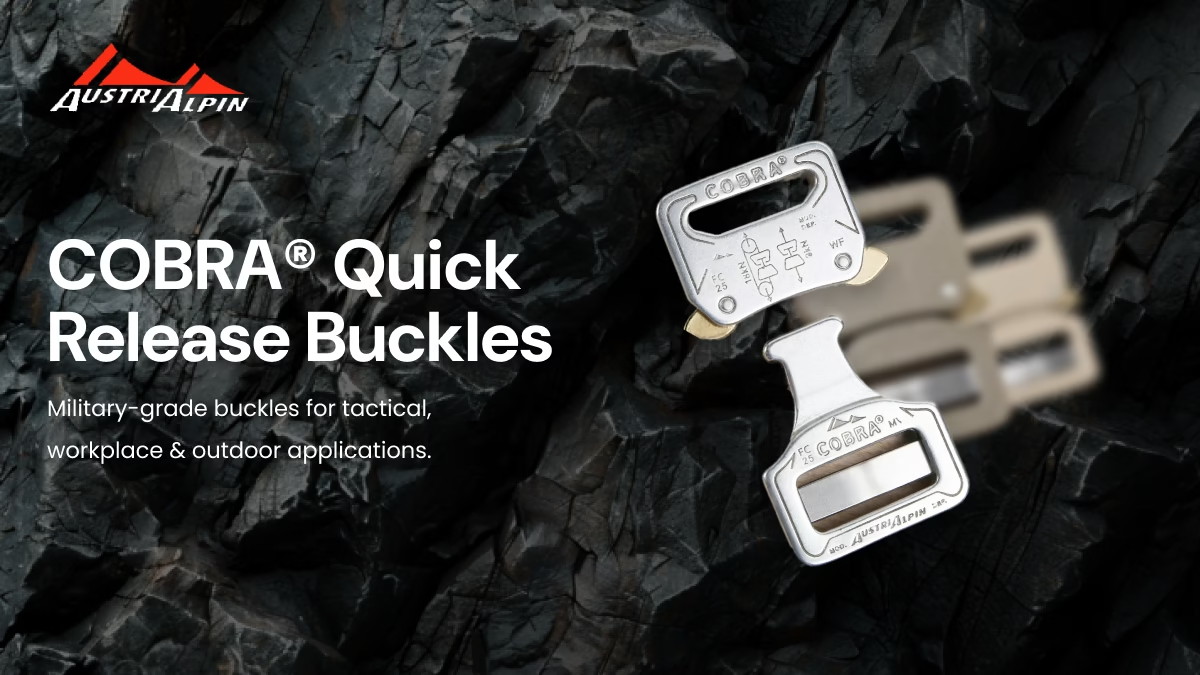
AustriAlpin North America | COBRA® Buckles
Military-grade COBRA® quick release buckles for tactical, work & outdoor use. Built to last, ships across North America. Shop now!
 austrialpin.net
- Member DIN
- S829
Lights are officially installed in the back! Now I just need to hit the inside with some quick black to hide stuff a bit. I also need to determine how to mount my battery bank (it will dictate the final wiring)


Time for some weathering! (it looks very plain without it)
Time for some weathering! (it looks very plain without it)
Similar threads
- Replies
- 2
- Views
- 472
- Replies
- 6
- Views
- 1,434
Similar threads
- Replies
- 6
- Views
- 1,434
