Beutiful! Is that a custom paint job or is it a skin in destiny 2? Been a while since I touched mida... man the nostalgia... and yes, we would immediately notice this wonderfull work of art scout rifle is not a BR Xbawesome work
You are using an out of date browser. It may not display this or other websites correctly.
You should upgrade or use an alternative browser.
You should upgrade or use an alternative browser.
NEMES1S's build. including second build 3d printed
- Thread starter NEMES1S
- Start date
- Status
- Not open for further replies.
NEMES1S
Member
- Member DIN
- S106
Yeh I did put a bit of thought into what side I would have forward facing enimies, and put more damage there as well as the more bulky Arnot prices like the shoulder.This looks fantastic! I love how it looks that the majority of the battle damage is on the left side like any time fire was incoming, you’d just tuck to the side. Looking forward to more!
Beutiful! Is that a custom paint job or is it a skin in destiny 2? Been a while since I touched mida... man the nostalgia... and yes, we would immediately notice this wonderfull work of art scout rifle is not a BR Xb
It's a bit of both. It was inspired by a skin, but I had this orange paint sitting around for ages so I decided to give it a go and a mash it up a bit. This was the original plan

What printer did you use?
NEMES1S
Member
- Member DIN
- S106
Not sure I bought it as a raw kit. Had to do a ton of sanding. I covered it in several layers of fibre glass resin to try fill in the build lines a bit first.What printer did you use?
NEMES1S
Member
- Member DIN
- S106
NEMES1S
Member
- Member DIN
- S106
Been a while sine i've done any halo related stuff, but the bug has bitten me again. Ive gotten into 3d printing and am close to finishing a 3d printed integrity knight so one that's done next project will be 3d printed spartan. Ive come across nerdforge designs models and decided to run with those instead of mucking around converting my paper files, and the straight game rips lack the detail.
had a quick mock up. I need to work out the undersuit first, so i can scale the parts to fit over the extra width of wearing the undersuit as well
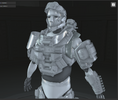
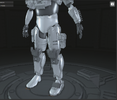
I'm also looking at frankensteining some thrusters on the base reach, i've chopped the h5 security thrusters to see if i can pull it off
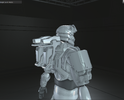
had a quick mock up. I need to work out the undersuit first, so i can scale the parts to fit over the extra width of wearing the undersuit as well


I'm also looking at frankensteining some thrusters on the base reach, i've chopped the h5 security thrusters to see if i can pull it off

NEMES1S
Member
- Member DIN
- S106
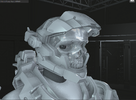
scaled up the helmet and attachments, going with haunted pilot. I didn't have the skills to do this helmet on my first build, but now i'm feeling confident enough i can do it justice.
i started printing out my magnum, after i got the handle and trigger printed i realised it seems to be in 1:1 scale which is quite large compared to the size of my hands. the damned thing is bigger than my forearm armour. so i might have to cut my losses scale it down and start re printing it.
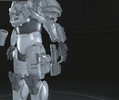

i started printing out my magnum, after i got the handle and trigger printed i realised it seems to be in 1:1 scale which is quite large compared to the size of my hands. the damned thing is bigger than my forearm armour. so i might have to cut my losses scale it down and start re printing it.

YOURE BACK! I have really missed your work and cant wait to see how this turns out! that tac pad is absolutely amazing!
NEMES1S
Member
- Member DIN
- S106
haha thanks, ive got some good ideas planned for this one, though it is bad timing now that we are being tempted with new armor from infinite. im pretty happy with how the tac pad is going. i just need to sort out the drivers to get the touch screen working, then manage to fit it and a battery pack into the forearm attachment.YOURE BACK! I have really missed your work and cant wait to see how this turns out! that tac pad is absolutely amazing!
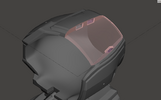
scaling is my biggest time consumer at the moment, have to make sure the parts fit over my under suit but arn't too big. ive scaled the biceps to the right size but realised they probably wont fit over the forearms of the undersuit. so i've split it and put cavities in it so i can insert magnets.. i still need to do a proper test other wise the magnets will be the go
NEMES1S
Member
- Member DIN
- S106
been a while since last update. had a few set backs with replacing hardware on my printer.
commando shoulder printed and looking good. I'm starting to get nervous about the weight, I'll have to use a more heavy duty attachment method than just velcro like i was planning.
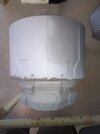
the cut out and holes for magnets on the biceps was all good. but after a bit of mock up i may not need to have them separate, if it still looks good after i mock up padding then ill just glue them back into one piece.
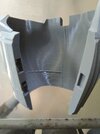
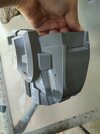
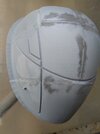
filling gaps on the buck for the visor. i'm not quite sure how much i need to sand it or if when it gets vacu formed how much of the imperfections will show up. i'm planning on getting ti done in petg if i can. my general theory is if the petg is thick enough (i'm thinking 2-3mm) the imperfections wont show up on the outside and only the proper grooves will be deep enough to show up
commando shoulder printed and looking good. I'm starting to get nervous about the weight, I'll have to use a more heavy duty attachment method than just velcro like i was planning.

the cut out and holes for magnets on the biceps was all good. but after a bit of mock up i may not need to have them separate, if it still looks good after i mock up padding then ill just glue them back into one piece.


filling gaps on the buck for the visor. i'm not quite sure how much i need to sand it or if when it gets vacu formed how much of the imperfections will show up. i'm planning on getting ti done in petg if i can. my general theory is if the petg is thick enough (i'm thinking 2-3mm) the imperfections wont show up on the outside and only the proper grooves will be deep enough to show up

NEMES1S
Member
- Member DIN
- S106
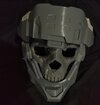
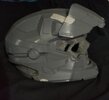
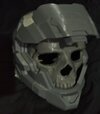
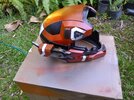
I got tired of sanding so I impulsively painted the helmet up. I have now set the colour scheme for the rest of the build. I had initially intended on doing a two tone of darker and brighter metal for the visor and inner part of the helmet, but once I got the masking off the black looked so good I left it as is.
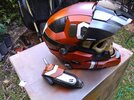
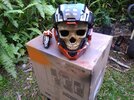
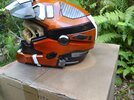


- Member DIN
- S795
It looks SUPER good bro, 
NEMES1S
Member
- Member DIN
- S106
I wasn't happy with the painted on carbon fibre look, is real let down so i replaced it with some carbon wrap i had laying around. i had hoped the painted on version would come through so i can do it on more organic surfaces that wrap is not suitable or too hard to do. but looks like i used the wrong tape of pattern for it. another learning experience. but looking cleaner now.

NEMES1S
Member
- Member DIN
- S106
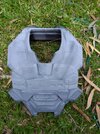
making some real progress, it's starting to look like a costume. swapped from regular pla to pla+ and updated to the latest version of cura, prints have been alot cleaner and faster. the new version of cura has cut down some of the print times and the support material detaches leaving the surface a hell of a lot cleaner. i'm holding off on cleaning the chest up too much until i have it all assembled and have the ua collar and tactical bit printed so i dont waste time sanding and cleaning up areas that are not going to be able to be seen after they are attached.
i have also scrapped the idea of attaching the thrusters to the back. i'm going to have to wear it for about 6 hrs and sit down ect so it just wasnt worth the extra hassle of having huge thrusters attached to the back. fortunately when i make changes to my models i keep varies saved files of the models at different stages of when i edit the meshes, so i just had to open an earlier version before i combined the thrusters and slice only the bits i needed into the final print file.
i have also scrapped the idea of attaching the thrusters to the back. i'm going to have to wear it for about 6 hrs and sit down ect so it just wasnt worth the extra hassle of having huge thrusters attached to the back. fortunately when i make changes to my models i keep varies saved files of the models at different stages of when i edit the meshes, so i just had to open an earlier version before i combined the thrusters and slice only the bits i needed into the final print file.

Rock Lobbster
Sr Member
- Member DIN
- S098
I'm obsessed with your style, it's like cyberpunk mixed with Halo and I'm all for itI got tired of sanding so I impulsively painted the helmet up. I have now set the colour scheme for the rest of the build. I had initially intended on doing a two tone of darker and brighter metal for the visor and inner part of the helmet, but once I got the masking off the black looked so good I left it as is.
View attachment 310403View attachment 310404View attachment 310405
NEMES1S
Member
- Member DIN
- S106
Thanks i'm glad people like it.I'm obsessed with your style, it's like cyberpunk mixed with Halo and I'm all for it
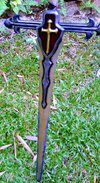
while i've been sanding and cleaning up the shoulder pieces i have been wondering whether i will leave the armour clean or go with light scuffing or even do some real damage like it did on my first suit. one the ideas i have been thinking about is doing some plasma damage, particularly on the grenadier shoulder. i tried out airbrushing a burnt metal look when i was doing my integrity knight cosplay and wouldn't mind giving plasma damage a go as well as doing the barrel on what ever weapon i decide to go with.
here's the sword i tested it out on
NEMES1S
Member
- Member DIN
- S106
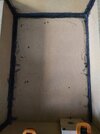
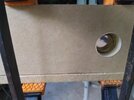
I have started assembling the vacuum forming box so i can do the visor, was off to a bad start, i didn't use a guide and the sides ended up not being square, so even after clamping there were still gaps. but i have filled them with wood filler and sealed with pva glue. once i get the top on i fill do the outside part as well and it should be all air tight and ready for vacuum forming.


- Status
- Not open for further replies.


