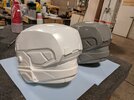
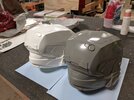
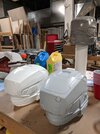
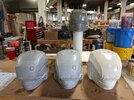
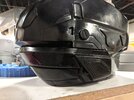
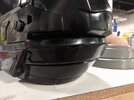
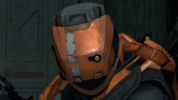
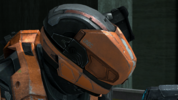
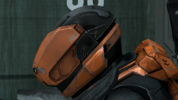
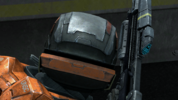
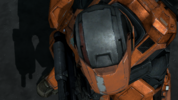
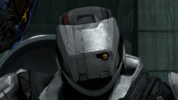
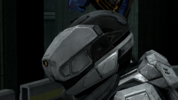
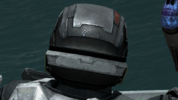
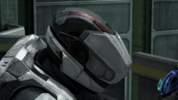
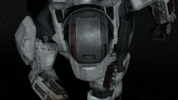
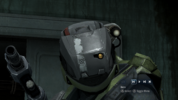
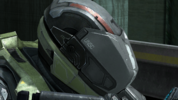
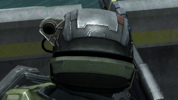
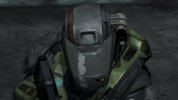
Reach Gungnir helmet build

Status
Not open for further replies.
Moar updates

Don't hate me for the double\triple posts lol

The first casting pull.

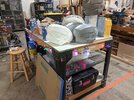
So now the helmet has been demolded successfully, it's time to reassemble the mold and figure out the casting process.

- How much resin will I need?
- How many layers?
- What areas might require extra care?
- What 'order' do I go in?

These are things you have to learn as you go, and will vary from mold to mold. For this mold, I have an *idea* for how much resin I'll need for a robust casting based on some previous molds that were slightly smaller. So I start there, and compare notes (always save your notes) and get a tentative process written down.

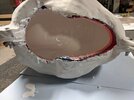
The first casting, I don't expect it to be 'successful'. This purpose of this one is to pull out any gunk that might still be stuck in the mold, like bits of primer, dust, etc. It might be too thin, it might have pooling in some areas as you sling it around like a mad man, etc. You won't bother with mold release or baby power on the first pull. You want to "clean" the mold with this casting.

So here I am, adding layers of SmoothCast 300, bit by bit, building thickness. SC300 cures bright white. It is not designed for rotocasting, and smoothon is pretty vocal on their documentation about NOT using it for that purpose (they want you to use 65D, which is designed for rotocasting.
IMG_20201017_180204.jpg

Does this mean you should not use SC300, or SC 320, or even onyx? Nope!!

The reason SmoothOn advises you not to use those for rotocasting, is that those resins are all "snap cure", meaning that once the pot-life expires, the resin basically starts to cure all at once, and that can result in pooling, 'lava' effects, and just general mess. With practice, you CAN use these resins for rotocasting, so long as you practice practice practice and respect the cure times and properties, and realize that you are taking a risk. If you look at other established builders , you'll see they do just fine with these resins for roto-casting.

Is there anything wrong with 65D? Not really. It just tends to be more sensitive to heat, and warps easier compared to the others. Onyx cures super fast, resists heat, but if too thin is very brittle.

You gotta pick the right material for the right application. It isn't set in stone.

OK. That said.

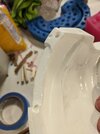
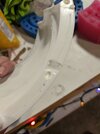
Here are some close ups of my first pull

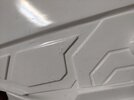
The cheek flaw that will be on every casting.
IMG_20201017_185440.jpg

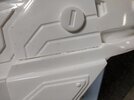
The 'trench' flaw that will be on every casting.
IMG_20201017_185448.jpg

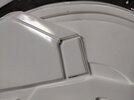
Some primer that got pulled off the master, that got pulled out of the mold (thanks, sacrificial first casting!)
IMG_20201017_185454.jpg

A thin area on the brim where I didn't slush enough material. Again, you learn these as you go.
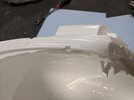
IMG_20201017_185531.jpg


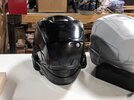
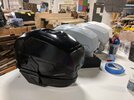
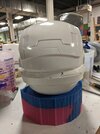
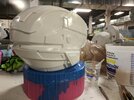
Here is the first pull next to the master
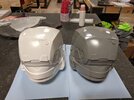
IMG_20201017_190018.jpgIMG_20201017_190022.jpgIMG_20201017_190031.jpg

Very shiny! Honestly, the first casting isn't a dud. It needs a little work, but is still totally useable. I'll probably offer it up for a discount once I get my first "good" pull to use for my giftee's replica.

The good news is I also dialed in the perfect amount of resin to use, I just need to tweak the order and technique for pouring.


Here is the 2nd casting a pulled. For this one, I sprayed mold release into the mold, and dusted in baby powder. I also tinted the resin light grey.

The mold release helps release the cast from the rubber, extending the life of the mold. The baby powder assists with pulling resin forward to the silicone, and reducing the chance of surface bubbles on the casting. The casting comes out a little more 'matte' though, as a result.
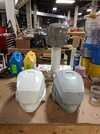
IMG_20201017_210210.jpgIMG_20201017_210218.jpg

This casing came out better than the first but also has some small flaws, a couple air bubbles on some sharp edges, and a little warping on the rear collar that occurred when I didn't have the rubber seated correctly (d'oh). Another discounted bucket for someone.

I'll post more pictures soon. So far, everything has been successful and I just need to keep pulling and dialing it in to get the process right.

I also, still need to mold the rear collar. Completely forgot to do that. So, I'll be doing that soon.

Thanks for reading and I'd love your feedback\comments!
 
Belated update time

Hey all, my day job and a bunch of mandatory OT have been keeping me away from working on this the last few weeks, but now that the election is over balance is returning and I have time to work on fun stuff again. I've made some progress since my last post, and have gotten the collar molded.

I have the next few days off and will be working on this a bunch to make up for lost time, and will post some more progress pics as I can.

Hoping that I can start getting one painted this weekend!
 
Update

I've been busy these last few days. Lets catch up, shall we?

Last I left you I had 2 castings. Now I have 5. It took me about 4 pulls to really "get" the process for roto-casting this particular helmet. This isn't unusual- each object you mold will have a unique process to cast it, maybe little quirks and things you pay attention to, such as maybe where resin has a higher chance to pool, or maybe where extra reinforcement is needed.

I pulled 3 in smooth cast 300. The white one is 65D.
IMG_20201018_162309.jpg
IMG_20201107_211120.jpg

The 5th one I pulled was the winner. For this one I used Onyx, which is a jet black, and fast setting resin. Roto-casting with this is not for the amateur - you gotta move fast and even. This resin will kick very quickly.

IMG_20201111_192608.jpg

IMG_20201111_192622.jpg

So outta 5, I have

3 that need some post finishing work
1 that is ready to go
1 dud (needs more work to fix than I have time for)

Not bad!

Next steps: molding the collar

So I'd been avoiding the collar for a bit. It is a deceptively difficult piece to mold. The piece is thin, curved, AND slants.

Thickness is easy to address- I simply grabbed some resin and slushed some on the inner area to increase the thickness and make it stronger.

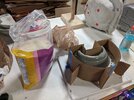
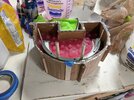
The molding on the other hand.... ugh. I'm short on time, so I went with a basic box mold for this one since I can do it quickly and have a 99% shot at success with it. Box molds are the easiest to do, but consume the most amount of material, especially with a part like this.

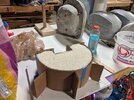
Boxing it up after setting the clay wall.
IMG_20201107_213226.jpg

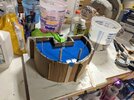
Estimating how much silicone I'll need by using rice as a void fill.
IMG_20201107_213750.jpg

F*ck.
IMG_20201108_143320.jpg

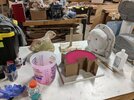
My poor wallet. First half poured with a dash of red pigment.
IMG_20201107_230103.jpg

No matter. It must be done. On the triangle of "Good-cheap-fast", choose two... I chose Good & fast.

I let that cure for the afternoon. While that was going, I spent time trimming the helmets. I have no progress pictures of that as I assume you are all familiar with that stage.

After about 8 hours, I returned to the collar mold to pour the other half.

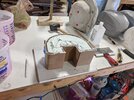
Flip it over to reveal the clay. Remove the clay, while taking care to not disturb the piece sitting in the silicone.
IMG_20201108_123720.jpg

The first half revealed and cleaned, the exposed part cleaned with alcohol and the mold sealed back up. Mold release is sprayed on the already cured pink silicone, so that the second half of the pour does not bond to the first half. Remember, silicone sticks to nothing and nothing sticks to silicone except itself.
IMG_20201108_143220.jpg

Pouring the second half. Then another 8 hour wait.
IMG_20201109_183104.jpg


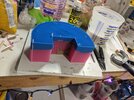
The next day, the walls are removed and the mold is revealed. Using pigment makes it easier to see where the mold should separate.
IMG_20201110_171622.jpg

The first pull

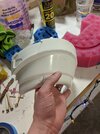
As with the rest of the helmet, I expect this first pull to be subpar and to clean the mold of any paint or clay debris. It turned out pretty well honestly. The only flaw is at the top where air became trapped and didn't escape the vent holes, leaving me with a large bubble that will need filled.

IMG_20201110_182519.jpgIMG_20201110_182527.jpgIMG_20201110_182532.jpg

Not a deal breaker. It also matches up to the helmet body, which is the most important part.
IMG_20201110_183044.jpg

IMG_20201110_183054.jpg

I think in the future, I'll worry less about making sure the magnet holes are pre-built into the casting and just use a jig and drill them after. Working to put them in the master made me have to over-engineer some of the molding stuff and results in more cleanup work than I want.

Live and learn.
 
Starting the helmet for my giftee

So the black casting is the best of the first batch, and I'll be using that one for my friend. It needed minimal cleanup and is the most balanced.
IMG_20201112_135731.jpg


I got the neck seal trimmed with a rotary tool and some light sanding, and then went to work with attaching the magnets.

The magnets are about a quarter inch in diameter and are quite strong. To attach them, I begin by working ONE, at a time, marking the polarity of each side with a sharpies as I go. The goal here is to make sure that the helmet has one polarity and the collar has the opposite. The holes for each magnet are snug, so to widen them just a hair, I carefully take my dremel and remove a little material from the edge making the hole bigger to account for the superglue that has to be dabbed in.

IMG_20201113_141233.jpg


Each magnet is paced in gently, making sure that the marked side is facing up, and any glue that squeezed out is wiped up before it sets.

Tip: I found that attaching the magnets in a row on an object (in my case a can of acetone) and then marking them as I went to be the easiest. One bad placement can ruin this whole stage, so you must be careful and double check as you go!!
IMG_20201113_141859.jpg


It went well, and though I lost some flesh to the super glue (really, can you call it a project if you DON'T lose some skin or blood, or bond your fingers together?) the parts marry up well and look good.

IMG_20201112_135657.jpg
IMG_20201112_135717.jpg

Here is a quick demo of the magnets in action.
(ignore the workshop noise in the background)
 
Tr-tr-tr-triple post!

Final update from the weekend: painting and detail planning.

The 4 helmets were all trimmed up, and any large imperfections were addressed like the cheek defect from the mold for example. This mold is really clean, so for cleanup I think I had MAYBE 3-4 holes to spot fill, and then some bubbles to cut off with a knife.

Then I put on my respirator for what lay ahead for the next 12 hours. Safety first!
IMG_20201114_213058.jpg


Each was wiped clean, and hit with a couple coats of gloss gray primer. The helmet on the right is the same primer but the casting is bright white, so it looks a little different. The collar I spayed chrome, as a test.
IMG_20201114_211519.jpg


The third one down however was a straight up JERK.
IMG_20201114_211531.jpg

When I went to prime him, he had super bad orange peel. Same technique and spray can as used on the other 3. So that meant maybe it had some residue on it (no biggie, that happens occasionally. Mold release remains are a usual culprit). So I stripped the primer and cleaned with acetone and tried to prime again. NOPE. Same issue. So I had to sand the little b*astard down to get whatever was leeching off and then I was tired by this point so I only sanded to 320 and glossed it. This helmet, will be my personal one, as my spartan color is usually matte white. So no shine needed.


Each helmet and collar was left to sit and dry, with occasional passes of a heat gun to speed the process.

At this point, I could move on to spraying color if I wanted to, but I'm not content to do that. I've got some liquid latex on order that I'm going to use to weather each bucket with, to really give a unique "worn" paint look.

That begins by giving each helmet a base layer of silver paint. Except of the one in the right, which I sprayed chrome because I had some so why not.
IMG_20201114_225004.jpg


Don't get too excited by the chrome- it rubs off super easy and just turns silver. I put it on purely for fun, and since a lot of my friends are making that new guy from StarWars y'all seem to be into these days.

You know the one, right? The space-cowboy who likes to dance? I think the show is called "The Mambo lorian" or something like that.

Beautiful.
IMG_20201114_225321.jpg


I'm a proud papa.
20201115_131214.jpg


SOON.
20201115_131219.jpg


While those were drying, I also spent some time working on making some stencils for the details. I drew up the Gungnir symbol and then tracked down the matching font for the details on the helmet, in game and from the concept art. Then I cut em out on the laser to use as stencils later. Not gonna lie, I was pretty happy I got the math right on the first try when sizing them to my bucket.
IMG_20201112_175547.jpg


My giftee (like I) is one to pour over details and will notice allllll the sins I've made along the way. More soon. Thanks for reading.
 
Last edited:
Update time: Getting references for painting

Well, our city\county is in another lockdown situation so that has introduced some challenges to getting to work on this, but I'm managing as best I can. I think I'll make my deadline of Christmas.

The painting & detailing stage is easily my favorite and I have a love\hate relationship with it. While I've gotten very proficient with rattle-cans over the last decade, there are still so many things that can go wrong or slip your mind and just make the experience frustrating.

Listen closely spartans: It all comes down to the prep work. ALL of it.

- Set & setting
- Temperature
- Moisture
- Ambient dust
- Surface prep (cleaning)
- Paint (shaken, warmed, distance)
- and moar.

90% of the time, the errors you get in your paint work (orange peel, cracking, runs, etc) are *your* fault. I've f*cked up so many paint jobs, learning along the way, and I STILL make the occasional rookie mistake. Just keep at it. You'll get better.

Ho'kay, lets move on.

I have 4 buckets to paint, and 3 of them are practice for the big show. I started this process by looking for reference material. There are some pretty good ones out there for this helmet, luckily.

This concept art piece here is basically perfect.
gungnir.jpg


I also like this one, with the "caution" decals on the rear.
gungnir1.jpg


But, I like to research and be as accurate as I can (for me, that is part of the joy in this work).

So, I spent a crap ton of MCC points to unlock the Gungnir helmet so I could fire up theater mode and take some reference pictures.
If helpful, here they are:

1 will be painted Orange (no reason, just for fun)
Halo_ The Master Chief Collection   11_14_2020 10_41_48 AM.pngHalo_ The Master Chief Collection   11_14_2020 10_38_03 AM.pngHalo_ The Master Chief Collection   11_14_2020 10_39_46 AM.pngHalo_ The Master Chief Collection   11_14_2020 10_42_31 AM.pngHalo_ The Master Chief Collection   11_14_2020 10_43_36 AM.png

1 will be painted White (this is my usual armor color, so I'll keep this bucket for me)
Halo_ The Master Chief Collection   11_14_2020 10_54_19 AM.pngHalo_ The Master Chief Collection   11_14_2020 10_54_57 AM.pngHalo_ The Master Chief Collection   11_14_2020 10_55_09 AM.pngHalo_ The Master Chief Collection   11_14_2020 10_55_42 AM.pngHalo_ The Master Chief Collection   11_14_2020 10_56_43 AM.png

1 will be painted (REDACTED), which is more non-traditional and something I'll do just for fun. It's not going to be quite as different as my Venom ODST, but not something you'd see in game.

1 will be painted Green and Steel. Those are the colors my buddy wore on his avatar back in the day and OH MY GOD I FORGOT HE HAD THE CAMERA ATTACHMENT AND I HAVE NOT MADE THAT YET AHHHHHHHHHHH -ahem- I'll deal with that crisis later.
Halo_ The Master Chief Collection   10_19_2020 5_35_59 PM.pngHalo_ The Master Chief Collection   10_19_2020 5_30_19 PM.pngHalo_ The Master Chief Collection   10_19_2020 5_31_24 PM.pngHalo_ The Master Chief Collection   10_19_2020 5_31_55 PM.png

Did you know you can still go to Bungie's website and see most of your old Halo stats? I was pretty certain I knew the colors my friend wore, but to be absolutely sure I was able to utilize that as a reference, rather than having to hunt for the answers through other more, "super liminal" methods.

1606078783884.png

That "Hushed Apprentice" invasion map\game is pretty fun.


And yes, I see that his visor-eyeball is Silver
.
boner2.png


So now that I have all my reference material, it's time to start practicing.
 
Update: Starting to Paint

So to continue my last post, now that I have all the references, the next stage is painting.

I'll be trying out liquid latex as a resist agent. I've personally never used this method before, but I know it is quite popular in the StarWars cosplay community.
IMG_20201120_191445.jpg


So for those that are not aware, a resist agent is something you can put on one layer of paint, and then when you apply your second layer of paint on top and let it dry, you can then expose the first layer when you remove the resist agent. This is quite useful for making a chiped or worn look. I've used regular old mustard in the past, but wanted to try the latex out.

The process......
It's a lot of extra work, but the layering effect looks quite promising. Here is a general breakdown of the process:

1) Prime your helmet
2) Paint your silver base
(3) Apply the latex on areas you want the silver to show through
4) Paint your "primer" layer, black or grey
(5) Apply the latex on areas you want the black or grey to show through. For example, just over the areas where you masked silver, to simulate chipping
6) Paint your color layer
7) Remove the latex, to reveal (hopefully) a weathered look
8) Paint your details
9) Clear coat & black wash (this can be reversed if you want to seal in your black wash under the clear coat).

I start with each helmet and apply a little latex to the areas I want the silver to be visible.
Using the reference images I took as a guide, I decanted a little of the latex into a small medicine cup and then painted it on with a brush.

If you don't have reference material and need to make it up as you go, those areas are typically going to be any hard, exposed edges where contact and wear\tear would be made in everyday handling. Where something might rub against repeatedly, or any obvious battle damage.
IMG_20201120_205659.jpg


The latex dries clear when done. Then I sprayed on my black layer. You can just barely make out the raised areas where the latex is underneath. Once the black was dry, I applied a little more latex around the first pass of latex, to hopefully achieve a chipped look.
IMG_20201120_220706.jpg

Here I did thin strokes with the brush to see how well I can get fine scratches to appear. If this doesn't pan out, I can always come back later with a regular old paint brush and dry-brush silver where needed.
IMG_20201120_235621.jpg


Then it was time to paint color! After all this time!

Per my previous post, I want to try something fun, like Orange.
Halo_ The Master Chief Collection   11_14_2020 10_41_48 AM.png


That's pretty Orange ^^^^^

But.....

I want
1606080141268.png


Morange, you might say.

Oh. That'll DO. Yessssssssssss.
IMG_20201121_173853.jpg


To achieve that deep, blood-orange I took a Gloss Krylon Orange and then while still wet, ever so slightly misted on some neon orange. I am somewhere between Orange and Traffic cone.

From there, it was a process of masking and spraying and drying and repeating those steps. Not gonna lie, it got tedious at times because this helmet has a lot of color depth to it.

That said, one small detail I'm really pleased with is the red detail stripe- I found the PERFECT color for it and it looks great!
IMG_20201121_203235.jpg


So here are the rest of the pictures- this one is not done yet, it still needs final details and the eye done, but I'm very happy with it so far

IMG_20201121_213134.jpg

IMG_20201121_213151.jpg

IMG_20201121_213200.jpg

IMG_20201121_213214.jpg

IMG_20201121_213233.jpg


The chipping look pretty good for my first attempt at this medium. I need to let the paint de-gas for a day or two before I move onto doing the final detail work like the Stripe, stencils and eye.

Here is the White one I'm playing with for myself, that will be my helmet and is more based on the in-game reference images I took.
IMG_20201121_223900.jpg

IMG_20201121_223907.jpg

IMG_20201121_223913.jpg

IMG_20201121_223934.jpg
IMG_20201121_223946.jpg


That's about as far as I can get at the moment. This weekend my goal is to wrap up the Orange & White helmets and get their processes down so I can start painting the Green one up.

Getting closer!
Thanks for reading :)
 
That paintwork is gorgeous, can't wait to see the finished product
Holy hell that looks amazing..............

Thank you very much!!

I'm still cranking away at this, been making my way through the various stages of paint work. I have a small dump of progress pics but -right now- I'm ahead of what you guys are seeing.

So let's check in!

Arguably, I think the Gungnir helmet has 2 iconic features: the Gungnir symbol, and the eye.

To tackle the symbol. I fired up the shops laser cutter and using painters tape on some scrap material, cut out the stencil.
IMG_20201126_174911.jpg


I then carefully removed the stencil and applied it to each helmet. Here it is on my 'concept' helmet.
IMG_20201126_175318.jpg


From there, the stripe is masked off and then painted on. Here is that happening on the Orange helmet, for example. I used plastic grocery bags to quickly mask off the helmet. Saves tape and time. You can also see where I was testing out the UNSC stencil I cut. Had mixed results with that.

IMG_20201129_150531.jpg


Feeling confident about my 'test' helmets, I moved on to my giftee's helmet and started getting the base color applied. Here the black had just been done.
IMG_20201128_171344.jpg


Then, finally, after 5 months I got to paint the green. Felt good, man. Same idea, using a bag to make masking easier.
IMG_20201129_134604.jpg


There he is. He's even smiling at me!
IMG_20201129_182610.jpg


I can't UNSEE this little smile now, every time I look at this bucket.
1607470710828.png


For the latex masking I strived to be as faithful to the in-game reference I had as possible, but it just pulled a little too much away. So I went back and re-worked it a bit.


Here is about where we're at today- all the main painting has been done. Detailing is done. Clear coat is done. The orange got a flat coat, the white and green got satin.
IMG_20201205_213458.jpg

IMG_20201205_213519.jpg


You might notice the 4th helmet peeking out above- I'm not quite ready to share all of him yet (still a WIP and not 'critical' to get done right now) but hopefully he turns out well.

The only thing left to do, is the other iconic part: they "visor". Such a small detail, yet it will be the most important for me.

So last night I fired up the airbrush, and started spraying spoons. I'm practicing to get the right process down for the result I want.
IMG_20201207_185550.jpg


I'm using Alclad paints here, gloss black, chrome, and an orange candy top coat that just might give me the gold I need on my helmet. My giftee has just a silver visor, according to the records I can skim on bungie.

Here is my battered orange boi, getting a black eye. Looks kinda soulless. Also, SPOON-MAN. COME TOGETHER WITH YOUR PLAN. PAINT MEEE.
IMG_20201207_213526.jpg


So nearly there folks. My goal is to get the eyes done this week, let them off-gas a day or two, and mail out next week in time for Christmas.

After that, I'll have castings available for anyone interested so I can fund my next project.
 
if you're looking to do full electronic build, I just finished mine last month so here's some tips.

1. its gonna cost around 500$, but its relatively easy to do compared to the build. Cheaper if you fly drones already since you should have goggles already. And since they aren't permanently mounted you can use what you have.

2. don't skimp on goggles. The camera is actually less important. Get quality glass lens goggles for clarity

3. Power it with lithium, but put the battery pack in the rear, it could get a little warm and you don't want to burn your neck. Speaking from experience. You can get about 8 hrs of battery life one battery.

4. Go wireless and go with goggles. I took a couple months working on a screen that was close to my face. Also tried to hard wire the goggles to the helmet. Both fail compared to the wireless fpv goggles and drone camera.

narrative:

I initially tried to hard wire a camera to a fpv screen close to my face. Of course focusing was difficult. Tried a split screen diopter style set up but again was hard on the eyes, not just because its hard to focus but also cause of how close the light is to the eye. You lose a lot of fov too. The other thing people don't consider when building this helmet is weight distribution. A camera and screen in front REALLY weighs it down. In my initial tests it would pop the neck piece off cause it leaned forward so much. (I used magnets for the collar too)

The best way, in my opinion, is to buy a wireless drone camera and fpv goggles. I settled on fpv shark low profile goggles. Youre close enough to the camera you don't need antenna. For the camera, I settled on a light weight all in one Caddox set up. The camera lens fit perfectly as the "lens" on the gungnir helmet, and there's plenty of room between your low pro goggles and the back of the camera. The wirefrom the camera to the control box goes up along the top insode of the helmet under neath some helmet pads. The control unit and battery are side by side around the crown of the head. Theres protrusions there that hold them just fine. I experimented with a camera on my neck too, which led to the battery being down there. Again, it gets hot, so don't put it there and don't let it touch your skin. Finally I had the recon helmet antenna mounted on the side of the gungnir helmet. So the halo reach antenna is the actual camera antenna. I also installed a chin strap to help keep the helmet from swaying. In a normal build thats not a big deal, but since every bounce is felt by the camera, its imperative you keep the helmet as still as possible. I tried running, which was doable with some practice, but you aren't going to be 360 no scoping with this thing. A halo band might be better.

Unfortunately I'm new here and I didnt take any pictures of my last build and its been sold. Ill reach out to the buyer for pictures but idk. Im looking to build another though, so ill document it there if you dont beat me to it. Maybe I'll buy one from your mold and save me the folding trouble. Great build man I'm enjoying following your progress.
 
Unfortunately I'm new here and I didnt take any pictures of my last build and its been sold. Ill reach out to the buyer for pictures but idk. Im looking to build another though, so ill document it there if you dont beat me to it. Maybe I'll buy one from your mold and save me the folding trouble. Great build man I'm enjoying following your progress.

Welcome!

Thanks for the advice. I have no intent in trying to make it functional or setting up any soft of electronics. For me, this project is just about making a really cool replica for display. I'm sure someone will try to cram a camera in there, but it won't be me :D
 
Update: One final effort

Well, here we are. I've reached the point of the final detail to add: the 'eye' for the visor. Such a small, but important detail!

In order to get it right, I spent time with the airbrush and some spoons testing out various finish combinations to make sure I know what I need to do on the actual kits. I stuck with Alclad paints and reached out to some friends for advice, and also good ol youtube.

All spoons were shot with a gloss black, allowed to cure, and then I tested with a few different combinations

Gloss black > Chrome
Gloss black > Chrome > Orange Candy (medium and heavy coats)
Gloss black > Chrome > Orange Candy > Clear (aqua gloss)
IMG_20201209_214732.jpg


Gloss black > Hi-Shine Aluminum
Gloss black > Hi-Shine Aluminum> Orange Candy (medium and heavy coats)
Gloss black > Hi-Shine Aluminum > Orange Candy > Clear (aqua gloss)
IMG_20201209_215140.jpg


Gloss black > Black Chrome
Gloss black > Black Chrome> Orange Candy (medium and heavy coats)
Gloss black > Black Chrome > Orange Candy > Clear (aqua gloss)
IMG_20201209_214620.jpg


Each has a use, in my case. I learned that the Aluminum is 'brighter' than the chrome, but is just a tad less reflective. The Orange candy is PERFECT for matching that in-game "gold visor" but it comes at the expense of the mirroring on the chrome (such is life) and the black chrome I really liked as a faux "black" visor. You barely have to use any. One REALLY cool thing I learned with the candy was after shooting it, if I let it cure and then hit it with a heat gun, it would gloss over beautifully. A heat gun on just the chromes had no such effect.


IMG_20201209_210827.jpg


Once that was done it was a matter of deciding what I wanted on each helmet. I knew mine would use the gold
IMG_20201209_210953.jpg


I knew my friends would use chrome (you can see me in it!)
IMG_20201209_210916.jpg


The orange one I debated. The chrome & black chrome each looked good in comparison. Gold I felt would get lost in the Orange. Having a good contrast really makes it pop.

chrome
IMG_20201209_211215.jpg


black chrome
IMG_20201209_211147.jpg


Ultimately, I settled on black chrome.

With that, I then moved on to doing the real deal on the helmets. Here is mine with the first light pass of orange on chrome. It looked really gold in person. It also ended up revealing a couple of flaws in the finish. Unfortunately some foreign objects got into the chrome (dust, I suspect, from our wood shop) and frankly, I didn't care so I just kept going.
IMG_20201210_181149.jpg


I then let all the helmets sit and cure, and then took pictures of each finished one, which I'll be posting here for your pleasure......

GET

SET
 
The Orange helmet
This helmet was the tester. The intent was to try out a heavily weathered appearance. This helmet has chips, dings, scratches, orange peel, black wash, airbrushing, all of it. It is supposed to look like this Spartan has been through some sh*t.

The paint is a custom mixture of a gloss orange & hi-viz orange to get an almost cartoonish appearance. The visor is Alclad black chrome that I might have sprayed just a tad too heavy.


IMG_20201211_234207.jpg
IMG_20201211_234251.jpg
IMG_20201211_234305.jpg
IMG_20201211_234321.jpg
IMG_20201211_234343.jpg
IMG_20201211_234417.jpg
IMG_20201211_234442.jpg
IMG_20201211_234604.jpg
IMG_20201212_004513.jpg
IMG_20201212_004537.jpg
IMG_20201212_004613.jpg
IMG_20201212_004706.jpg
 
The White helmet
This helmet was the second tester, and one I decided to paint up in my colors (personally I'm a Mk V kinda guy, but I'll admit that having worked on the Gungnir bucket for 6 months, I've grown to appreciate it a bit more) and would have a "medium" weathering. I tried to stay as faithful to the weathering in-game, with just a tad more added on to my personal preference. The visor is Alclad Chrome with 2-3 coats of Candy Orange.

IMG_20201211_233113.jpg
IMG_20201211_233134.jpg
IMG_20201211_233148.jpg
IMG_20201211_233217.jpg
IMG_20201211_233321.jpg
IMG_20201211_233337.jpg
IMG_20201211_233511.jpg
IMG_20201212_003617.jpg
IMG_20201212_003633.jpg
IMG_20201212_003706.jpg
IMG_20201212_003802.jpg
IMG_20201212_003817.jpg
IMG_20201212_003833.jpg
 
The Green & Steel Helmet
The reason this project exists. This helmet was done up in the colors of a friend of mine, as a 'thank-you' for a really cool Christmas gift I received from the last year. This one was weathered and styled to look as close to game-accurate to their avatar as I could deliver. The visor is Alcald chrome, with a thin layer of aqua gloss. The helmet has a satin finish overall.

IMG_20201211_232059.jpg
IMG_20201211_232121.jpg
IMG_20201211_232135.jpg
IMG_20201211_232200.jpg
IMG_20201211_232224.jpg
IMG_20201211_232242.jpg
IMG_20201211_232257.jpg
IMG_20201211_232318.jpg
IMG_20201211_232515.jpg
IMG_20201212_002741.jpg
IMG_20201212_002802.jpg
IMG_20201212_002835.jpg
IMG_20201212_002907.jpg
IMG_20201212_003025.jpg
IMG_20201212_003224.jpg
 
Status
Not open for further replies.
Back
Top