been following this on Instagram dude, this is some seriously clean work, loving the new suit!
You are using an out of date browser. It may not display this or other websites correctly.
You should upgrade or use an alternative browser.
You should upgrade or use an alternative browser.
Foam Reach Security Suit. (Quest for the Best)
- Thread starter Benton188
- Start date
-
- Tags
- halo reach security
- Status
- Not open for further replies.
- Member DIN
- S188
UPDATE!!
The "Giant Space Diaper" is done, along with one of the thighs. I also received my new sniper bullets and grenades from the very generous Rock Lobbster as well as another surprise I'll show down the road. I also have one pull from the visor buck using the vacuum former I built a few weeks back. It was almost good, but the plastic wasn't quite up to temperature so the edges near the bottom didn't get pulled taut enough. I plan on doing another pull this weekend after fixing the heat box, and maybe getting around to finishing the other thigh piece. These legs are moving right along.
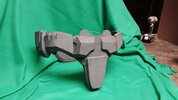
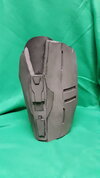
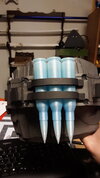
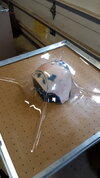
The "Giant Space Diaper" is done, along with one of the thighs. I also received my new sniper bullets and grenades from the very generous Rock Lobbster as well as another surprise I'll show down the road. I also have one pull from the visor buck using the vacuum former I built a few weeks back. It was almost good, but the plastic wasn't quite up to temperature so the edges near the bottom didn't get pulled taut enough. I plan on doing another pull this weekend after fixing the heat box, and maybe getting around to finishing the other thigh piece. These legs are moving right along.


- Member DIN
- S188
UPDATE!!
Thighs are done and now shins are done as well. Up next are the boots, then the undersuit pieces (Ab wrap, neckseal, spine bits, shoulder pieces, and maybe a few other spots.) Currently on a break from building though to finish a few home re-modelling things, but will hopefully resume with the boots starting next week.
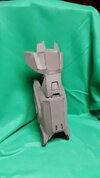

Thighs are done and now shins are done as well. Up next are the boots, then the undersuit pieces (Ab wrap, neckseal, spine bits, shoulder pieces, and maybe a few other spots.) Currently on a break from building though to finish a few home re-modelling things, but will hopefully resume with the boots starting next week.

Looks legit dude!!UPDATE!!
Thighs are done and now shins are done as well. Up next are the boots, then the undersuit pieces (Ab wrap, neckseal, spine bits, shoulder pieces, and maybe a few other spots.) Currently on a break from building though to finish a few home re-modelling things, but will hopefully resume with the boots starting next week.
View attachment 298240
View attachment 298241
- Member DIN
- S188
UPDATE!!
Boots are done, which means all the main armor components are complete! I even went ahead and gave all the pieces a good Plasti-dip....dip. So they can move on to being painted here during the Winter months. More importantly however, is I finally got the perfect visor pull on the vacuum bed for the visor. Dropped that sucker in the forbidden Velvet Cheese Soup, and gave the inside a spray of Alclad II (Spray can edition). Took 3 nights to paint, wash, and weather the helmet and install the visor. And other than a few minor touches left, I can properly say that for the first time (I think ever) in history there is a proper completed 1:1 game accurate Halo Reach Security Helmet. I've never seen one before this, other than my other 2 versions which were nowhere close. (Can someone fact check this please lol)

Boots are done, which means all the main armor components are complete! I even went ahead and gave all the pieces a good Plasti-dip....dip. So they can move on to being painted here during the Winter months. More importantly however, is I finally got the perfect visor pull on the vacuum bed for the visor. Dropped that sucker in the forbidden Velvet Cheese Soup, and gave the inside a spray of Alclad II (Spray can edition). Took 3 nights to paint, wash, and weather the helmet and install the visor. And other than a few minor touches left, I can properly say that for the first time (I think ever) in history there is a proper completed 1:1 game accurate Halo Reach Security Helmet. I've never seen one before this, other than my other 2 versions which were nowhere close. (Can someone fact check this please lol)
- Member DIN
- S068
I know pipninja is hot on your heels but you get to scream first.I can properly say that for the first time (I think ever) in history there is a proper completed 1:1 game accurate Halo Reach Security Helmet. I've never seen one before this, other than my other 2 versions which were nowhere close. (Can someone fact check this please lol)
- Member DIN
- S063
Great work man! Awesome
- Member DIN
- S770
Well I would be, but me heading out to sea shortly kinda throws a wrench into that lolI know pipninja is hot on your heels but you get to scream first.
Lukavago
Well-Known Member
- Member DIN
- S404
Small boy, flat top, or boat? I'm assuming San Diego.Well I would be, but me heading out to sea shortly kinda throws a wrench into that lol
- Member DIN
- S188
UPDATE!!
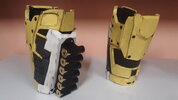
Forearms and shoulders now painted, washed, and weathered. Still need to change the color on the tops of the shotgun shells to gun metal to match the in-game color however. Moving onto the belt next so I can figure out the best way to mount the grenades to it. I'm thinking just velcro them on so I don't have to worry about them ripping paint or worse if they fall off, plus it'd give them a little "flexibility" if I decide to try something stupid in my suit.....like that would ever happen, ha!
 ]
]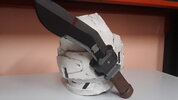
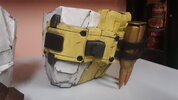
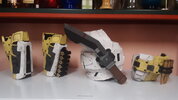
Forearms and shoulders now painted, washed, and weathered. Still need to change the color on the tops of the shotgun shells to gun metal to match the in-game color however. Moving onto the belt next so I can figure out the best way to mount the grenades to it. I'm thinking just velcro them on so I don't have to worry about them ripping paint or worse if they fall off, plus it'd give them a little "flexibility" if I decide to try something stupid in my suit.....like that would ever happen, ha!
 ]
]


Last edited:
It all looks so good man! I also honestly like the way the shells are. Looks real!UPDATE!!
Forearms and shoulders now painted, washed, and weathered. Still need to change the color on the tops of the shotgun shells to gun metal to match the in-game color however. Moving onto the belt next so I can figure out the best way to mount the grenades to it. I'm thinking just velcro them on so I don't have to worry about them ripping paint or worse if they fall off, plus it'd give them a little "flexibility" if I decide to try something stupid in my suit.....like that would ever happen, ha!
View attachment 300301View attachment 300302View attachment 300303View attachment 300304
Mysticporo
New Member
Dude, this is so Awesome it looks great and the progress you're making is fantastic to see. Gotta say that i wasnt expecting the additional add-ons like the knife sheath & bullet cartridge holders to be honest they slipped my mind when it comes to customising armour, can't wait to try my hand at making my own armour.
Congratz on all the progress so far though, hope to see the rest!
Congratz on all the progress so far though, hope to see the rest!
- Member DIN
- S188
UPDATE!!
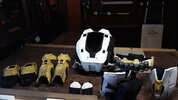
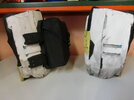
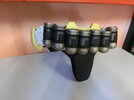
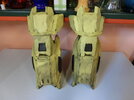
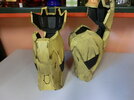
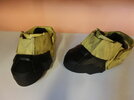
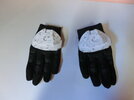
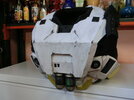
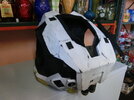
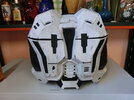
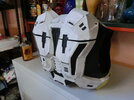
To quote Aaron Lewis- "It's been a while." Since I've made an update post, and I've gotten quite a bit done in that time. All the primary pieces of armor have been painted and weathered. A few pieces, like the shins and handplates, might need a little further weathering but that's not too hard. All the grenades for the belt and chestpiece have been painted and attached. I attached them with concrete anchors and screws to ensure they won't be falling off anything soon. Also attached the handplates to the gloves and the soft case to the thigh. The soft case does need a bit more work with adding straps and buckles to make it more game accurate, but that also shouldn't take long.
So now with all the major pieces done, it's time to move onto the thinner pieces of armor and the undersuit itself. This involves making the ab wrap, neck seal, and bottom spinal plates out of craft foam, and then attaching leather to the Under Armour undersuit.


Rock Lobbster
Sr Member
- Member DIN
- S098
I T S B E E N A W H I L E
Excellent progress being made. Its so close to completion!
Excellent progress being made. Its so close to completion!
- Status
- Not open for further replies.
Similar threads
- Replies
- 2
- Views
- 1,359
- Replies
- 6
- Views
- 514
