Under Suit Build:
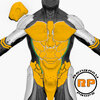
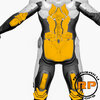
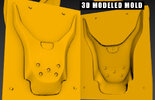
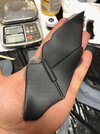
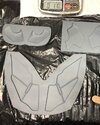
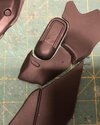
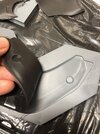
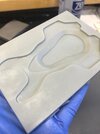
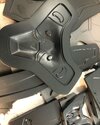
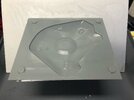
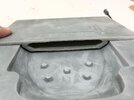
I wanted something more than a printed flat under suit or a flat black version. So I modeled the entire soft armor parts of the under suit. Then converted the models to open and closed faced hard molds. Then printed them on my resin printer, sealed them with paint and then poured tinted dragon skin silicon into them. The images below are the 3D models for the front, back, hips and shoulders. For any parts that would be covered by the hard armor I have left out. To save on both weight and to allow the suit to breath better. The cod piece for example is a two part mold, this ensures that the walls are exactly 3mm thick and the weight is kept low. Then the soft expansion foam is placed in the COD pc and then more silicon is added to the back to cover the foam . The result is a very light large silicon part. More to come...
I wanted something more than a printed flat under suit or a flat black version. So I modeled the entire soft armor parts of the under suit. Then converted the models to open and closed faced hard molds. Then printed them on my resin printer, sealed them with paint and then poured tinted dragon skin silicon into them. The images below are the 3D models for the front, back, hips and shoulders. For any parts that would be covered by the hard armor I have left out. To save on both weight and to allow the suit to breath better. The cod piece for example is a two part mold, this ensures that the walls are exactly 3mm thick and the weight is kept low. Then the soft expansion foam is placed in the COD pc and then more silicon is added to the back to cover the foam . The result is a very light large silicon part. More to come...


")