ZackisANerd
New Member
Hey everyone,
After years of admiring Spartan builds and ODST kits from the sidelines at conventions and instagram, I’m finally diving feet first into building my own ODST armor set. This thread will serve as an ongoing log of the build — one part progress journal, one part cautionary tale, and (hopefully) something useful for anyone thinking about printing out some armor!
This is my first time ever doing 3D printed cosplay, so any tips and advice are welcome! I’ll be updating this post as I go, so expect it to grow over time. Whether you’re here to offer advice, steal a few tips — welcome aboard.
Let’s see how this goes!
After years of admiring Spartan builds and ODST kits from the sidelines at conventions and instagram, I’m finally diving feet first into building my own ODST armor set. This thread will serve as an ongoing log of the build — one part progress journal, one part cautionary tale, and (hopefully) something useful for anyone thinking about printing out some armor!
This is my first time ever doing 3D printed cosplay, so any tips and advice are welcome! I’ll be updating this post as I go, so expect it to grow over time. Whether you’re here to offer advice, steal a few tips — welcome aboard.
The Plan:
- Full ODST armor set (leaning into Halo 3: ODST aesthetics), i’m thinking charcoal black/grey primary and a metallic navy accent color scheme with a silver visor, but this is subject to change!
- Primarily 3D printed with some EVA Foam elements (inner thigh, shoulder straps, rugsack lining, etc)
- Functional visor (meaning i can see through it), weathered finish, and con-ready mobility
- A 3D printed M6C/SOCOM and M7S SMG, 3x flashbangs, 3x grenades
- Voice amp, lights, stickers, and other bells and whistles to help bring some more customization to it
Let’s see how this goes!
Last edited:
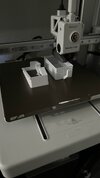
 ! I’m currently printing a poop chute mod for the printer to help cleanly handle purge filament and scrap material. Once that wraps up, I’ll be kicking off the first overnight print: The helmet....