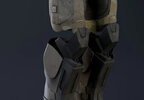
2nd ODST build

Okay, it’s update time. I’m kinda broke rn, which is the only thing preventing me from starting work on some of the parts. Hopefully I can get a job before everything is done printing, because I doubt I can spend much more money on this without a steadier source of income. On a more optimistic note, Im thinking that I will do some sketches today or tomorrow with some designs and color pallets.
 
Okay, it’s update time. I’m kinda broke rn, which is the only thing preventing me from starting work on some of the parts. Hopefully I can get a job before everything is done printing, because I doubt I can spend much more money on this without a steadier source of income. On a more optimistic note, Im thinking that I will do some sketches today or tomorrow with some designs and color pallets.
Good luck! I’m in a similar boat now. This hobby certainly isn’t super cheap, especially when going for a full suit. Excited to see those sketches.
 
After much procrastination I have finished some mostly accurate sketches, I left out a few details though because I wasn’t sure how to draw them. Halfway through I switched to an olive color which I’m probably going to use for the armor.
IMG_1340.jpeg
 
-Radios: Probably the simplest, just printing and painting some stuff.
-Helmet electronics: mic+headphones and a fan (never done anything with electronics before)

You’d be surprised what you can find 1) on amazon 2) thrifting. I made a radio out of an old dremel box I thrifted. I added a medicine cap, a shower flange, I think the turret from a toy tank … you get the idea lol
IMG_6063.jpeg


I think all the extras are a ton of fun. You can find giant comms like antennas at Walmart and Amazon fairly cheap.


For helmet electronics:
-I use a wireless radio/mic set up MIC HERE
-For fans, Troopertronix on Etsy does an entire set up or you can purchase it yourself. I use two PC fans powered by a battery I Velcro into my helmet
 
As the day my prints arrive comes closer (September 20th?), there are a couple details I want to iron out. First I’ve seen people use quite a few different methods for smoothing the prints besides filler primer, like epoxy resin or other sprays. Secondly is just small details of gear attached to the armor. I’d love to hear suggestions anyone has, I was thinking about a canteen or maybe some sort of portable light source?
 
Last edited:
As the day my prints arrive comes closer (September 20th?), there are a couple details I want to iron out. First I’ve seen people use quite a few different methods for smoothing the prints besides filler primer, like epoxy resin or other sprays. Secondly is just small details of gear attached to the armor. I’d love to hear suggestions anyone has, I was thinking about a canteen or maybe some sort of portable light source?

Smoothing - My preference is no 'magic shell' - Just sand it. Personally, I'm not a fan of thin, brittle, dissimilar materials as a coating.
The longest distance between two points is a short cut.
462562474_1693662008032262_30526542888017237_n.jpg


Gear Attachment.... Put it/pouch on your belt. That looks like Galactic Armory ODST. Maybe my ODST build thread based on the same files will help: SgtSaint ODST build (AU regiment)
 
Smoothing - My preference is no 'magic shell' - Just sand it. Personally, I'm not a fan of thin, brittle, dissimilar materials as a coating.

View attachment 366594

Gear Attachment.... Put it/pouch on your belt. That looks like Galactic Armory ODST. Maybe my ODST build thread based on the same files will help: SgtSaint ODST build (AU regiment)
I'll definitely try just sanding, maybe try it on a piece and see how it compares.
 
Had an idea while looking over my old armor, what if I painted green with grey accents? I would essentially be doing the reverse of what I did with my old armor, but reversed. Backpack prints should arrive in a few days, so I'm just glueing some parts together right now.
 
Soooooooo, I may have not realized that my Bondo required an activator to work before filling in the seams on half my armor. This is why you look up how to use things before, and not after! Luckily I was able to sand it down and apply new Bondo correctly on top. Backpack parts also still have not arrived from the seller, so I may have to track them down.
 
Things are going good, and a lot faster than anticipated. Right now I am finishing sanding, bondo, and glueing, so I’d say I’m about a third done. I also finally got a job last week and my first paycheck is in a few days so the finance front is looking good! I have one week left before classes begin, so my goal is to be done painting before my classes take up all my time.
 

Attachments

  • IMG_1413.jpeg
    IMG_1413.jpeg
    1.8 MB · Views: 5
Also I am learning that galactic armory built their files for accuracy not mobility. The way the forearms and legs are structured you can’t bend them without running into the armor, not much I can do about the legs without cutting a hole in them which I might do later, but I can switch the way the arms or oriented so that there is a gap for my arm. The photo with the more flush elbow is original assembly, and the more prominent elbow is how I am likely going to attach it, even though it doesn’t look as good.
 

Attachments

  • IMG_1411.jpeg
    IMG_1411.jpeg
    1.7 MB · Views: 9
  • IMG_1407.jpeg
    IMG_1407.jpeg
    23.4 KB · Views: 10
  • IMG_1412.jpeg
    IMG_1412.jpeg
    1.8 MB · Views: 9
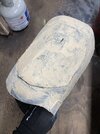
Started the smoothing process. I’m painting on an acetone and wood filler mixture, then sanding it down and finishing with primer. Kinda looks like a lighter shade of peanut butter lol.
 

Attachments

  • IMG_1414.jpeg
    IMG_1414.jpeg
    1.9 MB · Views: 1

Your message may be considered spam for the following reasons:

If you wish to reply despite these issues, check the box below before replying.
Be aware that malicious compliance may result in more severe penalties.
Back
Top