I am planning on buying an airbrush to try and learn a new skill. I am not the greatest painter, but I plan on doing some dry brushing along with washes also.
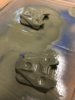
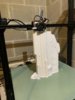
Started my chest armor last night, estimated at (spartan) 117 hours. After that, all I have left are my thighs, which I will start on my other printer.
View attachment 275768
View attachment 275769
Picked up the fabric for my undersuit, yaya Han scuba hex from Joann’s. I had been waiting for it to stop being on sale for 9.99$ and go back to 14.99 a yard, so I could use a 50% off coupon ;-)
Bought the whole bolt, planning on lining my armor padding with it too
View attachment 275770View attachment 275771