Another H2A ODST Cosplay – First Build

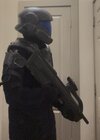
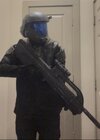
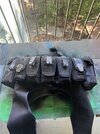
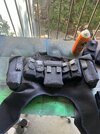
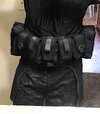
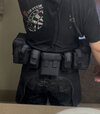
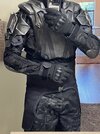
And the moment you’ve all been eagerly awaiting, I’m sure: actually wearing the armor!
IMG_7589.jpeg

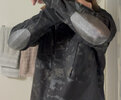
IMG_7603.jpegIMG_7605.jpegIMG_7599.jpeg

This is obviously without any of the fancy undersuit I’ve been working on, partly to keep the final look a surprise, and partly because I don’t have a way of wearing half of it yet lol. I’m officially finished with the actual 3D printed armor (besides some little tweaks) and just need to get off my ass and see the rest of the bags. Should be maybe a month? I could probably smash them out in a week but I’m lazy.

I’ll also add this “small” footnote: A large reason I hadn’t posted a suit-up even though it’s been almost finished for like a month and a half is because I didn’t have a super secure way of wearing the legs, and especially the knees were a big issue.
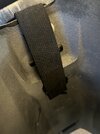
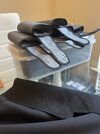
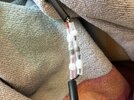
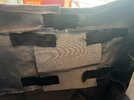
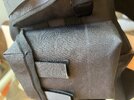
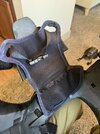
Having the strap as it is in-game (all the way from the ankle to the knee pad) was perfectly easy to do, but it didn’t let me bend the knee basically at all, there was no stretch. My solution was simple but I think sorta clever! Now you probably won’t be able to see clearly in the picture so I’ll just have to badly describe it.
IMG_7575.jpegIMG_7574.jpeg
The shin strap is isolated, just glued inside. The strap coming from the kneepad into the shin is the same strapping, but with elastic glued to the back and that elastic extending about 2” past the bottom. I took this and passed it over the original shin strap so that they appear connected, and then glued the exposed elastic to the inside of the shin. This gives the same appearance as actually using one strap, but allows a good few inches of stretch. Now I can comfortably sit, crouch, and bend in any way and the knees and shins both stay in place and don’t interfere with eachother!
 
I didn’t realize you had so much of the kit finished! It’s looking incredible! I love the ODST boots too much. I always want to wear them as just an every day thing lol
 
And the moment you’ve all been eagerly awaiting, I’m sure: actually wearing the armor!
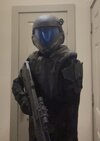
View attachment 364187
View attachment 364183View attachment 364182View attachment 364184

This is obviously without any of the fancy undersuit I’ve been working on, partly to keep the final look a surprise, and partly because I don’t have a way of wearing half of it yet lol. I’m officially finished with the actual 3D printed armor (besides some little tweaks) and just need to get off my ass and see the rest of the bags. Should be maybe a month? I could probably smash them out in a week but I’m lazy.

I’ll also add this “small” footnote: A large reason I hadn’t posted a suit-up even though it’s been almost finished for like a month and a half is because I didn’t have a super secure way of wearing the legs, and especially the knees were a big issue.
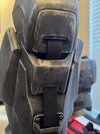
Having the strap as it is in-game (all the way from the ankle to the knee pad) was perfectly easy to do, but it didn’t let me bend the knee basically at all, there was no stretch. My solution was simple but I think sorta clever! Now you probably won’t be able to see clearly in the picture so I’ll just have to badly describe it.
View attachment 364188View attachment 364189
The shin strap is isolated, just glued inside. The strap coming from the kneepad into the shin is the same strapping, but with elastic glued to the back and that elastic extending about 2” past the bottom. I took this and passed it over the original shin strap so that they appear connected, and then glued the exposed elastic to the inside of the shin. This gives the same appearance as actually using one strap, but allows a good few inches of stretch. Now I can comfortably sit, crouch, and bend in any way and the knees and shins both stay in place and don’t interfere with eachother!
wow this looks incredible
 
Got a small update today, more bags! Got six more done, making the tally 11/18 finished. Been a while since I’ve worked on this costume, partially from being busy with life and other projects, and partially being lazy. But, I’ve got a con and photo shoot coming up in October, so I’m back on the grind! The majority of the bags remaining are pretty simple, so it shouldn’t take me as long to get them done.

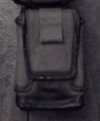
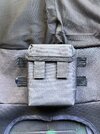
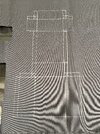
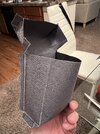
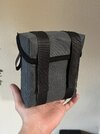
Not as many pictures for this one, as I went with a much simpler construction method that meant I didn’t have to do any hand-sewing. I started with making a simple pouch, but without the bottom since I’d be adding that later (again, to simplify the building process). I cut out a simple flap to go over the top and rounded the edges a bit. Added the bias tape to the edges, and the body of it was done. I’ll also include a picture of the actual bag model here for reference.
IMG_7911.jpegIMG_7930.jpeg

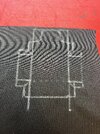
Next I sketched a pattern for a “cup” to go on the bottom for the black details.
IMG_7913.jpegIMG_7914.jpeg

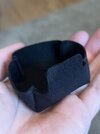
Next I stitched the edges to give the illusion of actual stitching (which I did do for my first bags, but was a huge pain in the ass so I skipped it here) and hot glued this piece to the bottom. It’s probably not quite as strong as a real stitch, but the bags will just be filled with foam to hold their shape for the most part, so structural integrity isn’t very important.
Finally, I sewed on a strap with a little hoop just like in the game, and it was done. I still have to do a weathering/color pass to match the rest I’ve done, plus the Velcro to actually close them, but the construction is all done.
IMG_7915.jpeg


With these, almost the entire “belt” of bags is complete, and 2/4 of the chest bags. That just leaves a handful of the simpler designs, and the two large, complicated bags for the thighs. These are the most detailed, but the design actually seems like the easiest to replicate, as well as being easier to sew since it’s so big. If I keep my pace with these I should have them all finished in two weeks or so. I’m also going to try to improve/redo the weathering for the bags and undersuit before calling it done, as I’m not super happy with my current results.

I’m not sure how I wrote so much for such a small update, but thanks for checking in! I’m in the end zone with this costume, and getting close to finishing a little side project I’ll reveal in this thread later. Expect the final updates soon.
 
Last edited:
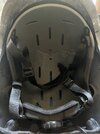
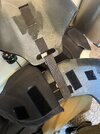
Oh, I don’t know how I forgot to mention this too. I added fans to the helmet! It got insanely hot within minutes of wearing it, so I got myself a tiny noctua pc fan and some bigger
blower fans. Printed a 90° air router for the noctua, and have all three pointed forward. They work great, and fit nicely under the helmet insert.
IMG_7817.jpegIMG_7816.jpeg
(Painters tape isn’t permanent lol)

Anybody have advice on an elegant method for routing the cables out to a battery pack? I was just gonna bundle them flat with electrical tape and run under it under the balaclava, but if there are tips for comfort or convenience I’d be happy to hear them!
 

Your message may be considered spam for the following reasons:

If you wish to reply despite these issues, check the box below before replying.
Be aware that malicious compliance may result in more severe penalties.
Back
Top