- Member DIN
- S297
It’s a bit or both lol, she’s about 5’1” and I’m around 6’5” in the armorHow tall is the girl in the picture? I can't tell if she is short or you're just tall in the armour.
It looks great so far though!
It’s a bit or both lol, she’s about 5’1” and I’m around 6’5” in the armorHow tall is the girl in the picture? I can't tell if she is short or you're just tall in the armour.
It looks great so far though!
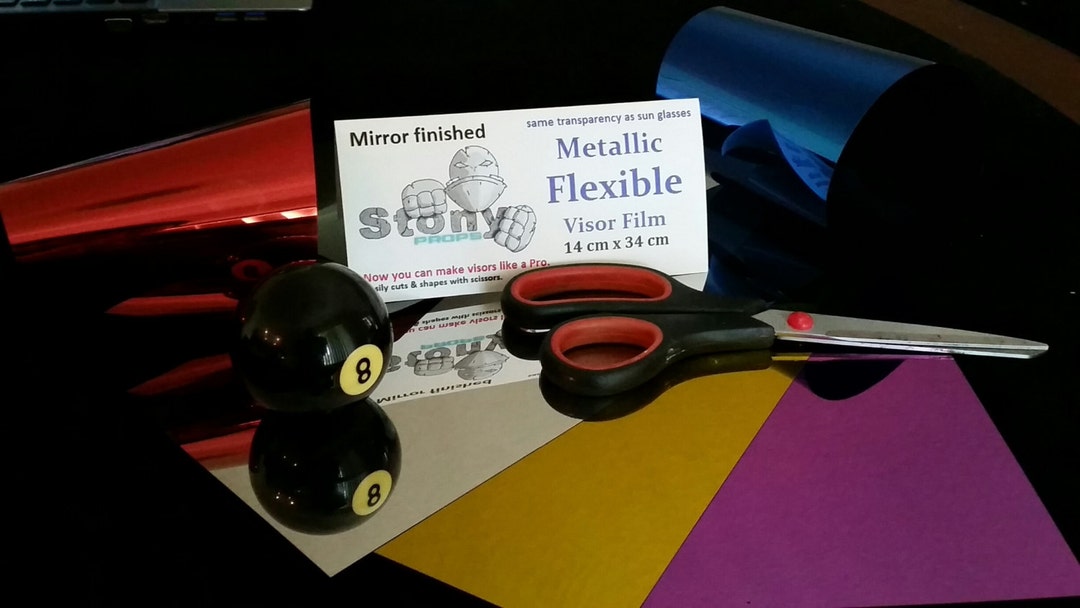
There are the flexible visor sheets I think a lot of us use found on etsy. I used them for my original visor on both my helmets and currently for my double layer visor on my main Mk. V.Hello again y’all! We’re nearing completion! Got my printer back up and running (I don’t remember who called it, but my plastic extruder was completely cracked haha), and I got most of my rigging figured out! I got the tactical/patrol gillie thing intsalled and it’s lookin pretty sweet! Pretty much all that’s left is for me to finish up sanding/painting and electronics!
I printed out Oddwork’s DMR and I don’t regret it! It turned out fantastic!
I’m looking for a temporary visor solution that I can get within a month, since the person I’d like to commission one from is currently unavailable. Any suggestions would be greatly appreciated! I might also look into reprinting my thigh armor eventually. I feel like they sit a bit too low at the moment, and they’re a bit too small to get them all the way up my leg lol
 www.etsy.com
Just ordered a sheet of this last night! Hopefully it'll hold me over until I figure out how to vacuform!There are the flexible visor sheets I think a lot of us use found on etsy. I used them for my original visor on both my helmets and currently for my double layer visor on my main Mk. V.
Flexible Metallic Visor Material - Etsy
This Craft Supplies & Tools item by IconProps has 1929 favorites from Etsy shoppers. Ships from Malabar, FL. Listed on Aug 19, 2024
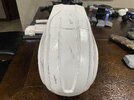
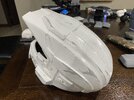
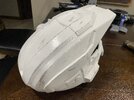
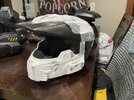
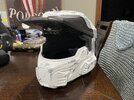
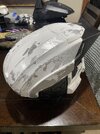
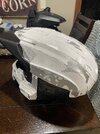
I like the amount of scuffing youve got going on, looks really nice. Are you going with a completely white paint scheme?I’ve begun some weathering on my helmet! I’m going for a more moderate damage look, but I’m not sure if I’ve gone too far. I’m also planning a blackwash and maybe a brownwash. Any thoughts/comments would be greatly appreciated!
Thank you! My color scheme will be as if I select white for both primary and secondary in Reach or MCC, so I’ll be adding some black accents.I like the amount of scuffing youve got going on, looks really nice. Are you going with a completely white paint scheme?
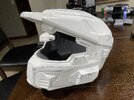
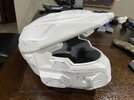
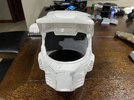
What are you using to splice the helmet and armor pieces (section it off)Hey there everyone! I think it’s time that I finally post my own progress over here. I’m currently working on my own custom Spartan-III armor from Reach. I’ll attach a picture that I’m using for reference for my final product. I’ve made some significant progress so far, and have completed printing the following:
- Mark V helmet w/ CNM module
- Complete left arm w/ Mark V shoulder and UGPS forearm
- Right arm w/ FJ Para shoulder (might swap to Mark V, would love to make the shoulders modular if I could figure out a way to do that)
- Chest armor, no attachments yet
I’ve also printed a M6G model from Thingiverse, and a combat knife that came from my armor files. All of my files I purchased from NerdForgeDesign, and I couldn’t be happier with how they’ve come out so far! I’ll be updating this thread occasionally with any progress I’ve made! Also any questions or feedback that any of you have would be greatly appreciated, as this is my first time building a full-on suit of armor like this.View attachment 313268
If you're referring to the software I use to slice prints so they fit on my printer, I have been using Meshmixer!What are you using to splice the helmet and armor pieces (section it off)
Both times I’ve waited well over 24 hours before putting down any tape or paint.If you're having trouble with paint peel up from tape, a workaround is to spray down a layer of clear coat before putting the paint down. This will give it a light protective layer. How long are you waiting between putting down the spray paint and the tape?
Ah, that's it then. Enamel paints can take weeks to dry properly. This is the sort of RustOleum paint I use:It’s all Rustoleum protective enamel
 www.bunnings.com.au
I see. I didn’t realize that the enamel took so long to dry completely. I’ve actually got some of that other type of gloss white lying around, so I’ll give that a try! That doesn’t quite explain why it peeled off some of my Rustoleum metallic paint though. That won’t be as much of an issue though since I won’t be taping over it. I appreciate your help!Ah, that's it then. Enamel paints can take weeks to dry properly. This is the sort of RustOleum paint I use:

Rust-Oleum 340g 2X Ultra Cover Flat White Primer Spray Paint
Find Rust-Oleum 340g 2X Ultra Cover Flat White Primer Spray Paint at Bunnings. Visit your local store for the widest range of products.
Thanks a lot!! I'll definitely look into a foam gasket! I may not have time for an ab wrap before my first con, that's definitely something I will look into in the future! What thickness of foam would you recommend for the gasket?Your scaling is looking spot on!
If you're still looking for those chest gaskets you can use the foam chest in the armory, scale it roughly to your printed chest and then use the gasket templates from that to build your own out of foam!
Having foam gaskets gives you a bit more mobility than printed ones and are much more comfortable.
I've also had pretty great success with taking 2-3mm low density foam and super 77ing on some marine vinyl to make the abwrap section.
Funny enough I did my abwrap the day before the con lol, first con I didn't have one though (abwrap pics can be found in my reach spartan thread).Thanks a lot!! I'll definitely look into a foam gasket! I may not have time for an ab wrap before my first con, that's definitely something I will look into in the future! What thickness of foam would you recommend for the gasket?