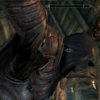
Duke's Skyrim Nightingale Armor

Status
Not open for further replies.

PerniciousDuke

RCO & BCO
405th Regiment Officer
Member DIN
S128
I'm very excited to finally be making some progress on this suit for my roommate.

He is a big fan of bows and assassins,
costume answer=
262307


You may recall a giveaway that I did awhile back. Congrats again to PaiganBoi and electricknite for guessing this cosplay. :)
262308


Special thank you to zombiegrimm for the massive amount of
Skyrim Pepakura Files


Time:
Planning - 16 hours
Leatherwork - 127 hours (49 pieces tooled)
Props - 32 hours


Materials:
Saran wrap - $2
Gorilla Tape - $20
PVC pipe and couplings - $34
PVC Cutter - tool
Poly Cotton Batting 7lb - $18
Balloon - $1
Pepakura Designer - free
ArmorSmith- $30
Printer Paper - $1
(2) Clear Tape - $2
Christmas paper - $1
Leather color samples - $5
(2) Sides 7-9oz Veg Tanned Leather -
(1) Belly 7-9oz Veg Tanned Leather -
(1) 50" x 1.25" Leather Strip - $22
(2) 50" x 3/4" Leather Strip - $24
(6) Box cutter knives -
150 grit sandpaper 4"x6"- $1
220 grit sandpaper 4"x6"- $1
Leather edge beveler - tool
(<1yd) Leather tracing paper -
Bevel Stamps - tool
Background Stamp - tool
Heat gun - tool
(<1) roll of Paper towels
(2) Black Dye
Black Gel
Satin Shene
(6pr) Disposal gloves
3 Leather Needles - $3
(25yds) Waxed Thread - $7
Box of bandaids- $3 (for stitching)
"Leather Weld" glue - $8
6-in-1 Punch - tool
Black Leather Edge Dye -$20
Snap Setters- tool
Grommets - $5
Large Snaps - $5
Small Snaps - $5
3d Printed Parts- $30
Krylon Triple Glaze - $4
Krylon Chalk Paint- $7
Black Auto Enamel - $5
5minute Epoxy- $4
(30ft) Black Paracord- $6
(1/2yd) Suede Fabric- $8
Spray Adhesive- $2
Cardboard- $0
2mm Craft Foam - $2
Dark Steel Spray Paint - $5
1yd Grey Upholstery Fabric - $12
1/2yd Black Shiney Spandex - $6
6" x 24" Painting Canvas - scrap
2yd Black Wool - $4 (thrift store)
(8) Spikes from an old Belt - $0
(1) Cabinet Drawer Handle - $4
(4) Cable Hold Downs - $3
(4) Carabiners- $6
(4) 3/4" buckles- $12
(1) Leather Skiver- tool
(4) rare earth magnets -$4
(1) Ecoflo Satin Shene Leather Seal - $8
(1) Locktite Gel Control Glue- $4

Lyrca Undersuit - $30
Ski Mask - $15
Knuckle Gloves - $12
Boots - $28
Resin Cast Blade of Woe- $30 Etsy
Handmade Con Arrows- $25 Etsy


Props
(12pg) 110lb Cardstock 8.5" x 11"
(10) hot glue sticks
(20oz) Fiberglass Resin
(20oz) Bondo Body Filler
Expanding Foam - $4
1/2" dowel - scrap
Black Primer - $4
Dark Walnut Brown Spray Paint - $4
Hammered Silver Spray Paint - $6
Acrylic Black Paint $1
Matte Clear Spray Paint -$4
 
Last edited:
Before you ask.... yes! I will be making this out of actual leather.

More than that it is called tooling leather which just means that it is thick enough to receive 3 dimensional designs by cutting and hammering them into the leather. So in essence this will be leather armor.

First step is making a duct tape dummy. (YouTube it if you're not familiar)

Since such large pieces of leather will need to become wet, shaped and then dried to that shape, it seemed a 1:1 mannequin of my roommate was the best starting point.

So far we have the ducttape shell and the PVC skeleton. We just have to put the two and two together.

20181114_174825.jpg
 
Last edited:
I'm very excited to finally be making some progress on this suit for my roommate.

He is a big fan of bows and ninjas, costume answer=
View attachment 262307


You may recall a giveaway that I did awhile back. Congrats again to PaiganBoi and electricknite for guessing this cosplay. :)
View attachment 262308


Special thank you to zombiegrimm for the massive amount of
Skyrim Pepakura Files


Time:
Scaling + Stand - 1hr

Materials:
Saran wrap - $2
Duct Tape - $20
PVC pipe and couplings - $30
Poly Cotton Batting 10lb - $18
Pepakura Designer - free
ArmorSmith- $15
Printer Paper - $1

Wow a Skyrim character! No surprise that the class is stealth archer, that's the best way to play the game :p
 
Wow a Skyrim character! No surprise that the class is stealth archer, that's the best way to play the game :p
If by play, you mean cheese then yes. :lol:
I prefer to play by bashing goblin faces with two maces simultaneously.

But I definitely did unlock this armor too because who wouldn't want to disappear in the middle of combat only to reappear at the death of thine enemy!
 
If by play, you mean cheese then yes. :lol:
I prefer to play by bashing goblin faces with two maces simultaneously.

But I definitely did unlock this armor too because who wouldn't want to disappear in the middle of combat only to reappear at the death of thine enemy!

I prefer to play by bashing goblin faces with two maces simultaneously.

bashing goblin faces


Goblin-Slayer-Wallpaper-506x500.jpg
 
LIAR! Everyone knows duct tape is silver! :p

You are correct sir! And the materials list has been fixed. I'm still gonna call it duct tape though. ;)
Materials:
Saran wrap - $2
Gorilla Tape - $20


Update:

This suit is full body so I wanted the mannequin to be as well. I'll need to form the facemask too.

My roommate was unwilling to let me duct tape his head. Trust is an important part of every relationship! But, I digress.

Attempt 1: I blew up a balloon to his size and wrapped it in duct tape. FAIL. When I popped the balloon the duct tape "deflated" as well.

Attempt 2: I blew up one balloon the size of his head and a little balloon the size of his chin. Then, wrapped it in saran wrap.
20181118_212606.jpg
Before wrapping it in duct tape.
20181118_220001.jpg
Success!
 
Last edited:
I'm sure every costume builder has cried out, "Why did I agree to do this!? What is wrong with me?!"

I'm experiencing those feelings now.

For some reason I thought since I had the PDO files that means I've got this in the bag. Now, its looking like a lot of preplanning. You only get one chance with leather. If I cut it too small there is no going back. And the pdo is not as defined as I was hoping.

First step was scaling the files in armor smith designer.
scaless.png

Then I had to modify each file in as big of pieces as I could. This was kind of fun. Once I had them I told it to hide folds less than 150* and to join edges together that are 10mm or closer.
Cuirassmockup.png

Next up I'll be printing them out and hanging them on the mannequin to determine where the leather should go .
 
You definetly have your work cut out for you!! But you’ll get it. You seem seem to get the hang of new skills quick! Look forward to the progress
 
Last edited:
Not much to report.. I'm definitely glad I have the mannequin. Armorsmith didnt seem to really capture the whole picture. You can see that the cuirass is too small and the forearms and knees are just a little too big. (If you need some giggles, try searching cuirass pronounciations.)
20181128_202100.jpg

Also, what do you think of my new hat rack?

Moving forward I think I will use a Life Line, Regis. I'm going to try to rope my mother in on this project.
 
Last edited:
lucky you're mom is open to helping. If I even mention sewing to my mother her face contorts and she gets war flashbacks fighting with broken machines and shattered dreams.
She's a hell of a cook though.

I'm so excited for your build. Nightingale armour is my favorite!!
What will you use as the base to attach the leather to? And how will you attach it?
 
What will you use as the base to attach the leather to? And how will you attach it?

That's a hard question to answer. For the most part leather won't need to attach to anything. It is it's own article of clothing.

Some spots like the knee will need to attach to cloth in which case I will most likely do the same as if one were to attach a cloth lining to leather, glue it. There are glue specific to leather. I use Leather Weld.

I'd like to glue the forearms to wrappings as well to make it once piece.

Some items like the bicep have a snap in the game and I will most likely make that functional. Snaps (or rivets) are a great leather securing method.

The bulk of the costume will be leather armor. I think we'll do a zentai suit under just so he's not naked beneath there.


Progress:

It's been quite a headache to plan where the armor is connected and how it will be donned. We want as few of pieces as possible. After many hours we've managed to make the main armor in two pieces. (Clarification one piece of armor means many pieces of leather permanently attached together. I will say "one piece of leather" if that is what I mean)

First we looked at how other people have done it. Great attempts, but I think everyone I've seen has skipped over some details/proportions creating a slightly off suit.
20181201_175003.jpg 20181201_174946.jpg


Next up was reference shots from in game.
20181201_171419.jpg 20181201_171247.jpg 20181201_171237.jpg 20181201_171225.jpg 20181201_171211.jpg 20181201_171157.jpg 20181201_171146.jpg 20181201_171135.jpg 20181201_171124.jpg 20181201_171111.jpg 20181201_171049.jpg 20181201_171037.jpg 20181201_171019.jpg 20181201_170952.jpg 20181201_170940.jpg 20181201_170930.jpg 20181201_170917.jpg 20181201_170902.jpg 20181201_170849.jpg 20181201_170836.jpg 20181201_170823.jpg 20181201_170751.jpg 20181201_170701.jpg 20181201_170645.jpg
Here's a cool re-imagining render:
Resized_pmtqw3boc6k01_380.jpeg

We think that the bust is one piece, that the straps on the front are functional and the snaps at the end of the triangles actually strap the bust to a seperate piece of armor around the ribs.

We can continue the bust down to the bottom of the middle part of the tunic and we can connect the rib section to the hip section and shake it all about.

It's much harder to make a functional custom belt buckle so I've opted to make the buckle permanent and instead put clasps in the back to secure the armor.

Here are the two armor pieces we think we could get away with. The waist section would be put on first. The chest piece second and you would have to tuck the middle tunic part under the buckle while donning the chest.
20181201_174004.jpg 20181201_173939.jpg

Then outlined to show which parts will be seperate pieces of leather.
20181201_174039.jpg 20181201_173758.jpg

Next up will be patterning the dummy with this set up in mind.
 
Status
Not open for further replies.
Back
Top