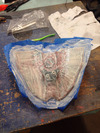
First build WIP - Halo 4 Recon Helmet / Halo 4 Mark VI Armor

Status
Not open for further replies.
Absolutely amazing! I am itching to start my first build! I don't have a whole lot of experience with any of this stuff so it is nice to see this and with the same suit that I want to make!
 
Your build looks absolutely amazing! Looking forward to see what else you can do with this project!

Thank you, I'm always making progress in some form or another, I cant wait till its finished!!

Absolutely amazing! I am itching to start my first build! I don't have a whole lot of experience with any of this stuff so it is nice to see this and with the same suit that I want to make!

Thanks, Just dive right in and give it hell is the best advice I can give you. The more you do, the more you develop you own techniques and ways of doing things. That's how you get comfortable with building stuff like this.


BUILD UPDATE:

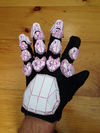
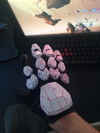
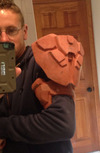
So at this point I've decided to get the remaining pieces of armor totally PEPed. I can make much better use of the warmer weather to come in the next few months if all my pep work is done by then. Right now the right shoulder is in the filler shaping stage, the left shoulder is all PEPed and ready to go, I've also PEPed both hands (gloves), and I'm right now stating the pep work for the lower abdomen and butt plate.

here's some pics for ya!

13494659445_6a9f810015_b_d.jpg
13494770113_d6dbb424db_b_d.jpg


13494693355_dbd3e7cbe5_c_d.jpg
13494697055_8dabcfe0ce_c_d.jpg


13494979435_930effad8f_h_d.jpg


And last but not least - I got majorly distracted this afternoon and spent way too much time making this pic:

13494364795_88cddf20f6_b_d.jpg


Stay tuned for the next update!
 

Attachments

  • 13494659445_6a9f810015_b_d.jpg
    13494659445_6a9f810015_b_d.jpg
    287.7 KB · Views: 211
  • 13494770113_d6dbb424db_b_d.jpg
    13494770113_d6dbb424db_b_d.jpg
    365.4 KB · Views: 221
  • 13494693355_dbd3e7cbe5_c_d.jpg
    13494693355_dbd3e7cbe5_c_d.jpg
    295.6 KB · Views: 205
  • 13494697055_8dabcfe0ce_c_d.jpg
    13494697055_8dabcfe0ce_c_d.jpg
    247.6 KB · Views: 210
  • 13494364795_88cddf20f6_b_d.jpg
    13494364795_88cddf20f6_b_d.jpg
    156.1 KB · Views: 211
  • 13494979435_930effad8f_h_d.jpg
    13494979435_930effad8f_h_d.jpg
    444.4 KB · Views: 217
thanks bro, actually i had found them right after i asked you. anyways, just wanted to say your build is very on point. from pep, to bondo, and the paintjob is just fabulous! keep up the good work!
 
so with your boots, how does the bondo not peel away from the tape/ cardboard. i noticed that in one of your pictures on the inside near the top of the boot, that there was a definite connection between body filler, cardboard. i've had bad experiences with those connections, they always peel.
 
thanks bro, actually i had found them right after i asked you. anyways, just wanted to say your build is very on point. from pep, to bondo, and the paintjob is just fabulous! keep up the good work!

Thanks a lot, I'm churning away at it!!

so with your boots, how does the bondo not peel away from the tape/ cardboard. i noticed that in one of your pictures on the inside near the top of the boot, that there was a definite connection between body filler, cardboard. i've had bad experiences with those connections, they always peel.

Hmm, I see what you are saying but in practice in my case I've had no such experiences. I did go right over the cardboard with my filler but I am guessing that the reason I haven't had trouble is two-fold. First, I attribute much of the success so far to the type of filler I've been using - Everglass is top notch. Second, Even though I went directly over the cardboard, 95% of my filler is quite thick in its covering.

I just went and weighed the boots to give you an idea of how much material (hiking boot, body filler, rubber sole) is actually incorporated in them.
Right boot: 10.6 lbs
Left boot: 10 lbs

This was the first time I've weighed them and I'm amazed how close in weight they are. I know a lot of people's jaws will probably drop when they read that because of how heavy they are but it really doesn't feel terrible at all when you have it on your foot. Maybe its just me and I'm used to it because I wear a heavy work boot daily but it doesn't seem like a big deal.

Anyway, I hope that sort of answered your question. Thanks for asking!
 
This is looking awesome!! Making anything from Halo 4 is hard because of all the detail required. Keep it up!
 
TT. man i wish i had a workshop set up again already, seeing this build just makes me miss it all the more. i really like your build style, everything just looks so crisp and clean, and you go that extra mile for the sake of getting the detail just right. well done. credit where it's due, this would be one of the best builds i have ever seen and surely deserves to be made elite!!! i can't wait to see the whole thing put together. once again, well done :D
 
Thanks guys.

So it's been over a month since my last update and I can assure you I've been making progress even though I haven't been keeping up with you here. My apologies.

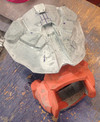
I stuck true to my word and finished all my pepakura work except for the left shin piece. I'm glad its (mostly) out of the way leaving me to the filler shaping all summer now. When I completed the pep work I picked right back up on shaping the right shoulder pieces which you can check out below! The last pic you see is where I enter unknown territory... Silicone molding. I'm attempting to duplicate the right outer shoulder plate for use on the left shoulder which will leave me to shape the left armband part by hand. I'll keep you posted with lots of pics as to how that process goes. That's it for now, next SITREP soon.

(as per usual - to view larger size pics check out my flickr directly from the link in the first post)

14269983294_ca8dae5c85_b_d.jpg


14247291656_d868b19acd_b_d.jpg


14083808510_ab0750dbe8_b_d.jpg


14083762578_dc4fd1e02b_b_d.jpg


14083811150_e8a1c26281_b_d.jpg


14269989244_a0462238a3_b_d.jpg


14083814160_5860863463_b_d.jpg


14083760419_e2bc2cb56c_b_d.jpg


14083761839_ea55dd484a_b_d.jpg


14290592683_576c2ab5fe_b_d.jpg


14083771648_977d5c6aa2_b_d.jpg


14083772968_942bedbe5c_b_d.jpg


14083821830_697540b610_b_d.jpg
 

Attachments

  • 14247291656_d868b19acd_b_d.jpg
    14247291656_d868b19acd_b_d.jpg
    283.8 KB · Views: 209
  • 14269983294_ca8dae5c85_b_d.jpg
    14269983294_ca8dae5c85_b_d.jpg
    256.3 KB · Views: 211
  • 14083808510_ab0750dbe8_b_d.jpg
    14083808510_ab0750dbe8_b_d.jpg
    258.8 KB · Views: 199
  • 14083762578_dc4fd1e02b_b_d.jpg
    14083762578_dc4fd1e02b_b_d.jpg
    270.8 KB · Views: 204
  • 14083811150_e8a1c26281_b_d.jpg
    14083811150_e8a1c26281_b_d.jpg
    204.6 KB · Views: 209
  • 14083814160_5860863463_b_d.jpg
    14083814160_5860863463_b_d.jpg
    246.5 KB · Views: 205
  • 14269989244_a0462238a3_b_d.jpg
    14269989244_a0462238a3_b_d.jpg
    273 KB · Views: 206
  • 14083760419_e2bc2cb56c_b_d.jpg
    14083760419_e2bc2cb56c_b_d.jpg
    189.8 KB · Views: 193
  • 14083761839_ea55dd484a_b_d.jpg
    14083761839_ea55dd484a_b_d.jpg
    312.6 KB · Views: 212
  • 14290592683_576c2ab5fe_b_d.jpg
    14290592683_576c2ab5fe_b_d.jpg
    180.2 KB · Views: 187
  • 14083771648_977d5c6aa2_b_d.jpg
    14083771648_977d5c6aa2_b_d.jpg
    351.4 KB · Views: 194
  • 14083772968_942bedbe5c_b_d.jpg
    14083772968_942bedbe5c_b_d.jpg
    250.2 KB · Views: 204
  • 14083821830_697540b610_b_d.jpg
    14083821830_697540b610_b_d.jpg
    328.8 KB · Views: 189
Considering the lack of detail in the raw Pepakura files, you've done an astonishing job of recreating the detail of the shoulder parts. I'm very impressed.
 
Considering the lack of detail in the raw Pepakura files, you've done an astonishing job of recreating the detail of the shoulder parts. I'm very impressed.

hey thanks a ton!


Here's a thursday night update:

So the mold making process to duplicate the right outer shoulder piece over for use on the left side was a lot harder to master than I had originally planned mostly because I didn't buy actual mold making silicone. I figured that for a one-off shot like this that it just wasn't worth the price. So in the place of that I used thin painted on layers of thinned down 100% silicone caulk from my local hardware store.

The last picture in the post above where you see the white silicone, well, that was my first attempt. It failed because for some reason the white 100% silicone just wouldn't cure. The only thing that seemed to work for me was the clear stuff. After three days of doing two painted on layers a day I finally achieved what you see below:

14278749866_e4f76e8854_b_d.jpg


14301885215_181f3e6e4e_b_d.jpg


The only trouble I had was that my outer shell of plaster crumbled on me halfway through de-molding the master. I was able to save enough of it to achieve my intended result that you see above. Now I just need to combine the two halves. In case you are wondering - I cast it with my body filler/ resin mix that I've used so many times before throughout this project.

It turns out the silicone pieces are still really good and intact so If anyone would like them for casting their own outer shoulder piece I could possibly mail them your way. PM me if you are interested.

Thats it for now... till next SITREP
 

Attachments

  • 14301885215_181f3e6e4e_b_d.jpg
    14301885215_181f3e6e4e_b_d.jpg
    220.8 KB · Views: 196
  • 14278749866_e4f76e8854_b_d.jpg
    14278749866_e4f76e8854_b_d.jpg
    251.4 KB · Views: 184
Awesome job! BTW, adding a few drops of glycerin to the silicone helps it cure much faster (for future reference). Also, if you do it on a warmer humid day, that also helps the cure time.
 
Awesome job! BTW, adding a few drops of glycerin to the silicone helps it cure much faster (for future reference). Also, if you do it on a warmer humid day, that also helps the cure time.

Thanks! I'll keep it in mind for next time I need to cast something. I'm thinking since I used naphtha to thin the silicone that it had a bad reaction with whatever the pigmentation was in that specific silicone, that's why it never setup.
 
For some unknown reason, I've never seen this thread. I don't know how I missed it! Your work is incredible man. I'm loving all the work you're putting into this. That blue and white color combo is pretty sick too. Really looking forward to seeing more from you. :D
 
For some unknown reason, I've never seen this thread. I don't know how I missed it! Your work is incredible man. I'm loving all the work you're putting into this. That blue and white color combo is pretty sick too. Really looking forward to seeing more from you. :D

Thanks for the complements!

Just a one pic update for ya tonight but the shoulders are getting closer and closer to being done done done.

14222614958_de52e23fca_b_d.jpg


I'm in the process of smoothing and priming them, I may hold off on the final paint until I have the next part (forearms) ready as well. I'm trying to keep my workflow organized more efficiently these days by grouping similar stages of work together for different body parts; such as completing all the pep work at once. Since I'm all setup for bondo and shaping at the moment I can just move ahead onto the next body part that requires it.

EDIT: I should add that when complete you wont see any of the aluminum piece that you can see now extending up out of the shoulder. I plan on encasing that in filler and making the shoulder one solid piece.
 

Attachments

  • 14222614958_de52e23fca_b_d.jpg
    14222614958_de52e23fca_b_d.jpg
    477.6 KB · Views: 199
last update on the shoulder progress for awhile:

They are ready for final paint. Other than that I need to devise exactly how they will attach to my undersuit top. No big deal :)

next up: the forearms

14415105125_f2cd7ca62e_b_d.jpg
 

Attachments

  • 14415105125_f2cd7ca62e_b_d.jpg
    14415105125_f2cd7ca62e_b_d.jpg
    220.3 KB · Views: 203
Status
Not open for further replies.
Back
Top