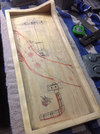
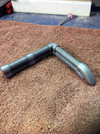
Yeah, this goes back to a conversation Redshirt and I were having in my BR85 build thread. I look at the 3D prints and subconsciously feel like it's "cheating" because they're "perfect", while consciously I know it takes a huge amount of time and effort and trial and error to get prints of that quality from an initial set of models.
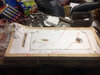
It's a stunning piece, for sure. That's the level I'm aiming at with mine, though I don't know if I'll be able to accomplish it. Good to know I'm not the only one planning on wet sanding to 2000 grit though!
It's a stunning piece, for sure. That's the level I'm aiming at with mine, though I don't know if I'll be able to accomplish it. Good to know I'm not the only one planning on wet sanding to 2000 grit though!
")