- Member DIN
- S935
Hello all!
Some of you that know me, know that I'm currently looking ahead to do my Jorge build from Halo Reach. Jorge because he is a true homie and always stood out in Noble team to me, also a huge fan of grenadier armor is general.
I will be using the NerdForgeDesign Mark Vb files for 3D printing using a Bambu Lab X1 carbon which I have some experience with by now considering this will be my 3rd NFD build with his files.
Because I have done 2 Noble six armors so far, I hope to take all that knowledge of connecting parts, mounting and scaling and use it for this build.
Below you can see my 1st rendition of the Noble six armor, to get an idea of the scaling I will use according to my body build.

I am fortunate enough to have the files fit me perfectly without needing to scale it.
The only thing that needs scaling regardless is the forearm/gauntlets because the base scale makes it so I have to break my hand to get in/out.
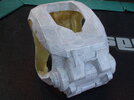
I will be reusing the fiberglass abdominal piece from my previous build which was ordered from 850armorworks, shown below:


As you can see, they come in 2 shells, They have a video on their facebook to show how to trim and connect it. You glue one side, while adding velcro to the other side which allows you to easily put it on yourself without assistance, and completes the Mark Vb look.
On to the printing side of things.
I am using a Bambu lab X1 Carbon which has been my workhorse ever since I sold all my other printers because this one is faster and more reliable than the others.
Its been printing non stop since I got it and this baby does it all.

I am using sunlu PLA+ and have had a great experience with it. You can easily get it on Amazon.


Above you can see I started on on the base of the Mark Vb first, because I want to get it out of the way, since this is my 3rd Mark Vb in a row and it is becoming monotonous work to print haha. Once that is done, I will start on the grenadier chestplate addon, shoulders, calves and bracers.
I will be making the boots and shins into 1 "boot" because the shins are freaking MASSIVE on this guy. Shins are the worst part of a build for me because the Mark Vb shins, you could house 10 regular size families in and still have spare room for your leg.
That's all for now!
Some of you that know me, know that I'm currently looking ahead to do my Jorge build from Halo Reach. Jorge because he is a true homie and always stood out in Noble team to me, also a huge fan of grenadier armor is general.
I will be using the NerdForgeDesign Mark Vb files for 3D printing using a Bambu Lab X1 carbon which I have some experience with by now considering this will be my 3rd NFD build with his files.
Because I have done 2 Noble six armors so far, I hope to take all that knowledge of connecting parts, mounting and scaling and use it for this build.
Below you can see my 1st rendition of the Noble six armor, to get an idea of the scaling I will use according to my body build.
I am fortunate enough to have the files fit me perfectly without needing to scale it.
The only thing that needs scaling regardless is the forearm/gauntlets because the base scale makes it so I have to break my hand to get in/out.
I will be reusing the fiberglass abdominal piece from my previous build which was ordered from 850armorworks, shown below:
As you can see, they come in 2 shells, They have a video on their facebook to show how to trim and connect it. You glue one side, while adding velcro to the other side which allows you to easily put it on yourself without assistance, and completes the Mark Vb look.
On to the printing side of things.
I am using a Bambu lab X1 Carbon which has been my workhorse ever since I sold all my other printers because this one is faster and more reliable than the others.
Its been printing non stop since I got it and this baby does it all.
I am using sunlu PLA+ and have had a great experience with it. You can easily get it on Amazon.
Above you can see I started on on the base of the Mark Vb first, because I want to get it out of the way, since this is my 3rd Mark Vb in a row and it is becoming monotonous work to print haha. Once that is done, I will start on the grenadier chestplate addon, shoulders, calves and bracers.
I will be making the boots and shins into 1 "boot" because the shins are freaking MASSIVE on this guy. Shins are the worst part of a build for me because the Mark Vb shins, you could house 10 regular size families in and still have spare room for your leg.
That's all for now!

