Mark 6 - First build - Trying to fit in

Status
Not open for further replies.

Apeiron

New Member
Alright, guys, strap in, the adventure begins!

And you are gonna be my company, so we all can laugh at my insane skills regarding crafting, modifying patterns, not choking on my own saliva, basically anything.
Since I have not managed to find anybody from Czech republic here, you may as well call me The Last Spartan or The Lone Ranger. That's how I roll. Lots of Germans, tho. I'd like to enjoy a bratwurst and beer with you, even though I can't really speak German, except vulgarities.

CHAPTER ONE - THE FOREARM

Oh, where should I start. Got the patterns, pounded down a shot of Red Bull and got ready to knock it out of the park. My lovely girlfriend bought Armorsmith for her and my cosplay needs. Needless to say, she is awesome, knows how to work with graphic programs and basically can actually think in a way that makes sense.

I somehow finally fit the forearm pattern to my body (actually the pattern is tilted just like I am while I am writing this)
1618601834973.png


Yet, I printed it, transferred it to my beautiful 10 mm thick EVA foam and started to get stuff done.
IMG_20210416_153744744.jpg
Huge props to Angelegend

His YouTube tutorial really tried hard to bash some sense into me. Sadly, they have failed.
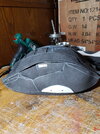
For starters, I was using contact cement, I love that stuff. Holds well, gets you high, looks like boogers, all in all pretty good fun. Soon I realized that contact cement is a lot like me: has trouble getting inside tight spaces. As I started, I wanted to completely nail the forearm on my first try. I really tried, I was confident in my Armosmith skills, in my craftsmanship and basically in myself. Then, when i was in the middle of cutting stuff out, I had my first breakdown. The inside cuts are just so ridiculous to make with a box cutter (9mm thick though). See the bottom of the forearm.
IMG_20210416_210930340.jpg


I have no clue how you manage to do that. Especially Angelegend made it look so simple and easy. His were neat. Mine were messy and not really straight, just like their creator. Honestly, guys, HOW?!

It didn't take long for me to lose the rest of my sanity. Then i started half-assing stuff and justifying to myself that after all, I am doing just a fitting test to see how stuff actually works out. Well, I did not manage to convince myself and I feel like shite. So I thought I'd share this (as of 16.4.2021 pretty short) journey, so we all can have some fun and some time later, I can look at myself writing this public diary entry and laugh on how actually dumb I was. Future me, if you are reading this, I hope you got some muscles and some sweet armor, you magnificent bastard!
IMG_20210416_211019294.jpgIMG_20210416_211010827.jpg
Another full image, the rest is below (I guess, the glue kicked my ass and I am in delirium)
IMG_20210416_210936815.jpg

As you can see, by the time I got to the circle thingy, I completely lost my mind. I sweated my ass of doing the fin thing side and then my boy Ange casually said ,,Okay, now let's do the most complicated part of the build". Oof. I have no clue how can something be short, but big at the same time. Excluding myself of course.

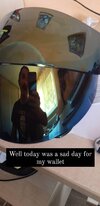
To close today's entry, here is a video of me including a face reveal. Cherish it and then sell the screenshot on eBay when I become famous, thx.
Hope you all had a nice laugh, are well fed and hydrated.


Signing off for now. Have a good one.

Your boy
Apeiron, the lone ranger from Czech republic.
 
I followed the same tutorial when I did my first suit recently. The thing I’ve learned throughout my build was don’t stress yourself out, it’s your first build and it’s ok if it’s less than perfect. Lord knows mine is, but I’d also encourage you to do a piece without the tutorial, like a bicep (which is 100 percent the easiest piece to do and a good starting point) or the shins like I did.
All in all your start is very promising, already you’re leagues above my forearms so I’m excited to see more!
 
Sadly, I'm quite a bit perfectionist, borderline OCD. And when I see details and how they are done, I NEED them. It's funny, whenever I put on a cosplay which I cuss about, once I wear it, my confidence shoots up like I am a literal god . Luckily, I have some experience with foam thanks to the fact I built Iron man Armor last year (Mark 4, to be exact). Ofc I found pattern and followed videos, but it was a nice exercise to work on my V-groove cuts, inward and outward cuts. After building the first piece of forearm and rescaling a little, I'm probably gonna do version 2.0. with the superglue and hot glue combo, because there's a lot of small pieces, because contact cement takes 5-10 mins before I can connect the pieces (really fine glue for good price, but ofc the crafting then takes a lot more of time). At the moment I feel kinda demotivated and kinda sad, even though I know no one who managed to nail a complicated piece like that on the first try (the inward cuts in all the arches really kicked my ass). Once the forearm is gonna fit, I'll just slap it with some sandpaper to clear the connections.
Yeah, I'll have a look probably at the bicep. Funnily enough, it is common knowledge to start with vambraces and forearms because in general, they are fast and easy to do, to ease yourself in. Well, that is not the case (Microsoft: How many parts must Chief's forearm have? Developers: Yes.)
Thank you for your kind words, mate. As I found somewhere on internet: You gotta build **** and it's gonna eventually become good ****


Here's my Eva foam Armor non Halo related. Of course it's not screen accurate so I'm gonna redo it, but for some trips to hospitals and events for children's it did its job.

Fun fact: for some reason I have broad shoulders and finding clothes is a chore for me (if the shoulders fit, the sleeves are too long and if the sleeves fit, I can't really move my arms. My body is straight up trolling me)
image1602856375323.png
 
FOREARM - ANOTHER TRY

So, after my failure, I jumped back to Armorsmith, raided my local store for thin foam and superglue and after roughly 7 hours, I was done.
When it comes to crafting, I have only two moods:
1. I suck
2. I am the god of crafting

I figure that it is going to take me a wekk or two before I have the urge to dump these and rebuild them, but for now, I am very happy with how they turned out.
IMG_20210423_171343331.jpg


I am going to sand them with a fine grit to get rid of some messy connections et cetera, but I am gonna do that "off-screen". If you want to see someone doing a damn lengthy and messy job, I suggest watching the new Star Wars movies. They still do not really fit, but I am just gonna add some squishy mattress foam on the inside. And to be honest, I am still not sure if I want to buy a motocross armored jacket or just sportswear/thermo clothing. So for now, I can choose freely.

NEXT STOP - BICEPS AND SHOULDER
 

Attachments

  • IMG_20210423_171501369_BURST000_COVER_TOP.jpg
    IMG_20210423_171501369_BURST000_COVER_TOP.jpg
    774.2 KB · Views: 223
  • IMG_20210423_171514833.jpg
    IMG_20210423_171514833.jpg
    832.8 KB · Views: 213
BICEPS AND SHOULDERS - DO YOU EVEN LIFT, BRO?

So, this weekend I was focusing on creating the shoulder pieces and the bicep ones. So, I opened up the Pepakura models and lost my mind. As a rule of thumb, forearm armor is generally the easiest to make. Turns out that in Chief's case, it's like the second most complicated piece, or at least third (leaving space for the chest and helmet, of which I am very afraid). A few measly A4's (three, to be exact, I just deleted the mirrored pieces and flipped the pattern). I did the same thing I did with my forearms: I have no skill to do recessed cuts so I just made all the recessed cuts accents out of thinner foam, because that's how I roll. Just like the forearms, they aren't really staying in position, but my EVA foam armor experience (the Iron man armor, which was my first work with EVA. Truly a lot of experience, right?) tells me to rather have a loose piece than tight. After all, the straps + mattress pieces on the inside are going to be more comfortable than having numb arms... Not to mention it bulks you up so you get that sweet muscular look even though you are a lazy pig playing videogames all the time.

All in all, I am very happy with the outcome and I am very proud to say, that I did them on the first try. Sadly, Angelegend's videos were slightly different, so I just kinda modified the accent pieces on the shoulders.
IMG_20210425_164557840.jpg
IMG_20210425_195853914.jpg

This project might turn out looking actually looking good!
 
I love your work, man. Keep it up!
Thank you so much! You are breathtaking! ♥️
To be honest, even though it is my second EVA project, I can see the progress and that's what I love about my hobby. The sleepless nights, when I am thinking about things, such as ,,Damn, what if I used hot glue for the lights on the helmet to diffuse the LEDs (I have LEDS that shine like fog lights on a car. The extra bright ones, hehe)" or ,,Damn, boy, what if I bought <insert thing> to do <insert thing>". The feeling that you are using your full potential is great.

On the other hand, though, it makes me want to rebuild the while iron man suit I made. :D Before Corona I frequently visited children wards in hospital etc. and felt really good about my build. But now that I know how to do some details, the urge to rebuild is huge. :D

Once again, thank you for your kind words which lifted my spirits. :)
 
I'm watching this build with deep interest. You've clearly got a passion for costume making and I love seeing that!
 
HELMET - PART ONE - WAS CHIEF A CYCLIST?!

As is my custom, I loaded up Angelegend, Armorsmith, poured myself a nice cold drink and got to work. So, first things first. I scaled down the helmet pattern by 10%, because I am a big-headed lad and I thought to myself something along the lines of "Bloody hell, this is going to work, there is no chance in hell I am printing and cutting out that thing".

So, the tutorial video was 1 hr and 37 minutes. My time? Around three hours. Then again, I can justify that, because I bought some really weird, slow and weak super glue, so I resorted to using contact cement.

IMG_20210503_175224762.jpg

For post-process, I am going to sand it down and prime it with Hexflex. That is going to let some details pop out and hide the failures a little.


While I was building my Iron Man suit, there was this fine man. To be honest, I have bought the templates, scaled them properly and then did stuff according to videotutorials from the very same guy. At times, I felt like a trained chimp, anyone could do a suit like that, possibly even better. To be clear, I do want to rebuild it, because I missed so many details! I didn't know how to do them! I had no idea I could just buy thin foam (moosgummi) and layer it! By the way, that is very demotivating. The unableness to just think of something, the need to search the internet instead of changing the game myself somehow. But then, I am in this hobby for a year and a half and this MK6 suit is my third costume *ever*..
But to get to the point, he was often saying ,,Doesn't matter if it's not exactly like mine. It's just cosplay, bro!"

At times, I remind myself of that. At other times, I chuck an EVA foam helmet in the trash because I didn't like it. Whoops?

So, Chief's Helmet, part one! At the moment, it looks like a bicycle helmet, but in the end I hope it's going to turn out well. If not, I'll redo it. It's just cosplay, bro!
IMG_20210503_214632269.jpg IMG_20210503_214650890.jpgIMG_20210503_214638058.jpg

To close this entry, here is a pic I like to call "Chief meets Peaky Blinders: The crossover you didn't know you needed"
IMG_20210503_214730199.jpg


Have a good one, folks.
 

Attachments

  • IMG_20210503_214644702.jpg
    IMG_20210503_214644702.jpg
    2.4 MB · Views: 190
Status update: I pulled an all nighter because I am a stupid, stupid man. I have a feeling, that today I am going to finally end that. I am still torn between EVA foam "boxes" and making real lights on the sides of the helmet. I probably will go for the lights if my girlfriend 3D prints me a small box with a wall inside it so I can casually hook up my LEDs without them tangling together and being a mess. I must decide fast, though, because without them, I can't do much.
IMG_20210504_210341140.jpg

So far, I hope the helmet is going to be a good fit. Sadly I don't feel like the rim is really symmetric, or the top is bended weird. Be it as it may, there is still a lot of work... Slowly, though, the flame of hope is dying. I am especially sad about the top iconic "horns". I sense a lot of sanding or redoing the helmet

IMG_20210504_210425731.jpg
 
The good thing about foam is how easy it is to bend and manipulate into the shape you want - as I'm sure you already know. While the thought of restarting a part is daunting (and I'm not suggesting you need to), sometimes it's the better idea; short term loss, long term gain. Better to restart it now then to put in all the effort and regret it later.

Also, what do you mean by "horns"? You've got me curious
Well, to put it in other words, the rim of the upper part that looks like the horizontal letter M.

Yes, well, as for now, I have just a tiny bit of foam and it's gonna be just enough for me to finish the helmet. So if things go awry, I am going to buy a 2x1 m sheet again.
 
MOMENT OF SILENCE
The unfinished helmet has left this world. Sadly, it got utterly destroyed as I was working on adding the back pieces.

For now, I need to sign off, breathe and try to work on my real life.
In the words of my father: ,,Now that the foam is going to arrive on the 11th, until then I'm going to see a whole lot more of you."
The old man is right.

On the other hand, this gives me another chance. Let's put up the remaining pieces of my helmet on display and learn from my mistakes.

I came here to craft cool helmets and chew tobacco. And I'm all out of tobacco.

The bad thing about my crafting coming to a pause, I am starting to have second thoughts about myself. ,,Should I redo the forearms to fit better or add foam inside?", ,,Should I redo the shoulders because the shoulder piece is not sitting on the bicep like Angelegend's is?". My brain is funny and I need to fight these urges.

Until then, have a good one.
 
PlanetAlexander I can't leave you hanging just like that, so here are some sneak pics of my visor. I bought two faceshields on AliExpress and I was livid when I found out the shipper is actually shipping from Czech Republic, so I got them in a day! 20€ for them both. But to be honest, I am afraid about cutting one and actually gluing them together, because I'm afraid that the visibility is going to bomb because of glue marks on it. But I'll look into it.
IMG_20210505_202318502.jpg
 

Attachments

  • IMG_20210127_141544_297.jpg
    IMG_20210127_141544_297.jpg
    154.6 KB · Views: 177
PlanetAlexander I can't leave you hanging just like that, so here are some sneak pics of my visor. I bought two faceshields on AliExpress and I was livid when I found out the shipper is actually shipping from Czech Republic, so I got them in a day! 20€ for them both. But to be honest, I am afraid about cutting one and actually gluing them together, because I'm afraid that the visibility is going to bomb because of glue marks on it. But I'll look into it. View attachment 305886
Also I forgot to mention that they are supposed to be gold. Or more like gold and from certain angles it has a blue-ish tint. Now I know that Chief's is more like orange and I certainly did overthink it a lot, but in the end, I think it's going to be cool anyways. In-game it seems that it really depends on the lightning.....
But I'm gonna hit up a lot of people and try to add some badass lights on the helmet (for the walks to the hotel after a few late drinks) and maybe, just maybe, add a small blue light to the back of the helmet, because that's where Cortana is! I'll look into that. You know how it goes. Lights > actual skill. I have neither. So let's at least put on a show
 
Nice! Visor looks like it has a snug fit to the helmet.

And don't worry about taking a break. My expression of sadness was because we wouldn't see any more progress but pfft, don't worry about us. Take the time you need to recouperate and gather your thoughts. And when you're ready, you can come back to kick some alien butt!
I had to bend it a little I was really afraid it's gonna break.
Oh man, I miss building already. I got hooked again.
The pause is mostly because, well, I have no foam at the moment. I could probably take a look at my pieces and do a cod piece or something small, to pass the time
 
You sir, are giving me cause for excitement! I will watch this build with much interest. Plz get more foam soon so I have humor to read once again! Also, the helmet higher up looks freaking amazing!
 
After a small pause, I'm back, baby!

SEXY BACK - Pt. 1

Alright, I'm back! Just to be safe, I bought 3x1 m sheets of 1cm EVA foam. This should be enough. I mean, the cosplayshop is owned by my friend, so at least my money's not going to a random person, but still, I prefer money when it's mine.
After a painstaking printing of 25 A4 sheets and connecting all the pieces, I was ready to go. Even though, like a midget at a urinal, I have to stay on my toes. I love Lesley Nielsen btw.

I decided to print the chest armor at 100% scale, because I am a chonky boy. My shoulders are very broad for my height, which is honestly a pain when shopping for shirts, because if the sleeves fit, the shoulders are tight. And if the shoulders fit, I have the sleeves up to my knuckles.

I have a steady pace at crafting one piece per day and my ancestors are smiling at me, imperial. Can you say the same? I managed to build everything on my first try!

But, I must say, my love for Angelegend has slowly turned into a love-hate relationship. I just hate that. The foam files, even though they are helpful, sadly do not possess cut marks and there are times I caught Ange not calling them out. Midway through building the jetpacks I just gave up and gave them my own spin. They turned out looking fine! And as a small Easter egg for me, I put my small personal mark on the side of the left one. I felt like it's a good idea and I can't say that I regret it.
IMG_20210515_185224800.jpg

IMG_20210515_185248672.jpg


I might slightly mix things up a bit more. For example, when building the helmet, Ange did an inward cut and then a V-groove cut just so he could get a nice beveled look. Well, I just did an outward angle cut, which I do not recall Ange doing. Not to mention the fact that he does some of his cuts AFTER he has the piece cut out. And even though it doesn't really matter, because no one is going to see that, I am losing my mind! Now, I just have a 9mm box cutter and not a scalpel, could be that, but there is a vast difference. See for yourself:
16211917072254413846262082450349.jpg
Now, I don't want to bash him, I really like his videos, these details are just inconveniencing me a little bit. For instance, I need to watch his builds twice so I can mark my paper templates before cutting them out.

Next thing I did was a little cushion for my spine. Well, there wasn't a lot to mess up, yet I found something to mess up. Could just be my OCD though. Due to its place, though, it's not going to be a huge bummer.
IMG_20210516_204726363.jpg

IMG_20210516_204702693.jpg

Definitely gonna sand some edges. I learned the hard way that 100 and 220 grit are just too rough. Or at least not quite smooth, I'll see after priming with Hexflex.


I originally wanted to upload the codpiece, but I scaled it too little. Now, I don't wanna flex, but I had to scale it up by 70%


Signing off for now,
your boy, the lone ranger from Czech Republic
Apeiron

Stay frosty.
 
Status
Not open for further replies.
Back
Top