Mk7 build (3D printing for the first time)

Manta

New Member
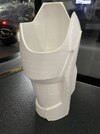
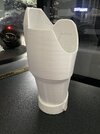
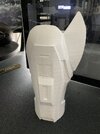
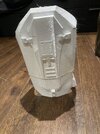
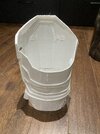
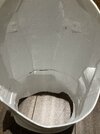
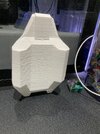
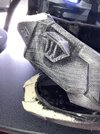
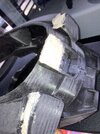
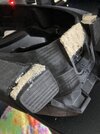
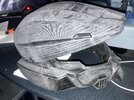
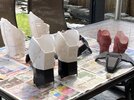
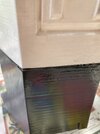
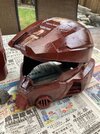
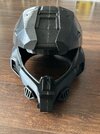
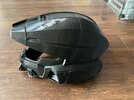
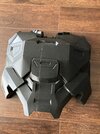
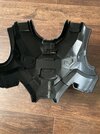
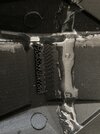
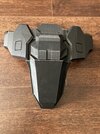
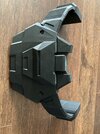
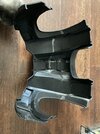
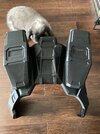
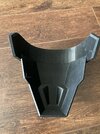
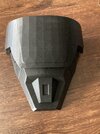
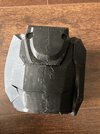
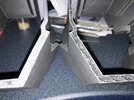
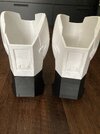
Hi this is my first time 3D printing a full halo armour set so I thought I'd share it. This is the progress so far and I'm still waiting for the last few pieces to be printed before sanding/painting.

The helmet and chest files are by MoeSizzlac
 

Attachments

  • IMG_1084.JPG
    IMG_1084.JPG
    2 MB · Views: 159
  • IMG_1085.JPG
    IMG_1085.JPG
    5.7 MB · Views: 159
  • IMG_1086.JPG
    IMG_1086.JPG
    2.3 MB · Views: 150
  • IMG_1087.JPG
    IMG_1087.JPG
    2.4 MB · Views: 155
  • IMG_1089.JPG
    IMG_1089.JPG
    2.4 MB · Views: 174
Here's the shoulder parts. Bicep pieces are pepakura files by TurboCharizard and the shoulder plate is by Makyr. They turned out great when exported to 3D files. Currently the shin pieces are printing, they should be done in 3 days.
 

Attachments

  • IMG_1098.JPG
    IMG_1098.JPG
    2.5 MB · Views: 107
  • IMG_1097.JPG
    IMG_1097.JPG
    2.4 MB · Views: 98
  • IMG_1096.JPG
    IMG_1096.JPG
    2.1 MB · Views: 107
  • IMG_1095.JPG
    IMG_1095.JPG
    2.1 MB · Views: 102
boonis if you'd like to save a pit of pain on future pieces by not having to do conversions from a Pepakura format, check out the Free Model Index. The group of us that did parts for the first MkVII unfolds made two versions, a lower poly for foam and Pepakura as well as higher poly versions for 3D printing.
 
boonis if you'd like to save a pit of pain on future pieces by not having to do conversions from a Pepakura format, check out the Free Model Index. The group of us that did parts for the first MkVII unfolds made two versions, a lower poly for foam and Pepakura as well as higher poly versions for 3D printing.
Wow that's awesome, thanks! I was having problems converting the forearm and was about to foam that part. Thanks for saving me the headache :D
 
Yikes the petg stuck so well to the bed that it ripped the first layer off one of the shins! I lowered the bed and hopefully that helps for the next print. Good thing it was just one layer. I didn't notice a height difference between the two pieces so that's a relief.
 

Attachments

  • IMG_1104.JPG
    IMG_1104.JPG
    6.5 MB · Views: 96
Forearm done. I love all the little details, including the bird eggplant chicken thing on the inside xD The file is by PlanetAlexander, and the shins from the previous pic are by Makyr.
Does anyone have suggestions for what grit sandpaper to use for these prints? The black pieces are pla and the white ones are petg. I'm not sure if there's a difference in hardness when sanding.
 

Attachments

  • IMG_1117[1].JPG
    IMG_1117[1].JPG
    7.1 MB · Views: 100
  • IMG_1116.JPG
    IMG_1116.JPG
    2 MB · Views: 101
  • IMG_1115.JPG
    IMG_1115.JPG
    2.1 MB · Views: 89
  • IMG_1114.JPG
    IMG_1114.JPG
    2 MB · Views: 99
Forearm done. I love all the little details, including the bird eggplant chicken thing on the inside xD The file is by PlanetAlexander, and the shins from the previous pic are by Makyr.
Does anyone have suggestions for what grit sandpaper to use for these prints? The black pieces are pla and the white ones are petg. I'm not sure if there's a difference in hardness when sanding.
I've only worked with PLA so idk how well this will work with PETG, but I use 120 grit sandpaper, hit it with filler primer, go back over it in 220 grit sandpaper, and the do another layer of filler primer, which seems to get everything fairly smooth, with a few of the tougher spots requiring a bit more elbow grease.
 
Progress has slowed quite a bit since I'm waiting for the weather to be nice and the temps to warm up, which is very rare at this time. I plan on covering the outside of each piece with a layer of fibreglass resin to smooth the lines since I'm lazy to do more sanding. Then I'll primer it and we'll see what happens lol.
 
I finally got a chance to go outside and fibreglass! It was 21 degrees today and everything cured nicely. I guess fibreglass resin does work with smoothing out print lines for someone like me who's too lazy to sand multiple times. There was one part in the front that still had thicc layer lines but it's a lot better than before.
 

Attachments

  • IMG_1462.JPG
    IMG_1462.JPG
    2.7 MB · Views: 64
  • IMG_1463.JPG
    IMG_1463.JPG
    976.9 KB · Views: 63
This thread is more than 9 months old.

Your message may be considered spam for the following reasons:

  1. This thread hasn't been active in some time. A new post in this thread might not contribute constructively to this discussion after so long.
If you wish to reply despite these issues, check the box below before replying.
Be aware that malicious compliance may result in more severe penalties.
Back
Top