TastyGumbo
New Member
Hello everyone,
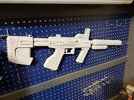
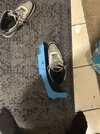
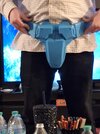
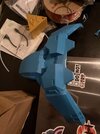
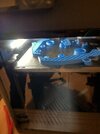
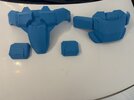
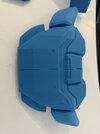
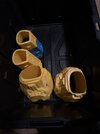
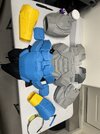
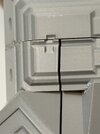
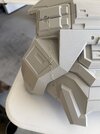
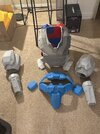
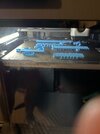
After a long long break from 3D printing I am back at it in full swing. Recently bought a Bambu P1S AMS 2 Combo during the Black Friday sale. After, what I feel was a successful obi wan cosplay it pumped me up to finally start over on my spartan armor. I decided that I will be working on the weapons of choice for now to try and slowly get back into it. I won’t tell what weapon it is right off the bat but it will be pieced together throughout this post (although I’m sure some can guess based off the pictures alone). Attached to this initial post will be four pieces of it plus a picture of the next seven pieces currently printing. I will say the weapons are not primarily used by Spartans but I really really like them and it’s from my second favorite game of the franchise. Anyways stay tuned for more updates!
After a long long break from 3D printing I am back at it in full swing. Recently bought a Bambu P1S AMS 2 Combo during the Black Friday sale. After, what I feel was a successful obi wan cosplay it pumped me up to finally start over on my spartan armor. I decided that I will be working on the weapons of choice for now to try and slowly get back into it. I won’t tell what weapon it is right off the bat but it will be pieced together throughout this post (although I’m sure some can guess based off the pictures alone). Attached to this initial post will be four pieces of it plus a picture of the next seven pieces currently printing. I will say the weapons are not primarily used by Spartans but I really really like them and it’s from my second favorite game of the franchise. Anyways stay tuned for more updates!


")