Contributor1909
Active Member
Going to be starting a Rakshasa build in the next couple months, being that I'll have the month of December to plan, organize, and begin to execute the build in its entirety.
Build will include:
Helm: Artaius with TAS attachment, 3D model I will be using is made by SlenderDummy
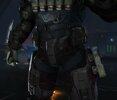
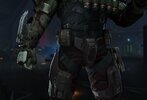
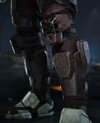
Chest: Ruckamuck Hippotooth OR Ruckamuck Rangeking
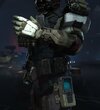
L Shoulder: TAC/PLQ - 196E Threepack
R Shoulder: IronGrip Rails
Utility: TAC/ Redscan OR Util Medkit
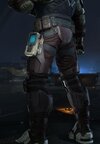
Wrist: Doziac Kiss
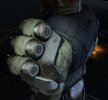
Hand: Abzug
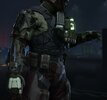
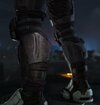
Knees: UA/ Type PTL
Images included will show the details of the armor and armor pieces I plan on incorporating, though changes may come over time, who knows man.
For right now, I'm going to start with the helmet. I'm mostly just excited to add another cool helmet to my collection.
I plan to SLA Print the components, and to FDM print the main bodies. SlenderDummy has been kind enough to break down the model beautifully into many components so that I can have multiple parts printing at once. Once I have some parts printed and start to clean them up and ready them for assembly/ painting, I'll post another update.
Until then, I'll see you around.
Build will include:
Helm: Artaius with TAS attachment, 3D model I will be using is made by SlenderDummy
Chest: Ruckamuck Hippotooth OR Ruckamuck Rangeking
L Shoulder: TAC/PLQ - 196E Threepack
R Shoulder: IronGrip Rails
Utility: TAC/ Redscan OR Util Medkit
Wrist: Doziac Kiss
Hand: Abzug
Knees: UA/ Type PTL
Images included will show the details of the armor and armor pieces I plan on incorporating, though changes may come over time, who knows man.
For right now, I'm going to start with the helmet. I'm mostly just excited to add another cool helmet to my collection.
I plan to SLA Print the components, and to FDM print the main bodies. SlenderDummy has been kind enough to break down the model beautifully into many components so that I can have multiple parts printing at once. Once I have some parts printed and start to clean them up and ready them for assembly/ painting, I'll post another update.
Until then, I'll see you around.
Attachments
-
 Abdomen detail.JPG111.2 KB · Views: 283
 -
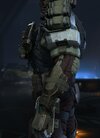
 Waist and wrist.JPG134.6 KB · Views: 230
 -
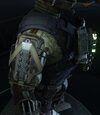 Shoulder detail2.JPG111.4 KB · Views: 224
 -
 Shoulder detail.JPG87.1 KB · Views: 207
 -
 Lower leg detail.JPG89.3 KB · Views: 220
 -
 Leg detail.JPG86.8 KB · Views: 211
 -
 Hip Side.JPG86.1 KB · Views: 217
 -
 Hand detail.JPG102.1 KB · Views: 213
 -
 Hand detail 2.JPG111.5 KB · Views: 221
 -
 Back leg detail.JPG84.2 KB · Views: 226
 -
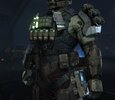
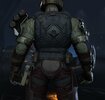 Back.JPG116.9 KB · Views: 280
 -
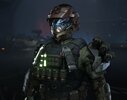 Bust.JPG122.6 KB · Views: 268
 -
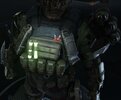 Chest detail.JPG143.9 KB · Views: 281
 -
 Chest profile.JPG81.9 KB · Views: 221
 -
 Chest.JPG131.7 KB · Views: 256

