Strengthening EVA Foam and making it seamless

Status
Not open for further replies.

OJ102

Member
Hey there,

Ive been working my way thought a lot of different techniques regarding building a costume, alas this has mainly been rebuilding the same parts with different methods, materials and designs, since im never totally happy with them so far, and thought maybe my standard is too high for the materials available.

My project is an Iron Man Suit, specifically the suit featured in Infinity wars and End Game. I have a full 3D breakdown of the suit in pepakura, although the scaling seems a little off.. the torso fits fine at its basic scale but the head is WAY off, to that end im not even attempting a head, and instead have made a BACK and currently preparing templates for the chest plate.

Im using 100* foam which seems to be the densest foam available, to be fair it is rock hard, but when its a large surface area it fends to bend too much.

For reinforcing, I initially tried polyester resin, which gave a beautiful finish like polished metal and initially took distortion very well, so I spray painted it silver to see its paint properties. It was brilliant, looked like a sheet of polished steel. Unfortunately, as it cured, it cracked when even slightly bent, both cracking the resin and flaking the paint. Thankfully I have several test components on low density foam that I'm trying different techniques on, that was a epic fail!

Im currently layering PVA glue on, but not seeing any change, ive got 5 layers on now and cant see any real difference. The outer foam I used a flexible rubber filler pressed into the seams, then wet and polished smooth before then sanding with 60 grit, then 80 and 120. Unfortunately I'm still able to see the seams and feel them under my finger tips. On the inside of the piece im experimenting with Decoupage/PVA to try and give it substance. essentially paper mache with very thin tissue paper. 5 layers in and it feels tougher but still trying so not gonna stress test it.

How smooth can I honestly expect to be able to make the seams on ajoining parts that don't require definitive edges?

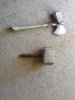
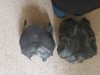
Im currently testing the mache on the exterior of a helmet to see if it will be smooth and then to test a basic paint bonding, but ive watched hundreds of youtube vids on this and some of their finished Armour, when intricate is somewhat below what my goal is, the seams are clearly visible after painting, even separating after being worn.

If I cant make seams totally invisible im thinking maybe going the other way and having the seals defined more so they look intentional and part of the design. This is my first project so im testing multiple techniques all the time, Ive already gone down paper/fiberglass and didn't like it, the foam is a lot faster and more fun (less smelly) but the finish is tougher to finalize.

What sort of results have others had and methods used?

Ill upload some images of my own once then dry a little more!

Cheers
 
as it cured, it cracked when even slightly bent
How smooth can I honestly expect to be able to make the seams on ajoining parts that don't require definitive edges?

I had these same problems with my Reach suit. My H4 suit on the other hand takes abuse like that really well. What I did for the H4 suit was: steal TurboCharizard sealing idea (think it was him, anyway, might be wrong) of using leak seal and ExCeLLuR8 paint idea: Exterior house paint.

For your seams: Kwik seal. There are also other substances out there like foam clay putty and other things, but I have no experience with them. Kwik seal does a good enough job, though. The cheek on my H4 helmet was so terrible that I almost remade the whole thing for the third time, but instead layered on several thin layers of kwik seal and built it up. I'll post a picture of the finished result here in a minute.... there we go:

20190527_015406.jpg


Layer the kwik seal and sand it smooth with a high grit sandpaper. Cover it with leak seal which is very flexible and forgiving, and then use these house paints which also bend and fold without creasing or cracking.

That's the best I've been able to get. Lemme see if I can find a tutorial from the youtubes by evil Ted about seams. Long story short: You can't always totally make them disappear, but you can get close.


Use a super sharp blade, make one solid, clean cut, and match it where it belongs. I got cleaner results using super glue than contact cement, but they both work really well. That way there's less of a gap that needs attention in the first place.

Hope that helps.
 
Last edited:
Could try coating it in some "gesto" it's like a an acrylic primer that gives everything a very hard surface look then your metallic paints also its flexible and use kamar varnish, it's a flexible clear coat
 
I tried hot glue but It didnt seem to bond well enough to the foam as seams just fell off.

The decoupage seems to work very well so far, because its so thin it doesnt obscure the tiny details and indents, but when combined with the PVA it gives a harder surface. Aditional layers on the inside of the pieces seems to add a lot of reinforcement with less then 1mm of thickness as well.

I sanded a test piece and it came up very smooth very fast which is promising. I was able to bend it 90 degrees without any wrinkling or cracks too, when I crushed it up and rolled in into a tube it did damage, but I really went to a test of extremes to accomplish it.

Once the decoupage dried I use a multi-tool sanding bit to go along the details and re highlight them which seemed to work nicely. The texture came out almost perfect but not quite, I could still see tiny markings although you couldn't feel them.

Im going to finish the decoupage on my back while I finish constructing the chestplate. Ive ordered a can of Plasti-Dip and Plasti-kote.

Plasti-dip as its considered the best for the purpose. The plasti-kote is meant to work well if not stressing the material as much, so im hoping that i can use both on various parts since unless something goes very wrong my torso shouldn't be twisting around 90 degrees!

The only paint I had to test was a basic metallic spray unfortunately, so not flexible by its own nature. The decoupage tester when painted took the paint very well but when under extremes the paint did crack, it didnt peel, but lines appeared. Thats why im thinking reinforcing the parts that need no flexibility, after all if I had made this with fiberglass these parts wouldn't move at all!
 
PlastiDip if you live in the US and want something fast and cheap.

Rustoleum Leak Seal if you want a product that outperforms PlastiDip and you live outside of the US. It bonds better to foam, is sandable and on average cheaper per can thanks to tariffs and environmental levies on PlastiDip.
 
The "Rustoleum Leak Seal" actually only works out about 50p cheaper in the UK haha

By out performs do you mean it actually does a better job?

Ive just finished assembling the foam chest component and to my amazement they actually line up with the back!, Ive pinned them in place with Masking Tape while I heat form the curves to line up, and reinforce the back plates. Once the Abs and Torso are built it should all slot together!
 
Ive just finished assembling the foam chest component and to my amazement they actually line up with the back!, Ive pinned them in place with Masking Tape while I heat form the curves to line up, and reinforce the back plates. Once the Abs and Torso are built it should all slot together!

*cough* Pics or it didn't happen.
 
If i read this earlier i would have taken a pic lol. Its currently soaked in its final layer of glue. Shoudl be dry by morning thi ready for sanding. I lined up the connecting parts, heat formed the curves and used masking tape on the inside to pin them while the layers of glue dried. It has the texture of leather now.

Here are my first creations i made for my kids. A Thors hammer and then stormbreaker. The paint is cracking a little as they litterally go into battle with them. Each one is a foam shell with a aluminum tube going the full length, with all internal space filled with expanding foam. Then coated in paper mache. Ive evolved since i made them last nonth lol
 

Attachments

  • 20190601_190940.jpg
    20190601_190940.jpg
    3.2 MB · Views: 525
This is the latest attempt. The scale was spot on but I'm just not happy with the seams.

I realised if I put a rubber sander on my multitool and whack it on max it can sand the foam away almost polishing it. Unfortunately there was a layer of PVA glue on it already trying to fix the seams... so when I peeled that off it looked tacky..

The same goes with the cliffs on the details, I think I worked them too hard and spoilt the texture beyond acceptance..

I'm starting to think some of the methods I'm trying are mutually exclusive...

I use a heat gun to form the shapes, then once a completed section part was done I layered PVA on it... but while the PVA hardens it, its main use I've read is sealing.. something the heat gun is already doing.. also.. imve got Plast-kote and plasti-dip for spraying on to give a better surface texture and stop paint cracking.. but it's also refered to as a sealer too....

I'm not happy with the finish and since the plasti spray is the next stage and its £12 a can, and I reckon that's a can per part given multiple layers.. where as the foam roll is £23 but I've only used about 10% of it.. that makes my current loss on the parts less then £3.. I'm thinking cut losses and try again..

What steps should I be using?

I'm cutting out the parts, cutting details then heat forming them so they fit better, then heating again when multiple parts are together to ensure continual curves.... but what should really be next?

Should it then just be plasti-(spray) before leaving ready to paint?
 

Attachments

  • 20190604_171631.jpg
    20190604_171631.jpg
    2.6 MB · Views: 895
I use a heat gun to form the shapes, then once a completed section part was done I layered PVA on it... but while the PVA hardens it, its main use I've read is sealing.. something the heat gun is already doing.. also.. imve got Plast-kote and plasti-dip for spraying on to give a better surface texture and stop paint cracking.. but it's also refered to as a sealer too....
Heat sealing can only do so much.
Since you are using PVA glue to give the foam a hard surface you have already sealed the foam and don't really need to be applying another product to seal. Applying a primer coat and then painting would be your next step.
 
Heat sealing can only do so much.
Since you are using PVA glue to give the foam a hard surface you have already sealed the foam and don't really need to be applying another product to seal. Applying a primer coat and then painting would be your next step.
Should plasti dip be used on top on pva as a primer then?
 
Should plasti dip be used on top on pva as a primer then?
I am not experienced with pva, but I would assume you could use any primer as long as it wont crack when flexed. Plastidip is used to seal the foam, and you have already done that. I'm sure you still can use plastidip, but other paints may come out smooth. I know Andrew dft and punished props did some pva work, but it may take some digging through those hundreds of videos before you find what you need.
 
Should plasti dip be used on top on pva as a primer then?
Not really, no. PlastiDip is designed to be able to peel off of hard surfaces, it just has the added bonus of flexibility which is a bonus for foam. You're making your foam rigid and removing the need for that property.

Stick with a paint that's formulated to bond to plastic for a more permanent solution.
 
I recently used epoxy resin on a Skyrim dragon skull made with paper. Its the same stuff they use for making jewelry pendants. It hardened nicely with a shiny finish. I only did a single coat so there was a bit of give when put under pressure, but I think a few more coats would make your foam fairly sturdy. However, the epoxy resin is not self-leveling, so it pools and drips if it is put on too thick. I made this mistake and trying to sand it down was a nightmare. An electric sander may have worked, but sanding by hand did absolutely nothing except scratch the smooth surface. I would give epoxy resin a test coat before applying to an entire piece to make sure it gives the finish you want. An even coat might be an issue over large areas.
 
In the case of foam, resin can't bond to it I've found. The slightest distortion and it shatters. If it was used with cloth it would prob hold!

Will plasti dip cover rough patches on foam? I've just built the shins but had to dremel a seam that wouldnt stay put, I've given 1 coat but would say 3 give a smooth surface?
Maybe. It depends on a few factors. If the seam is very small, it probably wont be a problem, but if it is more towards the size of a score line, it probably will retain its appearance and show through. Can you elaborate on what you mean by this?
 
In the case of foam, resin can't bond to it I've found. The slightest distortion and it shatters. If it was used with cloth it would prob hold!

Will plasti dip cover rough patches on foam? I've just built the shins but had to dremel a seam that wouldnt stay put, I've given 1 coat but would say 3 give a smooth surface?
Plasti Dip doesn't act as a filler. Any divots, bumps, rough areas and bad seams will still be visible even after multiple coats.
If there are rough areas or bad seams they have to smoothed out before the sealing and painting.
BUT, if you have already sealed, primed and started painting and have a roughed up section or visible seam you can try and hide it plain sight by weathering the area and make it look like battle damage.
 
Status
Not open for further replies.
Back
Top