Tips of improving armour needed

Status
Not open for further replies.
Its been a long time lads!
Every now and then I see a halo cosplayer in a facebook group and I remember I still want to finish my outfit...
So lately i've been thinking a lot about it, leading me to actually feel worse about what I have completed so far.
My example for this will be my Recon helmet from Reach.

I put love, work, blood, sweat and possibly some tears to make what I have now: (despite an unfortunate experience with the post office that bent the visor out of position) a helmet that I really pride myself on.

And yet, I see so many other amazing works, be it cast in resin or what have you, foam or any other building method and it hurts me because its just sub-par to them. From the shape to the colour and texture, I just feel like its not good enough! And I do realise that everyone starts somewhere but I dont exactly have the ability to keep remaking the helmet till I magically know whats missing...

So to FINALLY get to my point: Since i cant put my finger on exactly whats wrong, how would you, the honestly amazing and inspiring people of 405th, improve this helmet?

IMG_20180517_233401.jpg IMG_20180517_233404.jpg IMG_20180517_233410.jpg IMG_20180517_233415.jpg
 
I recon your Recon (see what I did there) helmet is pretty darn good. But since you're asking for a critique to help identify what is missing...

From a distance/at first glance I think it's the painting. Lines are blurred or rough and that takes away from what could be some crisp lines in your helmet. I'm talking about where the black and the white meet. Plus when I think something has paint chipped off of a weathered item, red is not the colour I expect to see underneath ;)

At closer inspection you have a number of pits/holes and even cracks where it seems things have flexed too much. Some of those pits like at the 'temple' could form part of your weathering process where combat situations caused the paint to chip off. Ie these pits would be the base colour (eg silver). But I can also see a lot of tiny bumps as if you had grains of sand trapped under the paint.

And finally, some weathering - scuffs and dirt/grime. Unless you want to be a fresh faced (helmed) recruit.

What is this made out of? Assuming some kind of resin/plastic/pepakura and fiberglass/something hard, sand it down, then use automotive filler for the bigger things you need to fill in, spot putty for the smaller, then filler primer for the final smoothing.

If it's EVA foam, well you'll need to be more careful with the sanding. Then use a flexible filler like Kwik Seal to smooth things out (both Punished Props and Evil Ted have tutorials), followed by something like Plasti-Dip before you proceed with your painting and weathering. Use a good masking tape to separate areas that'll get different colours, but allow adequate drying time before doing that.

I think this will be a great project.

Whatever you do, keep your choices (smoothness, colour, weathering) consistent with what you have in mind for the rest of the armour. And post some pics! :)
 
Callianis That is exactly what I was hoping for! Thank you very much for the in-depth criticism!
I just got a blue visor to replace the black one and I want to start improving it overall!
Now to adress some of your points with a note or an enquiries if you dont mind...
The red was supposed to be plasma burns or something. It was just an epiphany I had when i did a first paint scheme I didnt like.
Since i've made the helmet (which was actually quite the long time ago), i've improved in my spraying technique, especially considering i've gotten an airbrush, and im also picking up some chipping techniques so the thought of applying my newfound knowledge on the helmet is actually kind of exciting!
I was reluctant to use glossy or metalic paint since that usually doesnt look good unless done with a lot of care but showing through chipping effects wouldnt look bad at all now that you mention it..
Got any cosplay builds of your own or others that I can use as referance points for where such effects would be? Im guessing around the corners and seams, judging from my scale modelling experience.
As for the grainy feel, I dont know what caused it, but personally, at the time it didnt appear half bad considering how it was sort of reminiscent of the artstyle in reach (in my opinion), although i will try to correct it this time around.
As for weathering, I used some sandpaper to simulate scratches but I take it that it wasnt exactly succesful in being convincing.
I have some enamel washes such as engine soot, wash for gray hulls that resembles rust etc. Think those would be useful or do I have to go out to find some real deal mud? xD
Again if you have references, I would GREATLY appreciate it!
Now for my biggest issue, the indentesions and flexed parts. Especially at the top, i've noticed it was probably due to the lower poly count of the pep model, and im really not good with body filler but ill make the extra effort now that I have a goal to strive for!

Again, thank you so much! I REALLY appreciate you taking the time to go so in-depth!
Have an awesome day my friend!
 
I think a different colour visor will help things pop.

When I saw the red I immediately thought of the red spot putty that Punished Props uses. My own spot putty is an olive drab colour. I think a plasma burn would be accompanied by some actual damage (even if a shallow graze) and maybe more than just red - eg black in the middle, red towards the edge, then some bear silver where the paint/metal was knocked off. Or something like that. Though I've no idea what a good plasma burn would look like :)

I've recently got an airbrush and have had some fun poking around with it (repainting toy shotgun for a US Colonial Marine, for example), but I've still a lot to learn.

When I made my USCM armour out of worbla the base coat was silver/aluminium with a clearcoat following that. The clearcoat really dulled the shine but for me it was because I expected the Humbrol enamel hobby paints to get chipped off (and I was right) and it exposed the silver underneath, with the clearcoat helping stop the chipping going all the way through to the grey primer.

Other people apply the silver on top of their colours, simulating the chipped paint effect in the opposite direction. Usually they'll use one type of paint for the base, clearcoat it to seal that paint in, then do the weathering on top with a different type of paint. Punished Props uses acrylics for his colours, varnish for the clear coat, then oil based paint for his weathering/dirtying.

I'm actually still too new to painting and weathering to have really turned my gathered theory into practical knowledge that I can show you. But here are the closest I have;

* Deadshot arm gun (first pic below). Made from foam with enamel spray paint (because I was a noob). I tried the silver undercoat but enamel on soft foam is never a good idea and it was getting chipped right off to the blue foam underneath. So on convention day I'd keep a silver paint pen in my pocket for on the fly weathering. Which is ok since Deadshot's gear is incredibly beat up. You'll see most of the knocks and scrapes are on edges and protrusions
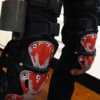
* Deadshot knee pads (second pic below). Again these were well worn and the weathering you see was entirely deliberate. They started off black but his ones are actually grey underneath the red. So I sprayed grey primer, smeared toothpaste (can use a condiment such as mustard) to mask off where I DIDN'T want the colour to be, then sprayed it with red. Once dry, wiped off the toothpaste, then followed up with a black wash which also gave the grey primer a slight gloss.
* USCM (third photo below); The only weathering I did was a light black wash but on con-day there was some friction that rubbed the enamel off, in this example you'll see it (silver) on the left side of the picture at the bottom of the shoulder piece

deadshot-weathering.jpgdeadshot-knee-pads-(7b).jpgUSCM-Sydnova-2018-Saturday-(2).jpg

The high points and protruding points are generally where you'll get your scuffs and scratches down to the 'metal'. A good example of that is the silvering on the top black visor thing on your helmet. Running your palm over the helmet will show you where the high points are. The low points won't have any or as much scuffing. The nooks, corners and crannies is where you'll get your dirt and grime, and can help add some depth. Blacks and browns is what Punished Props uses and 'burnt siena' is something he mentions often. He has a number of weathering videos inc drybrushing the silver scuffs. Since I'm limited in this area, his videos (and probably some others) will be of great benefit for you. Here is one of several weathering videos he does:

I thought your sandpaper weathering, particularly on the side of the helmet at the 'ear' and temple was actually pretty good, it was just the red threw me off when I was expecting the base colour of the helmet (silver?).

If you go with filling in things with Bondo/automotive filler, remember it sets really hard so if you've left lumps or put it on thick and lumpy you'll be doing a lot of sanding. So smear it on in thin even layers, then while still soft you can use a knife to cut off the big bumps you don't want. Easier to apply it in thin layers than adding a thick uneven layer. Again, there's tutorials on this too.
 
Status
Not open for further replies.
Back
Top