1st Build WandererTJ's Mjolnir Mk. V (Custom) - S-128 - [Hybrid Build] [Pic Heavy]

Status
Not open for further replies.

WandererTJ

Well-Known Member
Amazing work and write ups WandererTJ. Seen the suit all on instagram but never knew how the suit actually came to be. Awesome job with the upholstery foam. I never knew it had so much versatility. Is it easy to seal using spray on sealant like leak seal or plastidip(for upholstery foam)?

No it's a total pain! But only in the fact that you need A LOT of sealant to basically drown it.

Amazing work, WandererTJ! I am super duper jealous! Looks superb!

Thanks bro, I definitely appreciate it!
 

WandererTJ

Well-Known Member
I've gone back and added some more details to yesterday's posts, but I'm honestly not sure that I'd say I'm done with them.

Belt/Cod/Tail Plate:

Let's learn from our mistakes, let's learn from our mistakes, let's learn from our mistakes.
We're not going to pour hours into something scaled wrong again.

So what did I do?
I took the low poly geometry that was the game models, and then modeled the inside faces, the parts that touch the body that everything sticks out from. And then I only used those inside faces.
Glue? Nah, packing tape, it's all I needed to confirm that it was close enough.
If you want to go for a super speed build, honestly you might be able to get away with just doing this if you add a few details here and there.


Rough Draft Pics:
IMG_20190717_190806.jpg IMG_20190717_190813.jpg IMG_20190717_191006.jpg IMG_20190717_191437.jpg IMG_20190717_192543.jpg IMG_20190717_192559.jpg IMG_20190717_192610.jpg
I believe these photos were done before I fitted the Corset better.

When I finally made it to the official version, it did end up a little big, but I was fortunate to "only" have to tailor off 1.5" from the rear side panels.
Again, Armorsmith was great for ballparking measurements, but not great for getting things actually precise. It's really great at proportionating things and getting the length of everything, I think it just needs to grow as far as thicknesses are concerned.

So even though I did make a roughdraft, it wasn't enough.

I've seen a lot of builds skip out on geometry on the Belt/Cod, just like with the stomach piece, and I wanted to set a new bar for it.
I've done my best to capture all the angles inside and outside to help others who come by.
White = 5mm, Red = 3mm, Grey = 3/8".

This was like 10% templates and like 90% freehand.
Unlike with the rest of the armor, this one really felt like I was freehanding a lot more of it. There are SO many details left out of the game model that they just tossed into the texture file. That includes the entire recessed sections at the front and the rear of the belt that lead into the cod piece and butt plate.
Really ought to do side by sides with the game models, textures, and in-game references, because the #detailporn is here.

I'll also say it right now, you can do better than I did with the butt plate, the two upper structures on it can be built out a bit and be given more depth.

The belt attaches in the back with buckles. It secures to me via velcro in on the sides of the undersuit.
Straps on both sides? Okay, not exactly necessary, but 1) symmetry and 2) when you gotta go, you gotta go, I don't care what side I can reach quicker if I gotta pee.

I regret not reinforcing it more on the inside, because with the 5mm foam, I've gotten some bad flexing in the paint from it flapping around when I take it off.

I'm not actually wearing any of it in these pics.
The butt plate is sitting a little weird in these photos, but look better when its actually being worn.

Progress Pics:
IMG_20190720_164802.jpg IMG_20190720_164826.jpg IMG_20190720_164828.jpg IMG_20190721_215737.jpg IMG_20190721_215748.jpg IMG_20190723_135753.jpg IMG_20190723_135803.jpg IMG_20190723_143740.jpg IMG_20190723_160755.jpg IMG_20190725_211715.jpg IMG_20190725_211721.jpg IMG_20190725_211729.jpg IMG_20190725_211750.jpg IMG_20190725_211757.jpg IMG_20190725_211828.jpg IMG_20190725_212204.jpg IMG_20190725_212207.jpg IMG_20190725_212211.jpg IMG_20190725_212214.jpg IMG_20190725_212234.jpg IMG_20190725_212237.jpg IMG_20190725_212241.jpg IMG_20190725_212248.jpg IMG_20190725_212257.jpg IMG_20190725_212306.jpg IMG_20190725_212313.jpg IMG_20190725_212318.jpg IMG_20190725_212326.jpg

Model Used:
A mix of the game file and some other files, with a lot of free handing.
I also didn't have access to a printer for some of it, so I traced templates from my screen. Not fun, wouldn't recommend.

References:
reach_10600219_FullCODPIECE.jpg reach_10600226_FullCODPIECE.jpg reach_10600248_FullCODPIECEFRONT.jpg reach_10600259_FullCODPIECEBACK1.jpg reach_10600283_FullCODPIECE.jpg reach_10600287_FullCODPIECE.jpg reach_10600305_FullCODPIECE.jpg reach_10600313_FullCODPIECE.jpg reach_10614226_FullCODPIECESIDE1.jpg reach_10614292_FullCODPIECE.jpg reach_10614308_FullCODPIECEBACK2.jpg reach_10614309_FullCODPIECE.jpg reach_10715893_FullCODPIECESIDE2.jpg reach_10715894_FullCODPIECE.jpg
Credit: Ruze789
 
Last edited:

WandererTJ

Well-Known Member
Gloves and Paint Test

I previously covered my handplates in this post: http://www.405th.com/showthread.php?t=44695&p=734227&viewfull=1#post734227

I used the typical Rap4 gloves for my base.
I modified the gloves to my liking by taking a Dremel to the logo on the wrist strap and grinding it away.
I also cut out sections of the plastic on the back of the hand, because I felt that otherwise the handplates sat out too far.

Pictures:
IMG_20190715_132440.jpg IMG_20190715_133213.jpg IMG_20190715_133223.jpg IMG_20190715_133236.jpg IMG_20190715_134354.jpg IMG_20190715_134402.jpg IMG_20190715_134729.jpg IMG_20190715_134733.jpg IMG_20190715_134745.jpg IMG_20190718_095130.jpg IMG_20190718_095637.jpg IMG_20190718_102157.jpg IMG_20190718_103428.jpg IMG_20190718_120544.jpg IMG_20190718_121303.jpg IMG_20190718_122533.jpg IMG_20190718_123527.jpg IMG_20190718_123536.jpg IMG_20190718_123624.jpg IMG_20190718_123648.jpg IMG_20190718_124228.jpg IMG_20190718_174007.jpg IMG_20190718_174011.jpg IMG_20190718_174013.jpg
Paint Discussion:
The handplates were initially coated a few times with plastidip.
Krylon Brilliant Aluminum was used for the silver.
Rustoleum High Performance Enamel for Black
Krylon's Italian Olive was used for the green.
I used latex between coats so that I could later tear it away.
I used some crappy black acrylic for black washing.
I dry brushed some silver acrylic for all the scratches.
Clear coated with Duplicolor's Matte Wheel Clearcoat from O'Reilly's/Autozone.

Since your hands tend to hit and brush on things a lot, I decided to go very heavy with the weathering on these.
 

WandererTJ

Well-Known Member
Initial Paint Pass and First Suit Up

Progress Pics (Part 1):
I'm realizing I haven't really touched on filling gaps or seams all that much even though I should have a dedicated post to it.
I did it in several passes, each one waiting 2+ hours. I noted that the caulking seems to settle, so even when it looks filled in, you may have to add more later. I haven't mastered it yet, as I'm still struggling to get perfect transitions between my seams and the foam surface.

In the first batch of pics here, you'll see some Plastidip, the first go of Silver, and some applying of the latex for later weathering.

IMG_20190707_144532.jpg IMG_20190718_135646.jpg IMG_20190718_135652.jpg IMG_20190718_135706.jpg IMG_20190720_174017 .jpg IMG_20190728_212935.jpg IMG_20190731_190527.jpg IMG_20190802_190401.jpg IMG_20190804_104040.jpg IMG_20190804_184452.jpg
First Suit Up:
The video cuts out at 3:18 due to a power loss of the recording device.
What you miss is the torso being put on. The handler has to reach into the upper and lower front sides of the armpits and connect 4 total buckles.

Big note here: I added a very large band across the top of the ab wrap, effectively turning it into a corset, which I will stand by and continue to call it.
This is definitely the best way to not let anyone see any visible seams or gaps in your armor.
Progress Pics (Part 2):
Here you can see some of the initial color.
I discovered one thing while painting the CQC shoulder, and it turns out "dremel smooth" is very much not smooth. If you have surfaces you dremeled, you will likely need to take some caulking and apply a coat to the surface.
IMG_20190731_215404.jpg IMG_20190801_221800.jpg IMG_20190801_221921.jpg IMG_20190801_221924.jpg IMG_20190802_191053.jpg
Paints Used:
Silver - Krylon Brilliant Aluminum
Black - Rustoleum High Performance Enamel
Green - Krylon's Italian Olive
Clear Coat - Duplicolor's Matte Wheel Clearcoat from O'Reilly's/Autozone

I'm not suggesting that these are in any way good paints. There are some others I used as well that I'll have to find and post.
I've definitely not had the flexibility in the paint that I was hoping for, but I used rattle cans, which kinda limited my options.
 
Last edited:

WandererTJ

Well-Known Member
Thighs - Version 3

Oh my, totally overlooked this update. But I'm going to make sure to cover it now.

Thighs - Version 1
So these precious darlings helped build up my anxiety that led to my long leave the first time around.
Scaled right, I thought.
These fit nearly perfectly around my thighs, though I would say probably too snug.
It was impossible to get them all the way up to sit where I wanted.

Coming in with undersuit shorts, they did not work at all.
20190627_131754.jpg

Thighs - Version 2
Scaled wrong once again in Armorsmith... Too long and too wide even though it looked perfect on my digital avatar/mannequin.
Thankfully I stopped at 1 thigh this time and not two.

Might be interested in selling it though, same with the small ones, and
IMG_20190617_004247.jpg IMG_20190617_224611.jpg IMG_20190617_224616.jpg IMG_20190618_212024.jpg IMG_20190618_212100.jpg IMG_20190619_130506.jpg IMG_20190619_130523.jpg IMG_20190619_130527.jpg IMG_20190619_130532.jpg IMG_20190619_133148.jpg IMG_20190620_002317.jpg
This version ended up 4cm too tall, and I can't accept that, so I will go into a version 3 rebuild for the thigh.
This kind of stuff defeated me several years ago prolonging this build, but it's not stopping me now. Round 3: Fight!

Ankle covers are fully scratch. I could see the base shoes I used for the boot and needed to be able to hide them.
When I took this, I still needed to figure out exactly how I wanted them to fasten up. Visible zipper magically attached to the upholstery foam?
IMG_20190625_224105.jpg
If anyone is looking for thigh armor, I have some for sale! Both the small ones and I wouldn't mind making a matching larger thigh if it would make the sale.

Knee covers will come after completing thighs 3.0.

Thigh - Version 3
Scaled to perfection!
Apologies for the lack of progress pics on these, but when you make the same piece 3 times, you kinda just want to get done.
In the last shot, these are the middle thigh shown.
In the next to last shot, you can see that I actually did some seam filling with caulk.

IMG_20190701_215657.jpg IMG_20190701_215703.jpg IMG_20190701_215716.jpg IMG_20190702_002018.jpg IMG_20190702_002030.jpg IMG_20190702_002036.jpg IMG_20190703_194839.jpg IMG_20190715_110823.jpg

Do your best to not let screw ups of yours phase you.
Keep trying.


How bad is your range of movement for your right arm? Looks amazing! Can't wait to see tomorrow's update :D

:lol::lol::lol::lol::lol:
So unbelievably bad.
IMG_20190710_153741.jpg IMG_20190710_153808.jpg

When you add the torso in, doing even these are impossible. There is no existing "T-Pose" that can be done with this.
 
Last edited:

WandererTJ

Well-Known Member
This is going to be a multi-part update for all the paintingness.
Throughout these, I want to highlight the two-tone paint locations for everything, because every line should replicate the pattern in the game as accurately as possible.

I used a darker grey enamel for the recesses in the CQC and on some of the forearm.
It did NOT bond well with the silver and the blue painter's tape ripped A LOT of it up.
100% recommend using Frog Tape instead, but blue is what I had on hand.


Paint - Biceps & Shoulder Attachments
(Unweathered)
This is all Pre-Weathering Paint.
Kinda.
There IS weathering that has already been done, but it was built into the initial painting process by using latex between layers.

Bicep (Left):
IMG_20190804_120613.jpg IMG_20190804_120615.jpg IMG_20190804_120618.jpg IMG_20190804_120620.jpg IMG_20190804_120623.jpg IMG_20190804_120625.jpg IMG_20190804_120627.jpg IMG_20190804_120629.jpg

CQC Shoulder with Bicep (Left):
I had tape tear up some paint that I did not want to be torn up. Notably the black. I will go back and touch this up later.
It is my believe that all the black parts should not be weathered, or rather, should be done so in ways where you are not treating it as a metallic part.
I honestly think they are rubbery pieces. So if you want them to be weathered, buff them up a little bit, get them a little brighter, then add some more black that should be darker.
IMG_20190804_120528.jpg IMG_20190804_120530.jpg IMG_20190804_120532.jpg IMG_20190804_120534.jpg IMG_20190804_120537.jpg IMG_20190804_120539.jpg IMG_20190804_120544.jpg IMG_20190804_120552.jpg IMG_20190804_120557.jpg IMG_20190804_120559.jpg

Commando Shoulder with Bicep (Right):
IMG_20190804_111540.jpg IMG_20190804_111542.jpg IMG_20190804_111547.jpg IMG_20190804_111551.jpg IMG_20190804_111554.jpg IMG_20190804_111556.jpg IMG_20190804_111600.jpg IMG_20190804_111603.jpg IMG_20190804_111609.jpg IMG_20190804_111612.jpg
Touch Ups:
I really did not like the grey I used for the Commando shoulder, so I mixed some of the silver acrylic I had with some black and brushed on several coats.
IMG_20190804_163539.jpg
 
Last edited:

WandererTJ

Well-Known Member
Paint - Forearms
(Unweathered)

Had A LOT of the grey and the white get torn off from taping them off for the green.
Very unfortunate and frustrating, but wait... This is a Mark V build!
It also helps that you might expect your forearms to get pretty beaten up.
Going to touch all the grey back up before weathering. The white I'm going to live with. It's not TOO bad.
Maybe my character finished the fight with a atmospheric reentry in just the armor and a reentry kit.

Forearms, Painted:
IMG_20190804_191310.jpg IMG_20190804_191312.jpg IMG_20190804_191314.jpg IMG_20190804_191316.jpg IMG_20190804_191319.jpg IMG_20190804_191324.jpg IMG_20190804_191328.jpg IMG_20190804_191330.jpg IMG_20190804_191338.jpg IMG_20190804_191340.jpg IMG_20190804_191343.jpg IMG_20190804_191412.jpg IMG_20190804_191417.jpg IMG_20190804_191421.jpg IMG_20190804_191424.jpg IMG_20190804_191428.jpg
 

WandererTJ

Well-Known Member
Paint - Stomach Plate and the Belt/Cod/Tail Plate
(Unweathered)

I gotta be honest, I just REALLY want to provide you guys with as many references as possible for these parts.
Here to lift up the community as best as I can.
For those that read my previous posts, the butt plate could be better, but for a first try, I love how it turned out.

The cod piece has a lot of often overlooked recesses. At the top of the grey section it breaks down into a lot of subsections which were honestly difficult to do. The middle of the tri-split section should ideally be recessed more, but mine ended up about even with the others.

Once again, I hate the light grey here and will give it a darker metallic finish.

Stomach Plate:

IMG_20190804_120411.jpg IMG_20190804_120413.jpg IMG_20190804_120415.jpg IMG_20190804_120420.jpg IMG_20190804_120424.jpg IMG_20190804_120427.jpg IMG_20190804_120430.jpg
Belt/Cod/Tail Plate:
IMG_20190804_120253.jpg IMG_20190804_120254.jpg IMG_20190804_120255.jpg IMG_20190804_120259.jpg IMG_20190804_120300.jpg IMG_20190804_120302.jpg IMG_20190804_120303.jpg IMG_20190804_120305.jpg IMG_20190804_120307.jpg IMG_20190804_120309.jpg IMG_20190804_120310.jpg IMG_20190804_120312.jpg IMG_20190804_120317.jpg IMG_20190804_120322.jpg IMG_20190804_120326.jpg IMG_20190804_120329.jpg
 

WandererTJ

Well-Known Member
Note: Post #126 was updated to include Thigh v2 and Thigh v3


Paint - Leg Armor
(Unweathered)

Fun fact: I dremel the insides of my foam. Any inside edge/face that is near an opening and might get seen, I take all the material away. I don't want it to be known that it is foam until someone touches it.

Thighs:
Regarding the big silver battle damage:
At one point while doing the detailing, I used the wrong bit with my dremel, and made the recess too wide.
So then I just went at it and roughed it up more, then came back with hot glue in some spots to make it look a little melted.
IMG_20190804_120721.jpg IMG_20190804_120725.jpg IMG_20190804_120727.jpg IMG_20190804_120731.jpg IMG_20190804_120733.jpg IMG_20190804_120743.jpg IMG_20190804_120747.jpg IMG_20190804_120750.jpg IMG_20190804_120800.jpg IMG_20190804_120805.jpg

Grenadier Knees and Shins:
*ATTENTION* Grenadier Knees should match the primary color, not the secondary color. Painting my knees white was NOT an accident, it was a personal choice, as I strongly think that the color of the knee armor should match shin armor. I'd like to think that this might increase the perception of making your legs longer, but I don't know much about visual trickery. What I do know, is what I like, and I like the knees white

While most of the photos are unweathered, one of the knees was hit with a blackwash before these photos.
It was after that when I thought to myself "I should go take pictures real quick"

So the smokey white look, what caused it?
Well, this is just what it looked like after 1-2 coats of white.
I am sure that a 3rd coat would have left it much more uniformly white, but I liked the look and kept it. Less weathering later!

IMG_20190804_120901.jpg IMG_20190804_120904.jpg IMG_20190804_120909.jpg IMG_20190804_120911.jpg IMG_20190804_120915.jpg IMG_20190804_120920.jpg IMG_20190804_120923.jpg IMG_20190804_120930.jpg IMG_20190804_120933.jpg IMG_20190804_120938.jpg IMG_20190804_120944.jpg IMG_20190804_120948.jpg IMG_20190804_120951.jpg IMG_20190804_120956_01.jpg IMG_20190804_121000.jpg IMG_20190804_121003.jpg IMG_20190804_121006.jpg

Boots:
Reposting these first two pics so you guys can see the process of building up latex on each layer.
You can either peel it off between each color of paint, or build over the previous layer and pull it all of later.

If you compare them to the rest, you might notice I eliminated some of them. I honestly thought I was overdoing it in regards to paint chips, so I just painted over those spots. Thankfully you can't really tell the differentiation in layer thickness that I could have had due to trying to paint over spots with less paint on them.

IMG_20190804_104040.jpg IMG_20190804_184452.jpg IMG_20190806_095222.jpg IMG_20190806_095226.jpg IMG_20190806_095229.jpg IMG_20190806_095232.jpg IMG_20190806_095235.jpg IMG_20190806_095237.jpg IMG_20190806_095242.jpg IMG_20190806_095247.jpg IMG_20190806_095249.jpg IMG_20190806_095253.jpg IMG_20190806_095256.jpg IMG_20190806_095301.jpg IMG_20190806_095303.jpg IMG_20190806_095308.jpg IMG_20190806_095313.jpg
 
Last edited:

WandererTJ

Well-Known Member
Paint - Torso Armor
Torso progress pics, pre-weathering and clear coat.

Nearly every single piece I've done has gotten a minimum of 5 coats of paint. 1 Silver, 1 Black, and 5 White/3 Green.
I've done this just so that I can achieve a minor weathering effect of paint that has chipped off.
For these surfaces and edges I apply some liquid latex, let it dry, rotate my piece and apply more as necessary.
Between coats I pull all of that work off, and do it again for the next layer.

While the dark grey was sprayed on here, the black and the dark silver were both done by hand.

In the case of the boots, I thought I overweathered them, so when I was applying the latex over the black, there were rips/chips that I intentionally ignored.
IMG_20190806_084208.jpg IMG_20190806_210612.jpg IMG_20190807_034205.jpg IMG_20190807_105608.jpg IMG_20190807_105616.jpg IMG_20190807_105621.jpg IMG_20190807_105627.jpg IMG_20190807_105632.jpg IMG_20190807_105638.jpg IMG_20190807_105654.jpg IMG_20190807_105700.jpg IMG_20190807_105707.jpg IMG_20190729_123830.jpg

Peeling Up Latex:
Nothing too fancy with this, but wanted a detail shot showing you guys how peeling up latex reveals paint below.
IMG_20190806_225157.jpg IMG_20190806_225201.jpg IMG_20190806_225208.jpg IMG_20190807_005535.jpg

Spine Plates:
I have yet to really cover these at all, I freehanded them for the most part, using patterns on screen to assist with scaling.
The spine plates have an adapting thickness to them in the in-game models. They are deeply implanted, which made gauging the perfect thickness somewhat difficult, but the standard floor mats seemed to prove adequate.
The lower middle spine plate has a detailed drop in it. The rest of the details were etched in and heated.
Please note that the tips of the side pieces need to be painted to match the secondary color of your armor. It's very minor, but if you're striving for accuracy, you gotta do what you gotta do.
IMG_20190729_123830.jpg IMG_20190807_011336.jpg
References:
The first series of photos really help identify where you paint what. The last photo is the indicator of Primary vs Secondary armor color.
reach_10735320_FullSPINE.jpg reach_10735344_FullSPINE.jpg reach_10735367_FullSPINE.jpg reach_10735395_FullSPINE.jpg reach_10735396_FullSPINE.jpg reach_10735401_FullSPINE.jpg reach_10844680_FullSPINE.jpg reach_10844687_FullSPINE.jpg reach_10844688_FullSPINE.jpg reach_10844689_FullSPINE.jpg reach_10844690_FullSPINE.jpg reach_10844700_FullSPINE.jpg reach_10844703_FullSPINE.jpg reach_12013995_Full (Roadwarrior).jpg
Credits: Ruze789, Roadwarrior
 
Last edited:

WandererTJ

Well-Known Member
Decals Decals Decals!!!

These were absolutely amazingly fun to do.

I used a combination of the following:
• Semi-Reusable Vinyl Sticker Stencils
• Waterslide Decals on White
• Waterslide Decals on Clear
• Printer Paper cut out for a Hand-Painted Stencil on my Commando Shoulder
• Tape

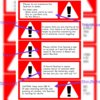
Warning Labels:
These allowed for a lot of creative freedom, because if you've looked at the suits at much as I have, you know all the warning labels are intentionally unintelligible. You can't read them, but you can come up with your own.
There are a total of 5 of them.
6 (WandererTJ).jpg 9.jpg 11.jpg

My Solution:
I like to have a laugh, and for such small decals and writing, I figured people might get close and personal to see what they say, so I did my best to keep them all themed and comical. Perhaps not the best anyone could come up with, but I enjoy them.
Also, as for the Big Caution Triangle, it's probably all in the same language, but I enjoyed putting caution/danger into 3 different languages for the decal.
IMG_20190628_225743.jpg 1562104418286__01.jpg IMG_20190722_114700.jpg

Primary Decals (Spartan Number and UNSC):
These proved a little bit of a challenge to get master level accuracy.
I spent a long time attempting to find the perfect military stencil to match. It absolutely doesn't exist.
I'm 90% certain that Bungie came up with their own damn font for this.
Using font searching tools that build results for you, I found the best matches that I could.
IMG_20190630_003541.jpg IMG_20190708_084612.jpg IMG_20190807_141557.jpg
I have to unfortunately be honest with the fact that I forgot which one I used, BUT, what I did was, with the font installed, I opened my preferred picture editing software (GIMP), and wrote and spaced out the UNSC how I wanted. Then I went and broke the letters into appropriate stencil segments to match the versions in game by just using the eraser tool.

Small Caution Triangles:
There are A LOT of little caution triangles. I also almost missed some myself. I also discovered little discrepancies like the colors of the decals per bicep on the MP models. They are different!!!
When I post the finished weathered pictures, be sure to look where the correct placement of these go.
For my height, the triangles were all 0.63" Tall.
IMG_20190722_114642.jpg IMG_20190731_204402__01.jpg

Waterslide Oopsies:
So you've printed out some awesome decals and you're ready to transfer them to your armor, right?
WRONG. Absolutely make sure that you apply at least 3 clear coats to cover the decals, otherwise you'll watch them wash away in front of you.
This can be played with somewhat. especially the clear waterslide paper. There are the caution stripes on the boots that like to move all over the place and cover up details. Due to their transparency, I actually placed them OVER the decals and you can still see them.
Waterslide decals are not the most fun to work with. They also like to peel up after a while. DO be sure to spray clear coats over them to seal them better to the armor. I would say carrying some backups with you if you're going to compete at Outpost is a good idea.
IMG_20190809_103728.jpg IMG_20190809_105723.jpg
Thankfully, with this guy I had a vinyl stencil as backup which turned out amazing.

ATTENTION: You have my permission to use my custom decals, BUT they are not to be made available for sale or shared to websites outside of the 405th. If you want to share them, link your friends to this post. If you enter in a contest or anyone asks you were you got them, be honest.

Caution Decal - Back.jpg Caution Decal - Shin, Left.jpg Caution Decal - Shin, Right.jpg Caution Decal - Thigh, Left.jpg Caution Decal - Thigh, Right.jpg Spartan Back Caution Triangle.png UNSC.png
If you would like to edit these and come up with your own funny text, you are welcome to.


Lastly, I want to make sure to thank TurboCharizard for printing the vinyl and white-backed waterslides for me.​
 
Last edited:

WandererTJ

Well-Known Member
Yelsanick0117 thank you bro. I miss you too, no joke.
I'm glad to be able to provide you and anyone else with motivation.

I regret not documenting my build here as I made it. When I first started off and I was posting, everyone who commented lifted me up and helped me get done what I did at the time.
But my goal was to cut out as many distractions as possible. Time not spent building stressed me out. I had so much to get done, I honestly didn't think I would.
That said, I got it wearable and can always upgrade!

he4thbar thank you my man, and thanks for following along, I see those likes!
The 405th community has been supremely helpful always, and I just want to be able to share as much as I can to uplift everyone still working on Reach/Mark V builds.
 

WandererTJ

Well-Known Member
Accessory - Smoke Grenades

What's a Mjolnir Mark V suit without having lots of attachments and accessories?
For starters, let's see what we're working with...

Emile Smoke Grenades - Game.png spartan_chest_grenades_emile_diffuse - Copy.jpg
(Fun fact: The "FH" is an Easter Egg, likely one of the developer's initials)
Oh dear....
Like with the majority of the game files, these aren't usable, but they are useful for coming up with an adequate scale.

3D Model:
I decided I'm going to 3D Model this one myself.
I could have been satisfied with just the shell, but I'm a huge fan of functional props and I wanted this to be able to hold stuff.
So I designed the top so that it could be screwed off.
Rather than designing threads that would be 3D Printed, I decided I would sacrifice some spice bottles to use their threads.
IMG_20190627_231546.jpg IMG_20190627_231807.jpg IMG_20190628_012908.jpg IMG_20190628_012950.jpg
3D Model by: WandererTJ

The Build:
Here are the 3D Prints and my salvaging the threads off the spice bottles.
I had hoped that these would be able to hold the tiny vodka bottles for the sake of laughs, but when designing them, I discovered they would be about a half inch too long, despite being the perfect diameter. I was not willing to compromise accuracy to accommodate them.
Good news though, they CAN hold little 5 Hour Energy bottles perfectly, which are a food-safe container you can put whatever you want in (if you wanted to).
IMG_20190701_195621_698.jpg IMG_20190722_110455.jpg IMG_20190722_110506.jpg IMG_20190722_114042.jpg IMG_20190722_143840.jpg
Thanks to TurboCharizard for 3D Printing these for me.​

Video of them in action can be found here on slide 2:

References Used:
While I'm not really fond of using another artist's interpretation for the basis of my work, I heavily based my work on the product from 3A, the 1/6th scale Emile. It seemed much more in line with the details that the game model and texture shared in comparison to the Play Arts Kai version, which is very different.
3A-Halo-Reach-Emile-002.jpg 3A-Halo-Reach-Emile-012.jpg 3A-Halo-Reach-EVA-014.jpg 3A-Halo-Reach-EVA-016.jpg 5498512857_4652ef882a.jpg poster,840x830,f8f8f8-pad,750x1000,f8f8f8.jpg
Gears of War 5 has presented new assets for our Emile and Kat characters. On Emile's Smoke Grenades in those models, they have pull-pins.
So maybe one day I'll get around to do that version. I was told be sa_roux of 343i that she personally oversaw their creation.
 
Last edited:

WandererTJ

Well-Known Member
Accessory - Magnum

This is my first BoomCo Mod, Retool, and Repaint that I completed.
A long while back, I came up with a custom color scheme I wanted to use on the M6H that I attempted here. Getting the yellow how I wanted it though proved impossible, so I ended up scrapping it. Eventually, when I get an airbrush, I should be able to achieve it.
received_932017467129952.png

Mod:
The BoomCo Magnums are not very cosplay friendly. They have a "Dart Detector" that keeps the gun cocked with no way to release it without having a dart. It does this to protect from dry-firing which can weaken the power of the gun over time. It simply had to go, and all you have to do for it is pull out a mechanism towards the front on the underside of the barrel.

Retool:
Branding is cool and all, but not when I want my cosplay to look dope, so I took my dremel and grinded away at all of the lettering.
I also wanted sights like the classic magnum, so I added them into the back, also using the Dremel, taking care not to fully penetrate the plastic.
After reassembly, I will add caulking into the recesses for the screws to hide them as best as possible.

Repaint:
IMG_20190719_202532.jpg IMG_20190719_202552.jpg IMG_20190719_202606.jpg IMG_20190719_202645.jpg IMG_20190719_202655.jpg IMG_20190719_203731.jpg IMG_20190719_203920.jpg
You can see in the last photo that the slide can mess up the paint a bit, but I kinda like the weathered look.

IMG_20190723_191847.jpg
I tried to stipple on some yellow, I wanted that faded decal look, but ended up ditching it.

Almost finished now. Paint is done in these, but I'm going to go back and dremel out a space for a Magnet. Using the bigger ones you can find at Hobby Lobby...which turned out not to be strong enough when walking down stairs or sudden jostles, but I'll try and figure out a better solution for round 2.
IMG_20190723_200220.jpg IMG_20190723_200224.jpg IMG_20190723_200229.jpg IMG_20190723_200234.jpg IMG_20190723_200244.jpg IMG_20190723_200247.jpg IMG_20190723_200250.jpg IMG_20190723_200255.jpg
Outdoor Photos

IMG_20190723_200504.jpg IMG_20190723_200512.jpg IMG_20190723_200527.jpg IMG_20190723_200534.jpg IMG_20190723_200550.jpg IMG_20190723_200614.jpg IMG_20190723_233955.jpg
Indoor Photos

IMG_20190807_205653.jpg IMG_20190807_210219.jpg IMG_20190809_185133.jpg
Magnets!

This has probably been an example of weathering when less is more. I probably went a little overkill.
 
Last edited:

xXDashIVXx

Sr Member
That turned out great, magnets and all! If you haven't played halo 5 alot(I am just throwing this out there because the base coat for the magnum is the same color) there is a shark face bomber skin for the magnum that looks neat. Great job turbo on the modeling as always too
 

WandererTJ

Well-Known Member
xXDashIVXx I model my own props. Turbo only helped me print things.
With the exception of a surprise he sent me, but I haven't covered it yet.

I didn't play a lot of 5, joined the party way late. My old crew are all on PS4 now. I mainly just played enough to get the 1000 GS.
 
Last edited:
Status
Not open for further replies.
Top