Charlie117
Member
YEEEEEEEEEEEEEEES epic work. when you finish the hole thing , can you share the foam files???
YEEEEEEEEEEEEEEES epic work. when you finish the hole thing , can you share the foam files???
")
ahh didnt see them lol thanks, there very very foam friendly!!! yay! got a question. how you going to do the fingers??
damn this shoulders did the Same.mistake to the Fingers and.gauntlets issue: i tried it one Day and have to.say: Cut off that handcovering piece like.you suggested - it works fine with it attached to the armpiece but you'll poke everything.and everyone with it Very nice work so far
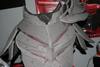
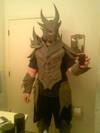
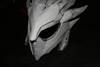
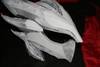
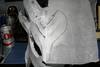
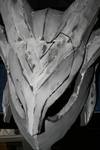
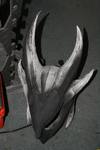
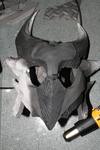
Well I've decided that I am finished and will move on to detailing and painting. I will be keeping just one pauldron as I feel it gives it a more unique look. I've decided to keep the fingers off for now, though I may add them later. I went ahead and used an old guitar hero strap to put around the waist of the torso to close it together. I used the remaining strips to attach the thigh pieces to the torso, hanging them from the waist strap by creating loops. I might come in and remove some of the foam just above the shoulders so that I can bend my arms further upwards without lifting the entire chest piece. I can lift them about parallel to the ground which is still pretty good. Now all I need is a weapon...

WHOA Those physics, that mirror has a reflection of you from the front, even though its behind you :$
Whoa. That is weird. That is one cool mirror you have there
Looking really good! I'm curious to the result
.Whoa Dude that went fast
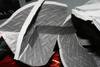
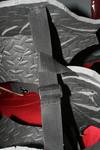
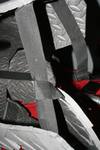
I'll be going with the default, in-game paint scheme. I've been practicing my technique to add the wrinkled, wavy, grainy, whatever you would call that texture haha. Luckily, the way I'll be doing it, I won't need to add the raised areas because doing the texture will create that effect. I'll add photos when I get there. I've also strapped the shoulder/upper arm to the torso piece, the plates under the big pauldrons. For the rivets, I'll be using thumb tacks with the dome top on them, and as they are already metal, I can apply them after I paint.
There is a technique involving plastic kitchen film used when people are doing marbling on TV sets which you can look up for the wrinkled effect. As for rivets have you tried small blobs of hot glue? It depends on the size of them though.
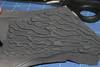
. Then I took hot glue and just created lines everywhere. Here's an example on a test piece: