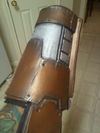
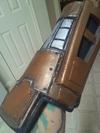
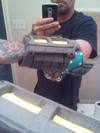
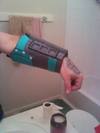
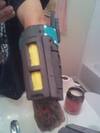
First attempts at foam armor.

Status
Not open for further replies.
Yeah, everyone says Mod Podge is a bad idea. Bounce+Foam Coat from Hot Wire Foam Factory works really well if you want a similar kind of base. You can check out my post in Ben Streeper's Foam Armoring thread to see some test results of them on the same type of foam.
 
looking really good..i considered taking a foam approach but decided i lacked the skill lol
keep up the awesome work. good luck man
 
Well real life has slowed me down, the experement with the clips doesnt work, yet....need something to force the foam to stay in shape, heat alone doesnt work. So back to the drawing board. I have some new patterns that i will try tonight after work, or maybe tomorrow. I,m thinking of elastic banding at the wrist....here is to the experement!
 
Well real life has slowed me down, the experement with the clips doesnt work, yet....need something to force the foam to stay in shape, heat alone doesnt work. So back to the drawing board. I have some new patterns that i will try tonight after work, or maybe tomorrow. I,m thinking of elastic banding at the wrist....here is to the experement!

Check out Timecon's thread and you find something to help you with your armor there as well. I have seen a lot of people on here use the duct tape dummys and heat to help mold the foam. I have also tried myself scoring the backside along the pep lines of my template and taking out just enough to make the angle I need and then hot glue the crevice and join up the sides to seal it back up. It's very solid after I use the that little method holds the shape I want.
http://www.405th.com/showthread.php/27231-Reach-and-mass-effects-its-been-awhile-for-me
 
By the way what kind of sanding block are you using and where did you get it? I don't want to use anything to abrasive and destroy it. Your edges look very smooth and it looks like you have what I want to use.
 
By the way what kind of sanding block are you using and where did you get it? I don't want to use anything to abrasive and destroy it. Your edges look very smooth and it looks like you have what I want to use.

Medium grit sanding sponges from harbor frieght, 6 pack, one side is 150 grit, the other is 220. the shape has a 45 degree beveled edge that has helped emensely in cleaning edges. It was $5 for a pack of 6? I think.......and thanks for the compliment by the way. :)
 
That does look really good. Can't wait to see the templates; those would be a fun and reasonably-priced project to outfit the kids in armor.

Some constructive criticism, if I may: remember to make your armor pieces big enough to go over whatever you plan to use for an undersuit.
 
This is looking pretty awesome, but I do have some questions... Where do you get your templates? Do you draw them yourself? If so, how do you go about doing so?
Thanks :)
 
I've been drawing my own templates from my measurements and looking at refrance from toys and screenshots. I used to do 3D modeling and am used to making my own templates/thinking in 3D. Now i'm just trying to apply it foam armor.
 
Well after looking at timecons armor I got planty of ides, here are the new forarm pieces in the first stage of painting. I wanted to match this helmet color.

eod_cnm.jpg


So here is the first attempt at colormatch for and EOD from reach.

reach2.jpg


another view

reachpaint1.jpg


I still need to add the brass rivets to the black holes for attachment plates but i think it works so far so good.
As allways comments, critisism is welcome. :)
 

Attachments

  • eod_cnm.jpg
    eod_cnm.jpg
    9.6 KB · Views: 80
  • reach2.jpg
    reach2.jpg
    45.7 KB · Views: 66
  • reachpaint1.jpg
    reachpaint1.jpg
    46.8 KB · Views: 73
Eurika! I found it!
Well first to share, 1, to add panel lines to foam, a nice hot soildering iron or wood burning tool. No need to precut the lines, draw them on and burn in slowly. Pull FROM the corners not to them. Second, brass headed tacks make great rivets! 3 bass relief (build ups) work and look better than cut relief.
2010-11-20112050.jpg

2010-11-20112110.jpg

2010-11-20112120.jpg


sorry if the pics arent the greatest, my camera is at the tattoo shop.
:)

Oh almost forgot!
Laytex caulk is great for seamimg edges and cuts.
 

Attachments

  • 2010-11-20112050.jpg
    2010-11-20112050.jpg
    68.8 KB · Views: 61
  • 2010-11-20112110.jpg
    2010-11-20112110.jpg
    54 KB · Views: 66
  • 2010-11-20112120.jpg
    2010-11-20112120.jpg
    61.9 KB · Views: 64
Ok, new updates, after 4 hours of total work for both pieces, i give you MK3 forarms! :) Primered and ready to paint.

2010-11-20140533.jpg


I have another new template that i will try to post tomorrow. After i make the templates I may do a short step by step with photos.
have a god day.
 

Attachments

  • 2010-11-20140533.jpg
    2010-11-20140533.jpg
    73.7 KB · Views: 69
ANOTHER UPDATE!

Well after a slow night at the shop i wanted to unwind. So I came home and finished the left shoulder and upper shield (ala emile).
Going to plasticoat it and start painting today. I am headed over to privateers to help with some casting later today and am so looking forward to trying hands on mold building and casting! If you are a texas noob, you realy should try to meet privateer or any member close to you, buildfriendships and learn from each other.
Enough ranting, here is the pic, again sorry for quality.....
2010-11-21102253.jpg
 

Attachments

  • 2010-11-21102253.jpg
    2010-11-21102253.jpg
    63.3 KB · Views: 66
damn i've never done foam armor myself but based on what i've seen here on the forums this looks great. makes me wonder if i shud be doin foam armor. anyways keep up the good work ino which thread ill be following
 
Well just got back from privateers place.....man talk about a musiem of props...WOW! I learned way to much to even try to go into it all in one post, but i do have some pics!

first attempt at slushie casting for handplates.
2010-11-21161441.jpg


first cast, not to bad.
2010-11-21161454.jpg


shoulder shield ready to primer
2010-11-21161612.jpg


I even got to learn how to "expanding foam cast parts" realy cool meathod!
here is one of Lee's Sniper rifle parts (scope)
2010-11-21161513.jpg

sorry for the blurry pic.... :(
Goal for the next week: chest.
After chest, PAINT!
have a good one~
 

Attachments

  • 2010-11-21161441.jpg
    2010-11-21161441.jpg
    82.7 KB · Views: 71
  • 2010-11-21161513.jpg
    2010-11-21161513.jpg
    50.4 KB · Views: 68
  • 2010-11-21161612.jpg
    2010-11-21161612.jpg
    79.5 KB · Views: 59
  • 2010-11-21161454.jpg
    2010-11-21161454.jpg
    50.9 KB · Views: 71
Status
Not open for further replies.
Back
Top