- Member DIN
- S132
Good morning 405th,
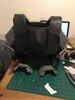
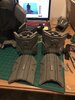
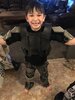
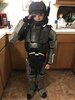
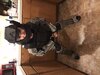
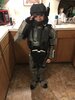
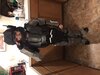
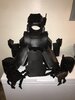
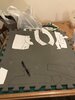
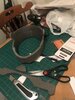
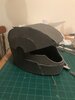
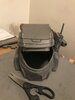
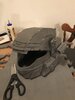
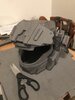
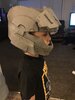
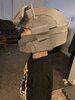
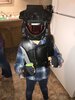
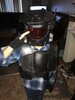
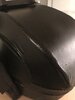
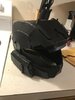
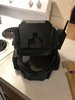
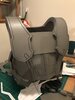
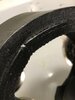
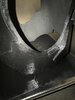
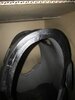
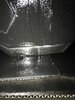
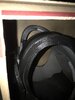
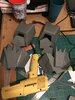
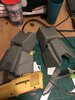
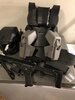
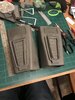
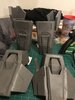
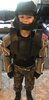
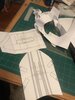
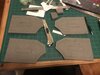
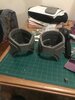
This is long overdue as I have been working diligently on my build. I will make sure I do a more formal and informative introduction in the Introduction thread, but my name is Matt and I am posting up my very first build in cosplay ever. Humongous shout out to TillXValhalla. I have definitely already learned a lot in technique, tools, cutting, sealing, seams, etc. but I am an open book and willing to learn more. TillXValhalla has helped me a lot along the way pointing me in the right direction, giving me links to tutorials, showing me cutting techniques (bevels kick my ass...lol) and much more. I know since this is my first build, its quite rough but I thought I would show you all my overall progress so far. Again, I have never made any cosplay before with the exception of a Deathstroke get-up for Halloween one year and all I did was throw together tactical gear I already had and painted a mask black and orange lol This is probably the most construction I've done on some sort of craft project, ever in my life. Any tips and critique is quite welcome. Again I am aware how rough it is, especially the helmet but here you guys go! Thanks for reading!
This is long overdue as I have been working diligently on my build. I will make sure I do a more formal and informative introduction in the Introduction thread, but my name is Matt and I am posting up my very first build in cosplay ever. Humongous shout out to TillXValhalla. I have definitely already learned a lot in technique, tools, cutting, sealing, seams, etc. but I am an open book and willing to learn more. TillXValhalla has helped me a lot along the way pointing me in the right direction, giving me links to tutorials, showing me cutting techniques (bevels kick my ass...lol) and much more. I know since this is my first build, its quite rough but I thought I would show you all my overall progress so far. Again, I have never made any cosplay before with the exception of a Deathstroke get-up for Halloween one year and all I did was throw together tactical gear I already had and painted a mask black and orange lol This is probably the most construction I've done on some sort of craft project, ever in my life. Any tips and critique is quite welcome. Again I am aware how rough it is, especially the helmet but here you guys go! Thanks for reading!
Attachments
-
 0.jpg1.2 MB · Views: 269
 -
 1.JPG1.5 MB · Views: 276
 -
 2.JPG1.2 MB · Views: 276
 -
 3.JPG1.2 MB · Views: 261
 -
 4.jpg980.4 KB · Views: 264
 -
 5.jpg1.1 MB · Views: 264
 -
 6.jpg1 MB · Views: 289
 -
 7.jpg1.4 MB · Views: 267
 -
 8.jpg1.4 MB · Views: 275
 -
 9.jpg1.4 MB · Views: 257
 -
 10.jpg1.6 MB · Views: 276
 -
 11.jpg1.5 MB · Views: 302
 -
 12.JPG1.1 MB · Views: 251
 -
 13.JPG1.2 MB · Views: 281
 -
 14.JPG1.2 MB · Views: 263
 -
 15.JPG1.2 MB · Views: 272
 -
 17.JPG1.2 MB · Views: 252
 -
 18.JPG1.4 MB · Views: 265
 -
 19.JPG1.3 MB · Views: 260
 -
 20.jpg1.9 MB · Views: 272
 -
 21.jpg1 MB · Views: 237
 -
 22.jpg1.5 MB · Views: 248
 -
 23.jpg838.4 KB · Views: 272
 -
 24.JPG1.4 MB · Views: 245
 -
 25.JPG1.4 MB · Views: 252
 -
 26.JPG1.2 MB · Views: 255
 -
 27.JPG1.5 MB · Views: 252
 -
 28.JPG1.4 MB · Views: 257
 -
 29.jpg1.5 MB · Views: 304
 -
 30.JPG1.3 MB · Views: 261
 -
 31.JPG1.8 MB · Views: 242
 -
 32.JPG1.4 MB · Views: 259
 -
 Compilation-1.JPG1.1 MB · Views: 244
Last edited: