How to remove Pepakura wrinkles?

Status
Not open for further replies.

xXDashIVXx

Sr Member
So I am going to finish up my timmy project, got a second and scaled version on the way, but is there any way to prevent this? I keep getting these wrinkles and indents on the helmet and I dont know if I'm doing something wrong or it will fix itself once i resin.
Any advice?
15443850600921505816775836228228.jpg
 
It's paper, and therefore won't be perfect.

Hint #1: go slow. Make sure each seam is perfect and tight. It'll take forever and be totally mind- numbing, but you get what you pay for.

Hint #2: pay attention to the small areas and details. The big stuff will take care of itself if you're careful with it.

Hint #3: goes along with hint 1, but it's take your time. "I want this helmet tomorrow night" is going to get you embarrassing results. Once you FINALLY have it pepped, take care applying the resin, and make sure to coat the whole thing several times. If your pep is perfect, and your resin is perfect, your fiberglass will be, too. After that, it's just a butt-load of bondo and sand, but be careful about the bondo as well.
 
Are you scoring each fold line first? it will clean up the edges a lot, I use a ball point pen and it works great. it also looks like you could use a touch more glue (around 1364 and 1367) , hold the paper together until its really stuck together.
 
what kind of glue are you using also? I used loctite super glue gel with the little control applicator. It really helped cause its thick and sits on the surface without absorbing into the paper. gives you a little longer ability to stick what you want where.

Scoring is huge for making clean pep also. Some of the surface voids you can clean up with bondo at the end of the process but you don't want to have to completely re-surface the whole piece. Defeats the purpose.
 
It looks like on a few of your seams you have the tabs alternating from one side to the other. In theory, this could help with alignment, but the seam will never close properly. Try to edit the tabs to the same side of the seam before you print and take your time aligning them when you glue it up. This could cut down on the wrinkling. As for what you have there, nothing a bit of resin and bondo couldn't fix.
 
Ok, thank you all! I am scoring my folds before working on them, and Asgardianhammer I am using superglue. It may not be the best item but It is readily accessible and is working fine I guess. Carpathia that is a great idea, but I have already cut out and started assembling, but I will keep that in mind for my next project!
I wanted my project to look as clean as possible to cut down on sanding, and thank you all for being such a great help!
 
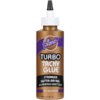
I use Aleene's Turbo Tacky Glue when pepping. A very small bead on the tab, join the pieces, hold for 10-15 seconds and it has started setting. After 30-40 seconds, those pieces aren't coming apart unless they tear. Best part, if you get some on your finger, it peels right off like school glue at the end of your session.

'Bout all I can offer on this topic. The duty experts seemed to have covered the rest. LOL
3ec7c7899d4377a48d606d8a26156befb6.jpg
 
Before the resin bondo process if you have any of those or areas where paper is sticking up and won't stay down, take a razor blade and carefully edge them off. I have found it easier to fill a small hole than to keep sanding the paper pushing up the resin/bondo.
 
Now that I've started pepping again I was looking for what might be causing your wrinkles so you can avoid them in the future.

One cause can be moisture. If it's humid where you live, if you sweat while you're folding the tabs or gluing, if the cardstock is thin or maybe too much liquid glue. I use hot glue and I don't come across this issue.

It also seems like the wrinkles for you are happening right at the tab intersections. Tabs are a pain. I like to make them as small as possible, 3mm seems to work best for me. I also dont like that Pep Designer auto alternates the tabs. Interlocking adds to the strength but if you don't cut them perfectly then they have a chance to buckle into each other. Not to mention taking longer to cut out. Next time try moving all the tabs in a row to one side except for one or two tabs. You do need some interlocking to help you line things up.
 
I like and agree with PerniciousDuke's recommendation to place more tabs along a shared seam (something that can be done in the Pepakura Designer program by editing flaps). I usually try to have at least two or three tabs on one side before switching to the other though sometimes more is better. If the parts layout of the unfold is symmetrical, it's good to edit the flaps so they are consistent between the two symmetrical parts...that way the paper gets built consistently too and the user is kind of cutting and gluing the exact same piece twice (except just mirrored).

xXDashIVXx, you might be using a little too much glue, you want to make each connection as flat as possible and if you have too much hot glue (for instance) the piece and the tab might not mate as flat as possible. Like Sean Anwalt suggested, work slow on one connection at a time and try to use just enough glue and no more, gently press for a bit and ensure the connection is flat before moving onto the next.

It looks like your alignment along the seams is okay, but the trick with this is to align the outer bounds of the edge numbers (i.e. if you're joining edge 137, the left-most part of the upright number one needs to align with the left-most part of the upside-down number seven on the other side of the edge). I hope that makes sense...proper alignment is critical for an accurate build to minimize any overall skew or warping.

I like to use hot glue, if while you're building you decide you don't like a connection you just made you can hold the side of the hot metal gun tip to the paper to reheat the glue and take the connection apart to redo it. Be careful not to burn yourself though. If you do this, make sure to remove any excess glue on each side of the connection before re-connecting (so the pieces fit as flat as possible).

Good luck and keep building! Practice goes a long way in improving so as you put more paper together your fingers will work more precisely and eventually you can go faster.
I have done most of this, and am using as little amounts of super glue as possible, but I think it may be the flaps that caused it. Thanks for the advice everyone!
 
I have done most of this, and am using as little amounts of super glue as possible, but I think it may be the flaps that caused it. Thanks for the advice everyone!

I am glad you seem to have found a solution too your problem.
If I also may suggest using thicker paper? It helps with initial stability and if you fold all the lines before assembling your pep you get nice and clean results.

If you want to sand your helmet afterwards, better don't use hotglue, that can get quite messy and worst case ruin your sanding machine. I work with all-purpose craft glue, just make sure its not any super glue.

Hope i could help a little :)

~~I_chan
Hot glue is convinient but I hate using it. I also used regular card stock and pre scored all the lines
 
Status
Not open for further replies.
Back
Top