1st Build JustinIsTree's Reach Build

Status
Not open for further replies.

JustinIsTree

New Member
Hello everyone!

I'm JustinIsTree and I guess here's my (technically second) step into the grand world of Halo cosplay. Years ago for Halloween when I was like 14 or 15, I wanted to be Master Chief so my dad took the leftover cardboard we had in the garage and made me a full suit from that in just a few weeks. Here it is (which is also my pfp):

halo.jpg


So here I am, probably around 10 years later, moved out from home, just as much of a Halo fan as before, and ready to build my own armor. I've been wanting to do a full suit for YEARS but never really had the drive to go all out. Then back in 2019 I went to RTX in Austin, TX and I met a member of the 405th there (sorry that I don't remember your name) and he pointed me in the direction of this group. If you're this dude, thanks!

1642461541917.jpeg


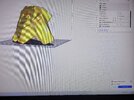
Alright that's enough of my backstory, now to get to the plan. Halo Reach armor is one of my favorites (next to Infinite), so I'm going with that. I'm planning on 3D printing the entire suit since I'm most familiar with that method. Also I've heard of something about tiers of armor (but I have no idea what that is so if someone could just educate me on that I'd appreciate it!).

jfo spartan.jpg


This is basically the look I'll be going for. JFO helmet, ODST and Commander Shoulders, and lots of tactical pouches. The color is something I'll probably be considering for a while, but I am leaning towards a darker color with blue accents. I'll definitely need help with different aspects of this build as I go, so I'll appreciate any help I can get.

I'll be posting soon with the parts that I've printed already, so until then... thanks for reading lol
 
Looking forward to your build JustinIsTree ! To enlighten you on Tiers:

We have a system called "Deployment", where members can submit photos of their costumes to be evaluated based on their accuracy. This is ranked in three tiers, 1-3, with Tier 3 being the most accurate to Halo lore, be it from a game, comic, film etc. - something from an official Halo source. You don't need to be deployed to be an active part of the 405th.

Here is some more info from the Membership FAQ:
1642464356800.png
 
Looking forward to your build JustinIsTree ! To enlighten you on Tiers:

We have a system called "Deployment", where members can submit photos of their costumes to be evaluated based on their accuracy. This is ranked in three tiers, 1-3, with Tier 3 being the most accurate to Halo lore, be it from a game, comic, film etc. - something from an official Halo source. You don't need to be deployed to be an active part of the 405th.

Here is some more info from the Membership FAQ:
View attachment 313152
Thanks for the clarification! I've already decided I'm just going to do my best, regardless of whether I knew what the tiers were or not. Good information to have anyways!
 
Alright progress post #1:

(All 3D files obtained from NerdForgeDesigns)
After 7d 5h 50min of printing my JFO helmet, it's done and as beautiful as I could have imagined. Only issue is that I feel like I scaled it up a little too big. Let me know what ya'll think. I know it does give good room for any padding or fans I'd like to add, so that's a positive at least.

20220118_092341.jpg
20220118_092259.jpg
20220118_092242.jpg


I also printed the wrist/hand pieces as just a small thing to get done after having such a long print for the helmet. I'll be testing out any sanding/priming/painting on the wrists before moving on to the helmet (especially since I'm not sure if I'll print a slightly smaller helmet in the future).

Currently working on the forearms next. Sliced the model up in Meshmixer so I can fit check before I print the whole thing. I do have Armorsmith with all the armor fit onto it but I can never be too safe, ya know?

Here's a bonus pic of my little helper:

20220118_091853.jpg
 
Last edited:
Woops I never put in the step before I fully printed the forearms. I did the tip that I saw a lot of people do where you slice the forearm in Meshmixer and print them out to make sure your hand can fit through the smallest end of the forearm piece.

I'm glad I did this because as you can see from this picture... it's like I'm speaking italian.

Italian Hand GIF
20220118_124541.jpg


Scaled it up to the 125% mark that I thought would work, and voila, the upscaled version fits.

20220122_233522.jpg
20220118_213453.jpg


Alright, now refer to the post above this one to see the printed forearm :D
I'll get the hang of these forums eventually...hopefully
 
Last edited:
I have muscles yes. The medium bicep was finally printed and I feel like it's a pretty good size!

20220127_095026.jpg


Although, I'm just not too sure about how well-fitting other people's armor is. Do people usually print armor to be as tight as possible or do they add padding inside to make it a tighter fit? I'm tempted to go smaller on the biceps so that there's less padding work to be done but I do like thicc look.

20220127_1034301.jpg
20220127_103430.jpg
20220127_100011.jpg


^^ Pic dump. Cat, cat and tree support emo bangs
 
Nice kitty. That looks about right for biceps, usually what I do is make the shell big, then do soft padding on the bis and tris with shallower harder padding like EVA foam on the inner and outer arm. That way, the natural ovalular cross-section of your arm keeps stuff from rotating around too much.
 
I keep putting off on making new posts here since I feel I never have enough stuff to put here... woops lol. But then I realized that I printed 5 additional pieces since then. Anyways, what I've done since I finished my left bicep was resize a smaller bicep, print that then I started on the chest. Because I'm using a CR10 S4, I was able to get away with splitting it into 3 pieces: Upper left, upper right, and bottom.

Here's a pic of the two upper pieces together. The upper left piece unfortunately has a slight deformation on the bottom/middle corner, so I'll need to use a bunch of filler putty or something to fill it in (if you have any recommendations for filling medium to small holes in a build, I'd appreciate the help!).

20220212_200528 (1).jpg


Then here comes a small learning lesson that I definitely have known already but just decided to make printing harder for me for a couple days?? I was trying to print the bottom of the chest piece in this orientation:

20220129_021106.jpg
20220217_011522.jpg


Each time I tried printing it like this, the supports would separate and the print would fail (shown in second picture). Now, you may say: "But Justin, theres a perfectly good flat surface where you spliced the part that could be the base of your print!". You'd be correct. Flipping the part around like this next picture resulted in a perfect one-try print.

20220217_134018.jpg
20220222_191830 (1).jpg


I temporarily taped the chest together and put on what I had to check the scaling again:

20220223_180543.jpg


About a month passes, and I get a spark of motivation so I finally started sanding my helmet to prep for priming, and then also within this last week I printed both the right bicep and right forearm pieces. Here's how it all looks so far! I feel good about the scaling, overall, but I'm still kind of iffy on the helmet sizing. It's an acceptable size but I feel it could be a few percentages smaller and be perfect. Oh well, I'll keep going with this for now.

20220406_150138.jpg
20220406_150711.jpg
 

Attachments

  • 20220129_021106.jpg
    20220129_021106.jpg
    4.9 MB · Views: 80
Now here's where I might need some advice or help since I've hit a decision wall of sorts. I've been printing in PLA this whole time. Weeks of printing time put into this. But I'm afraid that I'm realizing too late that I should be using a filament that's a bit more thermally resistant since I live in Texas and every time I would put this armor into my car, it's a risk of deformation and losing my work. I have an open 3d printer (CR10 S4) so printing in ABS is sort of out of the question since A: I don't want any risk of fumes in my small apartment (and cat), and B: I wouldn't be able to maintain the temperature as well when it's open. PETG is what I'm leaning towards at the moment. I've heard it's a bit annoying to get the printing where I'd want it, but I'm hoping I'd be able to print with it without an enclosure. I'm not exactly asking for people to just tell me what to do but I guess I'd like to hear what others have done.

Oh also I think I'll keep working on the PLA portion of my armor while being extremely careful of deformation whenever I transport it places in the future but then I'll print the rest in another material.
 
I've printed my whole suit in PLA. Yes I am slightly worried about thermal deformation - However, there are ways to strengthen + reinforce the PLA (ex. fiberglass)
Do you think it'd be worth the effort of trying to print with PETG to finish up the second half (roughly) of this suit? I think I'll at least try to print a few things in PETG to see if I can get as comfortable with it as PLA. I guess I'll probably have to decide between doing PLA and looking to reinforce it or switching to PETG/making an enclosure and switching to ABS.
 
Do you think it'd be worth the effort of trying to print with PETG to finish up the second half (roughly) of this suit? I think I'll at least try to print a few things in PETG to see if I can get as comfortable with it as PLA. I guess I'll probably have to decide between doing PLA and looking to reinforce it or switching to PETG/making an enclosure and switching to ABS.

I mainly went with PLA because it is easy to print and I was used to working with it. Since I printed my suit I've started using eSun PLA+ which is really easy to print and has a bit higher resistance to temperature.
 
Fun little update: I've been keeping track of my print times for each piece and I just passed 31 days.. Here's to another month of printing.

View attachment 316713

(PS. I live in a small apartment and I slowly drive myself more and more insane whenever I have my printer running for days on end)


What kind of print settings are you using? I was able to print my entire suit with ~38 days of print time.

 
What kind of print settings are you using? I was able to print my entire suit with ~38 days of print time.


Cr10 S4
layer height: .2mm
infill: 10%
print speed: 50mm/s (admittedly haven't tried going faster),
travel speed: 150mm/s.
I usually print a raft which sometimes can take upward of an hour or two just to finish that.
Tree supports, 0% infill
 
Status
Not open for further replies.
Back
Top