Props M247 Foamboard

Status
Not open for further replies.
Ok next piece is done and attached......well I do have 2 other pieces as well but no where to attach to yet so they don't count.

Here is the "Chamber" attached to the back end of the main barrel:

View attachment 251185

Alright....not much to see but still progress is progress. I was looking over all my pieces....I'm thinking that several of them would look better w/ some craft foam covering a lot of my mistakes and seams.....just an idea. Now I was also under the impression that I would have had to use something other than FB to create the cylindrical pieces....but I've been working on my Foam Board-Fu.....Yes I said it...FBF.....and I think I can make a passable one......time will tell. I'm going to need honest opinions once I have it built to see if I should continue in that direction or not.....lately my judgment has been woefully lacking.

Looking really good. Keep at it considering how it looks now. It will be perfect when you finish. My poor girl is do for a revisit after getting limp barrel itus due to weight.
 
Dam you're up early........I don't recall, did you put any type of dowel on the inside? I'll have to revisit your build thread.......Thanks for the compliment and knowing you.....you'll get her back in shape in no time.
 
Last edited:
After-weekend update:

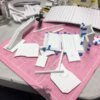
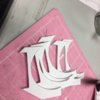
It's like 6 times the the effort compared to foaming.......and more pieces than anything Iv'e ever done. IMG_0671.JPG. Example: 1 piece of EVA foam could have made this piece but with FB......IMG_0670.JPG....it's 5 slices.

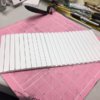
Believe it or not, creating the cylinder shape wasn't that hard.....nor was making the tapered section for the front.

IMG_0669.JPG just following the template fold lines and making undercuts on the backside.........IMG_0676.JPG IMG_0677.JPG......not bad. I do need to do something about the forward grips though. The PVC tube isn't exactly perfectly angled so there is some pull to the FB sides and the glue is just pulling away. My thinking is to get a couple of washers, nuts and thread a thin bolt through either end to secure the whole thing.........but any way I do it.....so far so good.

IMG_0675.JPG Look ma, 1 hand!!! The effort is well worth the end product!!!!
 
Dam you're up early........I don't recall, did you put any type of dowel on the inside? I'll have to revisit your build thread.......Thanks for the compliment and knowing you.....you'll get her back in shape in no time.
Cant even remember why I was up so early. Probably just me not sleeping due to my back being a pest.

And no I didnt have any support running through the barrel which was a real error on my part. still much in the learning stage when I did her. I will eventually get around to doing a total rebuild. Mixed foam and 3d print though this time. thinking body in foam and then things like the handles and supports as a 3d print. But really it is down the road when I dont have other projects looking me in the face going you need to finish this to get paid.
 
Hello, hello, hello!!!!! It's been a while......Holiday's........ vacation...... 2nd job.......but I still managed to get some work done on my new baby. Finished assembling the majority of the rear chamber and attached everything together. Here's my daughter Rock-en out w/ "Little Painless".....A few things to add though:

Lower barrel, rear handle, some top pieces on the rear chamber, fire control box (Assembled but not attached yet) and a ton of minor details. And all that before a few coats of 50/50 and then paint......

Now as I was looking at the overall assembled piece....I should have put in a central rod for more stability. This is the most detailed and elaborate piece I have ever made w/ FB and I'm just hoping that my glue points are enough to keep it straight and unbent. A few well placed "inconspicuous" strap pieces might help a bit, but I'm at the point where I don't think dropping it now would be a good idea. Having my son spin around the living room demonstrating his "No Scope" firing technique w/ this...... got me incredibly nervous. I'm also hoping that the 50/50 will shore up the exterior enough that I can breath a little better if I bump into anything.

Well that's it for now.....and once again it may be a while till the next update because I was just commissioned for a big construction job that will take care of some bills and at least 2 cons for this year.......have to have priorities straight. ;)

As always, comments, criticisms and mistakes made.....are always welcome.

DD

IMG_0704.JPG
IMG_0705.JPG
 
After Weekend Update:

I know I said that it would be a while till the next update.....but the big job hasn't started yet and I had time in between layers of paint drying to get some stuff done.

I added in some more detail framing screws and some pan head screws for stabilizing and securing pieces together.........which I should have done earlier......While relocating, I heard a large cracking noise.....apparently one of my seams was not glued fully. The bad part was it wasn't a section piece to section piece that failed. It was the piece that attached one section to another that pulled off. It was the point right under the forward grip at the end of the forward chamber Not a huge problem....just a concern now that this might happen again.

IMG_0711.JPG

IMG_0708.JPG


And yes, you guessed it.....I not only have a rear grip.....it has a working trigger!!!! I came across my old PC joystick and took the sucker apart.

IMG_0709.JPG


Took some PVC piping, heated it up (I was too lazy to cut and re-glue) bent it to shape and fit the whole thing together. A few more well placed screws and the back end is just about finished.

IMG_0710.JPG


Add on the fire control box......now I just have to find the right "Cable/Hose" to connect the box to the rear chamber, build and attach the lower barrel and then I can start the 50/50.
 
Last edited:
I didn't see that you started this up again. Gonna have to subscribe cause this is looking awesome Foam Board Master Dirt!

Love the joystick repurposed.
 
Took some PVC piping, heated it up (I was too lazy to cut and re-glue) bent it to shape and fit the whole thing together. A few more well placed screws and the back end is just about finished....

I've always found it hilarious how floppy PVC gets when heated. Must be the ancient greek in me.

Maybe you can replace the barrel with a PVC pipe that goes most of the way through if you're having stability concerns. Maybe a few 4-way intersections branching off to help the more distant parts.
 
Stability isn’t an issue with this. This has no flop to it like EVA does. In that kind of a build you would need some internal stabilization like you suggest. Foam board is much more ridged and since I built it in section each piece is very solid. I dropped several of the pieces prior to full assembly w/o incident. I’m currently working on the final piece, the lower barrel, and just covering up as many of the exposed layer edges of the foam that I can. Hopefully I can get to the 50/50 by mid week and base coat by next weekend. Not going to make it for my Purim Party though . At least I have my DMR.

I have a question though. The colored film for my visor developed air bubbles since I last wore it. If I heat it w/ my heat gun will it destroy the film? Or should I just poke the bubbles with a pin and try to squeeze the air out. I’m just afraid that will just make crease marks in the visor.
 
I have a question though. The colored film for my visor developed air bubbles since I last wore it. If I heat it w/ my heat gun will it destroy the film? Or should I just poke the bubbles with a pin and try to squeeze the air out. I’m just afraid that will just make crease marks in the visor.

Air/moisture + heat = expansion

I'd stay away from taking a heat gun to it in case the bubbles get larger or you create more of them from pores that aren't visible. It's probably safest to puncture them with a pin and press smooth with a credit card or something similar.
 
That is what I was afraid of.....Either way, I think that I'm going to end up e/ creases in the visor....Thank you for the advise.....
 
Last edited:
Thanks TheAstroBot, I'll post the actual dimensions and weight (after 50/50 and paint), but yes it is very ungainly.....kind of hard to maneuver through doorways if I'm not careful. This is the largest prop I have ever built.
 
Wow.....It's been months since I touched this......It actually took some damage while just sitting around doing nothing. The magazine cartridge broke off, the upper barrel tip started to pull off the front, the forward handle had to be reattached, and this past summer due to the heat and weight of the piece, the whole thing developed a downward droop. Not much and nothing you would notice if I keep moving it around but it bothers me and may be an indicator of structural defects that might develop later on. So repair work was done and since I was already in the ballpark, I finished the lower barrel, added so detail pieces and the control cable. I've also been putting craft foam on the exposed parts edges of the foamboard to clean it up. I tried using contact cement but it sometimes ate the foam a bit. I think I'll go w/ some card stock and PVC for the rest. Once all these exposed parts are covered up, it will be time for some 50/50 and painting. Its also my hope that the 50/50 will strengthen the whole thing as well.

IMG_0345.JPG
IMG_0346.JPG
 
Esh-uh- I- whu- if I had known, Dirtdives, that you had this lurking about, I'd have been so much kinder during our epic rap battle!

I'm pretty jealous, that looks fantastic!


No you wouldn't.............I wouldn't want you to be kinder......that would just be patronizing. And you wouldn't be at your best during the rap battle. As for being jealous, don't. this was a huge pain to build. And it still has a long way to go before finishing. But thanks.
 
Status
Not open for further replies.
Back
Top