If you're in Canada, I find that plasti-dip is not readily available (can't find it in hardware store)... so it's be great to have an alternative that works just the same.
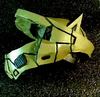
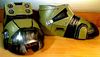
All my parts are put together WOOOOOHOOOOO
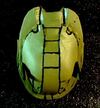
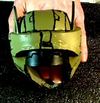
Only thing left now is painting everything and maybe putting a better visor in the helm.
I redid the left forearm and took video footage of the process. I have the first video up on my squidoo page showing how I cut my shapes. More videos are coming, I have to edit them down for size first. www.squidoo.com/how-to-make-halo-armor
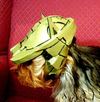
Here is the completed piece
Tutorial update
I posted the next tutorial video on my squidoo page, it shows how I do mountain folds. Follow the link in my sig.
Next up will be how I form the piece with a heat gun to get the nice round shape. Converting video and uploading takes abit, have patience
Thanks for the kudos. The tut vids are on hold as I am off to go paint the rest of the suit, we should have some pics up by tommorow, see how far we get with it.
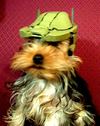
I like the MC helm too, so I made one for my dog! Enjoy
This looks awesome man! Way cleaner than my foam build is going. My only question is, how did you make your templates? I simply cut out the low def templates, and am essentially making the pep files, but you look like you used much migger pieces. Any way you could post up your templates to help fellow foamers out? Thanks!
This looks awesome man! Way cleaner than my foam build is going. My only question is, how did you make your templates? I simply cut out the low def templates, and am essentially making the pep files, but you look like you used much migger pieces. Any way you could post up your templates to help fellow foamers out? Thanks!
My templates are the same as yours I simply join the paper shapes together where I dont want a glue seam and try to have exposed edges either where there is a definition line or raised ridge detail. I find that I am modifying the foam shapes afterwards anyway so the patterns are just a guide for the basic armor shape. Improvise on the spot, this is a creative process, is all I can recommend at this point. Now that I have a suit made I might make some proper patterns and do up an instruction guide, it's on the bucket list anyway.
Awesome, thanks for the quick response! I'll try that on my other pieces. Right now I just have the chest armor all cut out and started. Do you think, as long as I level out all the edges, that my chest should still come out looking alright after the plastidip is applied? I have some spot putty at home too I could apply just before the plastidip. Obviously, I won't get the same smooth curves that you have in the chest piece, but I may be able to salvage it still. Thoughts? Thanks again!
I made my first piece like that, the left forearm, each pep shape cut out and glued together and it turned out OK, but again, I have a perfectionist problem, so I wasn't happy until I had no visible seams, like the new left forearm I made.
*UPDATE*
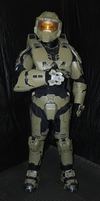
The suit is nearly done, just the helm and the undersuit need to be completed. I have a photo gallery up on my squidoo page, look for the stage 6 armor gallery www.squidoo.com/how-to-make-halo-armor
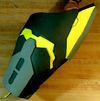
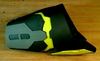
Here's how it looks so far
Awesome! Your kit just looks phenomonal! I would never guess that it was the same material as what's sutting on my dorm room floor. I like the spacers you used under the shins! I can't tell in the pic, but did you add the plungers to the midsection of the boots as well, or did you leave them as just foam? Looking great though! Can't wait to see the helmet and undersuit completed!
The boots have only foam, for the spacer I burned the grooves in with a larger tip on the wood-burning tool. For the toe-caps we used hammered black spray paint and drybrushed hammered steel. They came out very nice
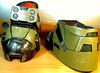
that actually ended up pretty hi-def, also, you could improve the visor, and paint the insides, and edges. I see a little bit of white creeping out, and a barely noticeable green line around the visor.
Great work, i am definately going to do my codpiece in foam now.
")