Foam My Halo Infinite Chief build!

I know I had a few other projects going, but the last year as been pretty turbulent and I feel like I need a fresh new project to sink my teeth into to get me motivated. I'm using Heroes workshop files, mixed with Moesizzlac 3d prints and that commercial helmet. While following other build threads here.

I want to try some new things, like magnetic weapon retention and using masking liquids. Still unsure about the undersuit. I know foam has been being used for the Infinite undersuits, buuuut I have heat issues, so I may have to do some creative sewing (and maybe some inspiration from the Halo TV suits).

*The Beginning plays*
1000000133.jpg

1000000132.jpg

1000000131.jpg


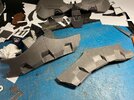
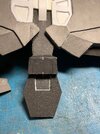
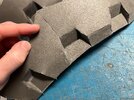
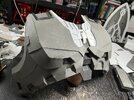
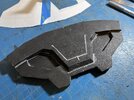
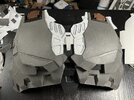
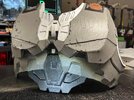
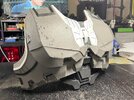
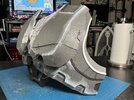
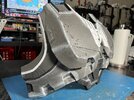
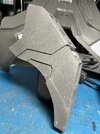
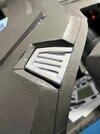
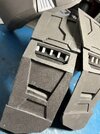
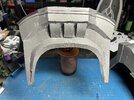
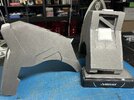
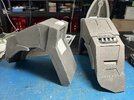
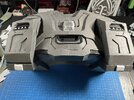
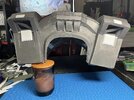
This part of the chest is done, and mostly happy with it. I'll bevel and seal the seams when the whole piece is done. I'm a tad concerned about the center pieces, with the four indents. Originally, I had them slanted off the main breast plates, but then I saw a reference when the whole piece was indented, so I cutout and redid them... now I see them slanted in another reference.

Probably overthinking this.

I really should be using contact cement a lot more, but this chest piece is complicated. I prefer to do it in small parts, instead of cutting every small bit out at once. That would take forever to build and take forever to air out my apartment. Hell, even with hot glue to speed things up, this took 2 days to get this far.
 
Last edited:
I know I had a few other projects going, but the last year as been pretty turbulent and I feel like I need a fresh new project to sink my teeth into to get me motivated. I'm using Heroes workshop files, mixed with Moesizzlac 3d prints and that commercial helmet. While following other build threads here.

I want to try some new things, like magnetic weapon retention and using masking liquids. Still unsure about the undersuit. I know foam has been being used for the Infinite undersuits, buuuut I have heat issues, so I may have to do some creative sewing (and maybe some inspiration from the Halo TV suits).

*The Beginning plays*
View attachment 338210
View attachment 338211
View attachment 338212

This part of the chest is done, and mostly happy with it. I'll bevel and seal the seams when the whole piece is done. I'm a tad concerned about the center pieces, with the four indents. Originally, I had them slanted off the main breast plates, but then I saw a reference when the whole piece was indented, so I cutout and redid them... now I see them slanted in another reference.

Probably overthinking this.

I really should be using contact cement a lot more, but this chest piece is complicated. I prefer to do it in small parts, instead of cutting every small bit out at once. That would take forever to build and take forever to air out my apartment. Hell, even with hot glue to speed things up, this took 2 days to get this far.
Looking great so far! I wouldn’t worry about the chest part, looks accurate enough to me!
 
The chest piece looks awesome! Looks like you're making great progress so far. If you're concerned about reference, the video in this thread links to a place where you can access the in-game model of the Mark VI. That way, you won't have to deal with conflicting images because you'll be able to look at the real thing from every angle. Wishing you luck with the rest of the build!
 
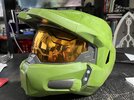
Just got back Vegas with the Disguise helmet on my doorstep. A bit disappointed that I got this for $40, but now seeing the Jazwares one for $60. I mayyyy buy the Jazwares one.

It looks alright.
IMG_8579.jpeg
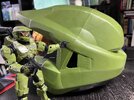
But the most obvious things are these gaps and line.
IMG_8580.jpeg
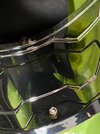
But at least the visor is held by screws, that is a huge help.
IMG_8581.jpeg
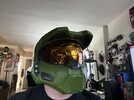
Still not bad for the price, feels nice enough. IMG_8583.jpeg

It also doesn’t have helmet lights, I can rig them up. I could probably fix up a lot of this and do a repaint. It would be nice to get the Jazwares one and only repaint, but I’ll probably stick with this and the elbow grease.
 
Just got back Vegas with the Disguise helmet on my doorstep. A bit disappointed that I got this for $40, but now seeing the Jazwares one for $60. I mayyyy buy the Jazwares one.

It looks alright.
View attachment 338314
But the most obvious things are these gaps and line.
View attachment 338315
But at least the visor is held by screws, that is a huge help.
View attachment 338316
Still not bad for the price, feels nice enough. View attachment 338317

It also doesn’t have helmet lights, I can rig them up. I could probably fix up a lot of this and do a repaint. It would be nice to get the Jazwares one and only repaint, but I’ll probably stick with this and the elbow grease.
If you're worried that the gaps will take away from the look of the armour there's nothing a little spot putty can't fix!
 
If you're worried that the gaps will take away from the look of the armour there's nothing a little spot putty can't fix!
Yeah. I'm likely going to cover up the gap up top and bottoms, but leave the gap on the ears/sides, since there is a line there (even if its not in the right location).

I'm making more progress on the chest, but I'm seeing the fallacy of using Heroes Workshop files. Also, switched to the Loctite super glue, saw a three pack for $6 at Home Depot and figured it was a sign to give it a try over hot glue.
399912736_888154889646477_4310703216068263288_n.jpg399807998_980707873037624_2302319404177917829_n.jpg

They really didn't do a good job at these parts. The edge isn't folded down enough and the indent doesn't meet where it should... I consider myself fairly decent at foam and pepakura, but just couldn't get these right after three tries. Luckily Infinite Chief is heavily weathered.
400018804_6684640764946723_5747352507031968571_n.jpg

Gonna need a whole lot of dremel, foam clay, and Kwik Seal work. I also got a set of better tools and supplies the way. And probably switch to a mix of ShaneDark515's files and 3D printing for the rest of the suit (still going to be mostly foam).

Any airbrush paint suggestions for the green? Its gonna get cold soon and want to limit spray cans to Plastidip and a metal-colored primer
 
Last edited:
They really didn't do a good job at these parts. The edge isn't folded down enough and the indent doesn't meet where it should...
*spits out coffee* WHAT? I wish my foam work before sanding could look even half as good as that! Like you said, a bit of sanding will hide the imperfections away like they were never there! It's going to look fantastic my guy.
 
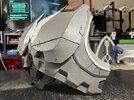
First phase of the chest is about done. Gotta attach the "eye mask" piece and then do all the filling/dremeling/etc.
399098355_7442380859124534_9082782493663566116_n.jpg
400485466_7442380935791193_8839433672641559730_n.jpg
400449381_7442380845791202_1005523836365774824_n.jpg

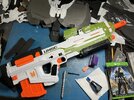
Also, got in another Nerf MA40. Plan is to gut everything, install magnets, and make a good prop out of it.
401543801_7441574415871845_8859627370448596109_n.jpg

Broke down and just ordered a bunch of electronics for the helm. Doing both a mic and that internal headset mod.
 
Last edited:
First phase of the chest is about done. Gotta attach the "eye mask" piece and then do all the filling/dremeling/etc.
View attachment 338478
View attachment 338479
View attachment 338480

Also, got in another Nerf MA40. Plan is to gut everything, install magnets, and make a good prop out of it.
View attachment 338477

Broke down and just ordered a bunch of electronics for the helm. Doing both a mic and that internal headset mod.
That is some clean foam work! This suit is looking amazing already, I'm super excited to see the finished product... and to see I'm not the only one that bought a Nerf AR to gut for a prop lol
 
Any airbrush paint suggestions for the green?
What kind of airbrush do you have? For my foam stuff I've been thinning down and using latex house paints with some great results.

I found that just a plain OD green from Lowe's works great. I might have thrown my test piece away when I cleaned my shop, but I'll see if I can find it and post a picture of the test swatch so you can see the color in the sun.

edit:

Forgot to add that your foam work is CLEAN. I can't wait to see the rest of the parts as you make them!
Thanks! I have a decent Badger. But I should have been more specific. I'm looking for something from Vallejo, Tamiya, etc. I rather not have to attempt to decant a spray can in my apartment. And my attempts to thin out other types of paints haven't been the best.

I want to limit rattle cans to just PlastiDip and a metallic primer. Its getting cold outside, and I can airbrush inside the apartment.

EDIT: While I'm here. Chest progress.
400657803_1012423383368536_8314054711436679576_n.jpg386833739_246129305130040_5432773035354812917_n.jpg371470373_632886405587944_1095333332554227545_n.jpg

Added more details and tried to make the most out of the Heroes Workshop files. It's kind of hard to determine what on the suit is a dent or a paint chip, but I think I got it. It now needs the Kwik Sealing and foam clay.
 
Last edited:
You got the chest done quick and it looks great! I’m sure the rest will be a breeze! How are you planning on connecting the back?
Thanks, and I hope so! Back is giving me some complications, but I think I've worked through them well so far. Screen accuracy is out of the question, but I'll be hella close. No idea on how I'm attaching to the front just yet. I'll face that boss when I get to it.

401628053_7453564854672801_7485163264492981735_n.jpg

(Chief for scale)

The real trick is likely figuring out where I'll be installing these honking huge magnets:
IMG_8654.jpeg
 
Thanks! I have a decent Badger. But I should have been more specific. I'm looking for something from Vallejo, Tamiya, etc
All of those should defiantly be capable of spraying standard latex paints. I would start with an OD green latex from lowes or home depot and see how it lays down on a test piece. You may need to thin it some, but I've had really good success doing that.

You could also test various colors through a color printer and have them scan and match that at the store.
 
Tonight's progress. One complicated part on this piece so far, but been going slow and smooth since.
400717859_7457536077609012_5707634161463003963_n.jpg

401637270_7457539610941992_2827101501394218973_n.jpg400533811_7457536110942342_9116447015379184396_n.jpg400572902_7457536277608992_5469646904732587206_n.jpg

I'm getting better with small details with foam, and could probably go further with foam, and not rely on 3D printing so much. Found on a possible spot to mount a speaker (for a mic), and looks like under the vents will be probably be the best spot.
 
Again, that’s some super clean foam work. Can’t wait to see the finished torso.
 
95% of the back construction is done! There is still a fine detail to get on (that hexagon piece) and some related to rigging. But its all ready for dremeling and gap/seam filling. Also, figure out where to put them giant magnets.
403843455_7469014233127863_4502139240554153563_n.jpg

404040228_7469014456461174_4180203788999076335_n.jpg404029252_7469014256461194_4297821522607307761_n.jpg

Close up on the detail in that weird recess:
403804364_7469014369794516_895504241144654333_n.jpg


And some torso previews:
403853209_7469014346461185_7968884784215413734_n.jpg

404060120_7469014493127837_7023941405686092127_n.jpg


A lot of wonky-ness happened in some areas of the back and not sure how to explain it, but it will be turning out pretty well.
 
Last edited:
This thread is more than 3 months old.

Your message may be considered spam for the following reasons:

  1. This thread hasn't been active in some time. A new post in this thread might not contribute constructively to this discussion after so long.
If you wish to reply despite these issues, check the box below before replying.
Be aware that malicious compliance may result in more severe penalties.
Back
Top