Nuts4Accuracy's portfolio

Status
Not open for further replies.

Nuts4Accuracy

Active Member
Hello everyone, just wanted to let you have a sneak peek at a project I'm working on. Since I've managed to save up more money, I'm finally able to shift gears and be hopeful for the future and do something I love.

1659638911680.png


I wonder what it is :whistle:;)
 
Looks like you're printing a matrix mold for a Mjolnir helmet?

Bahahha yes, i'd thought id save buying $30-$40 of clay by instead printing a hard shell using a 1kg of cheap filament.

This will help keep the helmet centred whilst I make a fibreglass jacket over it, then i simply have to remove half of "matrix print" and pour silicone through the jacket. I have more control over the thickness of silicone by 3d modelling it, so when it comes to actually pouring silicone im saving us much as possible.


As I have moved recently, I will have to set up my 3D printer shortly. I did run into an issue last time I used it, but forgot was it was before i packed it down for transport.
 
remove half of "matrix print
is it just for making the silicone mould or will it also be used during casting to add some stability? in that case you could split the model in half and add some connection holes along the top ridge. would at least save some time cutting it
 
is it just for making the silicone mould or will it also be used during casting to add some stability? in that case you could split the model in half and add some connection holes along the top ridge. would at least save some time cutting it

It will be used for molding the outer fiberglass jacket accurately. I'm using a 3D printed piece in place of clay basically. So once the Fiberglass 2-piece jacket is done, One-Half of the 3d printed shell (Because it will be a 2-piece silicone mold as well) can be removed to expose a cavity between the jacket and the actual helmet. Brush a print layer of silicone, and re-assemble the jacket. That cavity will then have silicone poured into from an opening on the fiberglass jacket (Likely a 3" hole)

I could go for a Plaster jacket to be even cheaper, but to maintain the strength of the jacket, heaps of plaster would have to be used. But man, a massive plaster jacket would just be heavy to slush cast.
 
Last edited:
It will be used for molding the outer fiberglass jacket accurately. I'm using a 3D printed piece in place of clay basically. So once the Fiberglass 2-piece jacket is done, One-Half of the 3d printed shell (Because it will be a 2-piece silicone mold as well) can be removed to expose a cavity between the jacket and the actual helmet. Brush a print layer of silicone, and re-assemble the jacket. That cavity will then have silicone poured into from an opening on the fiberglass jacket (Likely a 3" hole)

I could go for a Plaster jacket to be even cheaper, but to maintain the strength of the jacket, heaps of plaster would have to be used. But man, a massive plaster jacket would just be heavy to slush cast.
You shouldn’t need a fiberglass jacket. Add you pour spout, bleeders, and a place for your model to sit. This is your jacket.

Here’s an example of what I mean.
 

Attachments

  • E9134AC8-373E-4014-A0DE-4F55F096CCC1.jpeg
    E9134AC8-373E-4014-A0DE-4F55F096CCC1.jpeg
    152 KB · Views: 122
You shouldn’t need a fiberglass jacket. Add you pour spout, bleeders, and a place for your model to sit. This is your jacket.

Here’s an example of what I mean.
I was thinking of that; unfortunately, my 3D printer isn't big enough to print it in 1 go, and I'm not really fond of the strength of glues to hold a multi-piece jacket together since I am very clumsy with my hands.

But I won't discredit that idea, it is definitely a viable method for smaller props like pistols. Besides that; I was balancing the costs of a fibreglass matt vs.... a carbon fibre matt. And the idea of making a carbon fibre jacket definitely has appeal to it, not going to lie bahaha, even if it is aesthetics.
 
Now; I've finalized my "Blur" 3D model to be ready for printing. So you probably guessed correctly that after 2 years, I am molding the Halo 2 Anniversary Cinematic Version of the Mk VI. It was hell and a half to get it right. The amount examining cutscenes after cutscenes to get it right. I even had to redo the visor 3 times.
1660193525793.png


one issue. I don't know whether to go to the spartan scale or the human scale.

So I'm trying to balance the probabilities that a 6ft (182cm) person trying to cosplay as master chief with steep boots and a helmet will barely reach 2 metres tall (6ft 8") Both a human scale and spartan scale helmet are doable.

But not all people are 6ft or taller and not alot of people design armors to make themselves look taller. So for shorter people the helmet will look comically large. I'm basically have a "infinity gauntlet" scale issue.


Both 6ft mannquins; Human scale left, spartan scale right.
1660192798419.png
1660192836846.png


Which would you prefer the helmet to be finalised at?
 
Last edited:
I'd definitely recommend human scale. It's what a lot of helmet casts are based on to make them more realistic for cosplays, plus it means it should fit for larger heads, and not be too much larger for small ones.
 
So whilst re-examing the helmet for the 500th time I noticed a small area on the top of the cap that I missed out on my model, and with half the helmet at 90% print completion (2 day print) you can bet that I facepalmed... Hard.

1660407582919.png


This is the texure of the campaign model.


I realised after viewing the cutscenes over and over that this highlighted area is a raised face

1660407638943.png


Thanks to this shot from the cutscene
1660407679488.png


I also realised this face isn't as sunk in as a thought it was
1660407739043.png


So my model being printed looks like this

1660407776659.png


The updated features look like this

1660408030414.png


Thankfully these are raised faces! meaning I can 3D print these as little building blocks and glue them onto the model without hassle with just some seam cleanup. If it was a sunk in detail, that would be a process of cutting the area out and gluing a "3d printed" block in or sculpting it entirely by hand.

Whilst typically you wouldn't find a studio that would bother with such small nuance details, I just have to do this for my sanity.

As you can see I take accuracy too extreme.
 
Last edited:
Small update; Silicone and Resin is on the way; I decided to go with Rebound 25 for the silicone because of its viscosity being able to be both brushed and poured.

For the resin I actually decided not to go with the typical smooth-cast route but to instead goto TC1630 because of its low-shrink, higher temperature resistance, strength, thicker viscosity and longer cure time (Which prolongs to life of the mold) and the fact that I can use it for other projects related to my automotive hobby ;D. Biggest difference between Smooth cast 300 and TC1630 is that 300 demolds in 15 minutes, TC1630 is one hour.

The print so far; absolutely horrendous. First, the quality of the prints seem fine for about 25mm into the print, then the quality gradually got worse with each layer having serious quality control. I bought a reputable PLA too. Turn outs my nozzle was installed incorrectly or had come loose at some point; and had filament oozing out from the threads. Turned onto 170 degrees celsius and got a brush and cleaned the pla off and retightened the nozzle... And man was the hot end gunked full of molten PLA. Surely no more layer shifts? Yes and no. It definately solved the quality issue though.

The idler bearing on the filament drive gear isn't stabilised at the top; as in the screw holding the bearing isn't 90 degrees with the base/thread. So at certain Z axis' the filament's own springyness put enough pressure to push the bearing out, thus isn't feeding properly. I bought an aluminium dual gear kit online, which when arrives, should address the issue; but I think their are some Z-axis issues or mods i need to implement to solve the levelling issue as the x-axis bar for some reason becomes unlevelled the higher it gets on the z-axis. Maybe Anti-backlash nuts need to be installed?

I'm doing a band-aid fix atm by scrapping the layer that had the filament stop extruding; and printing the missing layers separetely; but it's quite scary to come to a 3d print where it's 1cm off the last layer.

20220816_055136.jpg


20220816_055150.jpg


AS you can see the base work of the helmet; horrid quality; the replacement layers the glue on; much better. Nothing sanding can't fix though.
 
Last edited:
Current status, whilst the other back half is printing, decided to lather some primer filler and spot putty and goto work sharpening the lines.

I still think human scale might be too small. The helmet looks normally scaled when viewed from the outside but it just... feels tiny in my hand.

Once the helmet halves are glued and finished, If im truly unhappy with the scale, I will goto spartan scale. Maybe me having a big head causes the "snug fit", thus making me feel claustrophobic.

Sorry for bad photo; took it indoor and really need to get some sleep.
20220816_130430.jpg
 
So as I've decided that I wasn't happy with the scale; i've elected to rescale the helmet back to spartan size. Whilst the helmet would otherwise before perfectly scaled; once you add the hard armor; i believe it may actually be too small.

In the meantime that I was awaiting for more filament to arrive and my nozzle upgrade; I've done a few adjustments to the model (Again).

1661417533899.png


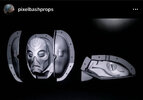
I've seperated areas which be tricky to both mold and cast; to prevent any cases of airbubbles. This is ofcourse the light areas and the vents. This and the fact that on the test print it was a pain in the A$$ to carefully sand.

1661417605650.png


1661417782785.png


Because I'm keeping the "Grid pattern" on the lights because of the accuracy as per the photo below; I will try to send the Light domes off to get printed on a SLA printer.

1661419100753.png

I made sure no one can install them in the wrong orientation by adding slots. To make sure the grid pattern has the correct amount of lines; I counted the lines on the cutscenes.
1661419195978.png


I do intend to cast these in clear resin. If needed they have a hole to fit a LED.

1661419324390.png


The face it glues into has a punched hole to allow for easy drilling incase you want to install wires.

As usual; i was a little bit unhappy with the model after seeing 1-1 statues of the halo 2a chief from Outpost; and resorted to one technique to get correct depths of cuts based off textures. Pythagoras theorem. Oh god.

Since the original model is a decimated version of blur; the textures retain some accuracy of the faces just pulled over the decimated areas. To get a correct depth of a certain area which is textured; you have to use pythagoras theorem to get the the missing average and add it as depth to your selected "shallow part" of the texture.

1661418449647.png


You're basically rotating C back to a 180 degree angle. Blender might have a measurement tool in place to save me all the hassle; but I'm still a novice at blender to bother finding it.


I promise this is the last of the 3d tinkering. I'm satisfied now.
 
Last edited:
Blender does have a measure tool in the left toolbar. Not the best tool, but definitely better than nothing.
1661422442523.png


Sorry, can't get more images to upload because of internet (you're Australian, you know the deal). But you can drag a line between two points to get a measurement of the space. Hold control to snap to vertices. If you click and drag the line, you can get angles! There's also addons to measure curves sections and volume, if that interests you.
 
So small update,

Caught covid 2 weeks ago and was spent that time recovering so couldn't make any progress.

But 3D printed the new scale. The back half still had these horrible banding issues because it was printed pre-extruder upgrade, front half used a new filament but the filament seemed to be a bad batch because the quality was all over the place. Dialed it in on test prints, got it good, started printing the helmet, and I would have thin layers occasionally.

I think the gold pla was extremely temperature-sensitive since in mornings it printed fine, at colder nights it was cooling too fast. When I printed the vents; the grey pla did just fine with the extruder gear upgrade.

20220910_152054.jpg


20220910_152104.jpg


Tested out some glues too, since I've had issues with some glues being too flexible and having body filler or primer filler crack at the joints.

Absolutely in love with this. It's ABS cement; fuses the pla together and has some plastic mixed into the cement so it can act a bit like a filler too. As you can see I applied it onto the areas where the print layers started getting too thin (Under extrusion?) to make sure those layers don't come apart.

I have bought some XTC-3D to put on top; but just wanted to make sure those layers are fully enclosed.

It sets fast but cures over 16 hours i think. After 16 hours it's rock hard with the print.

Tomorrow I will get back to sanding and then coating with XTC-3D
 
Last edited:
Changed name of thread to just make this more about my 3D modelling journey and printing rather than making new threads for different projects.

If any of you guys have been here long enough, you know that 3 years ago I started attempting making a Legacy Effects ODST helmet.

That thread got locked for inactivity and I can't post updates on it. lol


1663236993002.png


I have not forgotten about that project. Just it's a pain in the ass to get the angles right. And since seeing I saw that someone on Etsy is selling armor stl's for this particular costume; I've felt a new sense of motivation to get this finished.

I restarted the dome as i wasn't happy with the original one and adjusted the jaw.

This very poor vertex painting is to help give me a general idea of what a finished product might look like.
 
More progress on the sanding of new scale

Very slow. In the past few weeks I have been sanding, I contemplated that maybe I should have invested in sanding pens and twigs.

I jumped the gun and bought myself a set of MIG sanding sticks, sanding twig bundles and a Proxxon Sanding pen. and they have done a marvelous job in the small hard to reach areas.

Sorry for the bad photos; took them at 8ft away and just zoomed in on my phone. Don't want any distortion.


20221006_101815.jpg

20221006_101803.jpg


Focused most of my effort on the visor area getting the inset face border squared up. I really should have calibrated my print better. Hoping to upgrade to SLA one day.

Just need to touch up some areas with bodyfiller/knife putty, but it's going great so far.
 
Last edited:
Status
Not open for further replies.
Back
Top