Foam ODST Build - Upgrade Time Again

Status
Not open for further replies.
*Pics added soon*

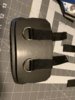
Over the past two evenings I cut down the thigh plates and sanded the edges. I'm going to seal the now sliced edges tonight before testing straps and painting.

Status
  • Helmet: Painted, padded, possibly add more padding to prevent slipping or a chin strap, add fans if time
  • Chest: Painted, half strapped
  • Back: Needs straps
  • Shoulders: Done (might add blue paint detail time permitting)
  • Biceps: need straps
  • Forearms: can be done but prefer adding some highlighting
  • Belt, hips, cod, butt: Done
  • Thighs: Needs paint and strapping
  • Knees: Needs straps
  • Shins and Calves: Needs paint and straps
The remaining supplies for strapping as well as a new undersuit arrived yesterday. My goal is to have my suit done before the weekend so that I can do a quick photoshoot with a friend then spend the next week or two adding those little details, adjusting the fit and padding if needed as well as buying and setting up my carrying case and repair kit.

Initially I was planning on speed building a suppresser for my SMG, but I'm leaning towards it won't be allowed in because it's a solid resin cast and quite heavy and will likely leave it at home. Perhaps I'll bring my BoomCo AR instead. I disabled the firing action on it back in April for a local con.
 
Really getting close now. As I said, I cut down the thigh plates to make something that fits me better. Let's just say to get full movement there was a LOT of material cut off, but it was completely worth it to get more movement. At this point thighs just need strapping and I can call them done. Likely will not add what looks like buckles in the recesses, but that's still in flux.

2019-07-11 20.37.19.jpg

Chest plate is assembled and just needs its final rigging to the vest settled. Went ahead and added a bit of pop of different shades of metallic grays to the chest parts, and I have a file ready in Silhouette Studio to cut out for the "UNSC" that goes on the bottom of the top plate. Leaning towards running it through cutting yellow frog tape and using that as a stencil I can paint over fairly easily instead of making stickers to apply.

unsc.png 2019-07-11 20.35.21.jpg

The last thing to show is the gauntlets. They're padding and don't slip when wearing my undersuit. I also went ahead and added some highlighting. I gave a few pieces a slightly lighter shade of gray that depending on the light blends in or pops. I also plan on adding a little bit of black to some areas as well as doing the same with some other pieces.

2019-07-11 20.35.57.jpg

I'm scheduled to have a brief photo shoot over the weekend, so I'll be able to make any more painting/detail decisions following how things look in those photos.
 
No pics this update.

Got everything strapped over the weekend and did a test fitting of the full suit. I got a few pics w/ that setup and wasn't happy with the result, so I'm going back to the drawing board over strapping. I'm glad I kept the 6mm foam back plate because I sealed and painted that to replace the 10mm version I was wearing in the pics. It just looked too bulky with the 10mm when all put together. I'm swapping out my original belt with something a little more substantial to hold up to the weight of all of the pieces hanging off of it. I'm also extending the strap for the thigh plates so that they no longer attach to the belt but directly to my vest getting more weight off of the belt.

As for the shins/calves. I've got a few things I'm updating.
1) I made some quick foam calves that work, but are a little small. This was my first attempt to get more mobility in my knees. They'll work if I need them, and I prefer them over the pep'd versions.

2) In strapping, originally I was trying to keep the buckles more inside the shins/calves and connecting the two together. After looking through reference pics and other people's suits, I'm moving the strapping to the outside. I plan to add elastic with buckles to the calf plates and strap that around where the buckle will sit underneath the shins. The shins will then have nylon straps that are adjustable attached on either side that wraps around the back of the calf plates.

3) I'm hoping to get done 3d printed calves in time after spending a fair amount of time dialing in scale. Focused on printing speed and will resin like I did the forearms to fill in layer lines rather than trying to sand like crazy. Thankfully calves also don't have lots of tiny details to worry about. Print time for each calf plate is ~14hrs. First is going now and second I hope to start tomorrow after work. If they don't get done in time, foam ones it'll be.

The one thing I really need to practice is walking in my boots with risers in them. I have ~3inches of risers I'm trying to use inside my boots, and I'm not quite comfortable walking in them at that height yet. I'll still be short, but not as short.
 
I plan to add elastic with buckles
Where might one find these guides or ideas? I think i've seen it before but not in a while to where I would know to look. unless its in the tutorial index.
 
Where might one find these guides or ideas? I think i've seen it before but not in a while to where I would know to look. unless its in the tutorial index.

There might be guides in the tutorial index or mixed in with other people's build threads.

Why I chose that was from experience and past mistakes and reading other people's build threads, learning from their success/mistakes.

In practice it comes down to experimentation to find what works/doesn't work for each suit, material, and individual.
My Pidge suit last year used elastic to utilize a compression fit for the majority of pieces exception being straps from thighs to belt and Velcro to attach the sides of the chest plate. My marine build is all nylon webbing straps and buckles, the big mistake being initially not factoring in wanting to lengthen or shorten the straps.
 
Wanted to get a post up about strapping so far. As I said, I re-evaluated and started over on strapping. Here's what I've completed so far:

The forearms didn't need to be readjusted, so I left them the way the are. I used a minimal amount of foam until the parts would sit comfortably without slipping over my undersuit. I also added a ring of 2mm foam around the wrist area to prevent scratching my hands trying to fit them on.

2019-07-18 20.43.36.jpg 2019-07-18 20.43.41.jpg

The shoulders had been ok, so I just improved slightly on one part. I kept the buckle at the top that ultimately attaches to the shoulders of the vest. The model I printed had pieces where you could pull a strap through, but two of them broke off when I dropped the part, so I adjusted there. I decided to drill through the shoulders and install screws that attached to an elastic strap which wraps around my arm.

2019-07-18 20.44.50.jpg 2019-07-18 20.45.07.jpg

The parts that go on the belt are mostly there. Instead of my originally planned webbing belt, I'm going to use the belt that came with my vest. This belt has larger buckles than the original belt, so I had to make adjustments to all of the parts that go around the belt.


2019-07-18 20.42.40.jpg

The butt plate I wrapped some nylon straps around. I didn't have webbing that would fit through the holes in the plate, so I grabbed some elastic I had and slid that through. So far the elastic is hot glued to both ends of the nylon webbing that goes over the top of the part. I'm leaning towards reinforcing that by sewing the elastic to the webbing. I don't have a sewing machine to hand sewn it is.

2019-07-18 20.42.59.jpg 2019-07-18 20.43.06.jpg 2019-07-18 20.43.13.jpg

For the groin and the belt buckle, the model has pieces that bridge from the sides on the groin and top to bottom on the belt. Groin didn't change from the original plan attaching webbing around the "bridge" and running up towards the belt. Originally I just glued those straps around the bars of the belt buckle, but I figure why not make that removable?

My original belt I just ran behind the bars and attached. However, with the thicker belt, this won't work, so I needed to change that. Referencing how someone else suggested the belt (can't remember where I found it) I decided to add screws in the top and bottom of the buckle and attach webbing to either side. I purposefully cut more webbing than I needed to fit the buckle and split it so that I can add Velcro and wrap the buckle over the real buckle without having to fumble around to get my belt on. I need to run to the store to get Velcro tomorrow after work.

2019-07-18 20.44.06.jpg 2019-07-18 20.44.15.jpg 2019-07-18 20.44.22.jpg

That's all I've redone so far for straps, but it gets me close. I want to make sure I do this right so my suit is comfortable to wear for extended periods and reduce the possibility of strapping failures.

One other thing of note, I must have twisted my chest and stomach plate attachment awkwardly because the top of the stomach plate broke off. I'm going to print a bar that I'll attach to the stomach plate to replace the section that broke before reattaching the parts.
 

Attachments

  • 2019-07-18 20.44.02.jpg
    2019-07-18 20.44.02.jpg
    1.6 MB · Views: 245
Got everything suited up today. It'll work. I need to add longer straps on the shins that go around the calves, and a few other fit adjustments. I don't care for how small the stomach looks, so when I start doing upgrades after HOD That'll be one of the first to get updated. Everything will end up 3D printed at that point as well.

odst_suit.png IMG_1578.png

Some minor changes coming:
  • I need to possibly cut out a better slot for my elbow in the forearms. It's hard to get my helmet on and off alone with the forearms when my gloves push them back towards my elbows. - DONE
  • I'm going to swap out the 10mm back plate in the photos and use my 6mm foam one. I'd already said I wanted to do this, just needs the straps moved over. - DONE
  • Will cut off the foam that goes on the outside shoulders of the back plate to get back some range of motion. It's only ~1in of material, but that 1in restricts a lot. - DONE (on both the 6mm and 10mm)
  • Add the longer straps to the shins. Using screws makes this as simple as unscrewing the old, cutting the new and installing. - DONE
Get those done and take a rest until HOD. After that I'll start making swapping out with 3D printed parts. I plan to use ABS or PETG for my printing, so my CR-10 is going to get an enclosure added first as well.

*Edit*

Just for fun here's where my board ended up for v1. Everything in "Done" will get archived and start with the v2 updates. And I get to unblock that energy sword card.

Screen Shot 2019-07-23 at 6.36.24 AM.png
 
Last edited:
Push to HOD

Updated earlier post for what's done on adjustments on the ODST for comfort. All that's left there is move the straps from the 10mm foam back to the 6mm foam back.

Since I'm going to try to take both of my suits with me, I figure why not give the Marine a few upgrades while I'm still in builder mode. The culprit for issues that comes up: straps.

Marine Upgrades:
The Marine was my first full suit, and is the AndrewDFT version. I made it in ~3 weeks before Halloween a few years back, so not everything was made to last. Last time I wore it was WizardWorld St. Louis. Fun enough, I left my storage bag open one day, and my cat got in and gave me some extra battle damage. Problems I dealt with then were the knees kept rotating because they weren't tight enough and were mostly held up by the shins that were resting on the top of my boots, which also rotated on me (for WW I actually used safety pins to hold the shins in place better). Walking back to the car that day I hung all of my parts off of the chest plate and carried it. Well, the glue failed towards the end of that.

Each day this week I'm updating a piece of strapping to fit better or become less likely to fail.

Yesterday went through all parts and decided which ones were going to get updated and prioritized them. Only the shoulders do I not plan to do anything about. It's hard to beat clipped to the chest plate with a strap around the arm.

Today:
  1. Removed straps from all of the parts. Some I left a small piece of webbing attached that I'll attach elastic to so that there's a section of elastic that doesn't pull. Rubbing alcohol makes quick work of getting up hot glue.
    1. 2019-07-23 19.07.44.jpg 2019-07-23 19.08.10.jpg
  2. Fixed the chest plate
    1. 2019-07-23 19.37.44.jpg 2019-07-23 19.37.34.jpg
  3. Attached elastic around the boot covers. Easy to do, and will help them stay tight to the boot while being easy to remove
    1. 2019-07-23 20.04.58.jpg 2019-07-23 20.05.03.jpg
 
Push to HOD

Marine Upgrades:


Finished updating the strapping on my Marine armor. It's worth noting that while I had a helmet for it originally, I no longer have it, so I'll be going with either no helmet/hat or the Sgt. Johnson BDU style cover that came in a LootCrate.

1. Shins/boots got restrapped with elastic instead of webbing

2019-07-27 18.10.43.jpg 2019-07-27 18.10.47.jpg

2. Forearms went from having buckles to just elastic bands to slip on/off

2019-07-27 18.10.52.jpg 2019-07-27 18.10.49.jpg

3. Knees lost the webbing and gained elastic with buckles. They don't rotate nearly as easily anymore

2019-07-27 18.10.53.jpg 2019-07-27 18.10.59.jpg

4. The piece that goes just above the boot on the shin also got elastic instead of webbing as well as a quick repair to a part trying to separate.

Finally I got all of my parts, both ODST and Marine packed up in my carrying case with plenty of bubble wrap to make the trip.

2019-07-27 18.11.50.jpg

It's tight, but it all fits without the lid popping. In my suitcase I'll be packing a hockey bag that I can use if I find I want to be able to take my gear off in the middle of the day without going back to my hotel. I'm going to pack my boomco in with my clothes.

*Edit*
Added fan system to ODST helmet.
 
Last edited:
Begin Printer Upgrades

Getting ready to start upgrading the suit from a combo set to all 3D printed. But first, it's time to start upgrading my printers to make my life easier.

FlashForge Creator Pro
This one needs fewer upgrades to work well. Probably could have gotten away with adding nothing more and just dialing in settings. But the only upgrades I've made so far are a flexible build plate and switching my print surface after running out of the tape it shipped with.

Upgrades I've made/am making:
Creality CR-10
Note: None of these upgrades have been installed yet, so I cannot speak to how they'll go.
  • Filament runout sensor
  • All metal hot end
  • Enclosure - I bought a kit to save me time. If I have to cut the acrylic myself/have a store do it, I'm unlikely to ever finish the project, so this way I remove that excuse.
  • BuildTak FlexPlate system - tried out a cheaper one, and it didn't work well. I've been very happy w/ BuildTak's FlexPlate on the FlashForge, so repeat for CR-10 to be able to swap out glass or flex.
I also plan on installing a version of Marlin that supports power loss recovery.

Once the new nozzles arrive, I'll get those installed and get my FlashForge dialed in to start printing smaller parts. CR-10 won't really get upgraded until I install the new outlets in my basement and get it out of my kitchen.
 
Last edited:
New nozzles arrived during this week, and got them installed.

2019-08-14 17.48.28.jpg 2019-08-14 17.54.18.jpg 2019-08-14 17.54.45.jpg

I also removed the old hot end insulation and did my best to clean it up before putting the silicone socks over top. Got the bed leveled and did a small test print. Thankfully when I went to level the bed, I checked both nozzles and they were so close to the same that I don't have to fix nozzle leveling. This week I'll be working on figuring out my best settings and will be able to start on smaller pieces that will be printed in ABS (I have a lot of ABS filament lying around).

Also started running the new circuit in the basement to put my CR-10 down there. I still need to go out and buy a new breaker for the new route, but hopefully it'll be ready soon enough, and I'll get my CR-10 set up again.

I forgot to add above that I'm adding a Pi w/ OctoPrint and a camera for the CR-10 as well so that I can monitor those prints without having to go to the basement every time.
 
Been over a week, so mandatory update time.

No progress on getting 3d printed parts started up again yet. Made an attempt at printing a bicep, but it failed due to lack of surface area on the print bed in the orientation I chose. Rotating or adding a brim should fix it no problem.

I don't think I'll have enough time between now and Halloween to get my printer set up and get the parts I want printed, so I'm making some interim upgrades with foam. Starting with thighs then shins. We'll see where this lands by then, and who knows, maybe I'll keep 'em.
 
My goal this extended weekend is to have both thighs constructed and fitting. Got the first one built and should have the second built today. It took a couple of attempts to get the size right.


2019-09-02 07.41.05.jpg 2019-09-02 07.41.15.jpg 2019-09-02 07.41.21.jpg

I was looking at my McFarlane figure and noticed these depressed rectangles on the thighs that weren't in the model. Went searching for images and found a reference that showed them, so I figure go ahead and add that. Made a template closer to the real detail inside the recesses on the main part, but haven't cut it out and attached yet.

halo-3-odst-gallery-007-full-screen-1920x1080-0bf7fa7e35e647c5a68f6c7ba26f643e.jpg

Also testing out some flexible spackle to fill in seams, so actually works out that I have a thigh plate that was too tall that I can test multiple seams of various sizes before using it on the real thing.

2019-09-02 07.41.45.jpg 2019-09-02 07.41.34.jpg

Waiting for that to dry, then I'll test out sanding it smooth. This will also be my tester for some new paint.
 
Last edited:
Been taking my time in filling the seams and plastidipping the thighs. One thing that I do like about using flexible spackle is that you wait until it's dry and then sand it smooth, so like Bondo I can sand to my heart's content and build up small layers until I'm satisfied (or at least not completely unhappy w/ the finish).
2019-09-04 18.52.37.jpg2019-09-04 18.52.43.jpg2019-09-04 18.52.51.jpg2019-09-04 18.53.04.jpg


One thing that caused this to take more time and almost ended with a remake of one thigh plate was that on the second coat of plastidip there was likely some moisture underneath as I left it out in the sun and came back to some bubbling underneath. I ended up cutting away the bubbles and filling in the missing areas with more spackle. In the photo below it was the plate on the right that bubbled, and there's still a spot that's not completely fixed.

2019-09-08 17.29.15.jpg

For Halloween, I'm good with this setup. I think I may have installed the raised details backwards for the real deal, but this was the arrangement that allowed for better movement. Onto the shins this week.
 
Status
Not open for further replies.
Back
Top