Starting My Jorge Helmet

itsmeitspb

New Member
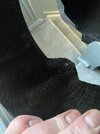
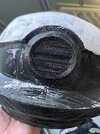
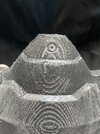
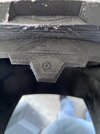
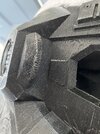
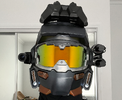
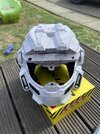
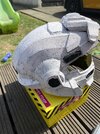
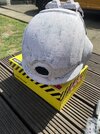
Hey all, I’m starting my Jorge helmet. I’ve had it for over 3 years and was put off with how rough it looked when it arrived. I have gave it a sand and now started filling. How do you all deal with rivits ect on the prints. There’s some on Jorges helmet near the visor but I don’t want to fill them in with filler. Any tips would be great!
 

Attachments

  • IMG_2803.jpeg
    IMG_2803.jpeg
    1.8 MB · Views: 3
  • IMG_2804.jpeg
    IMG_2804.jpeg
    1.7 MB · Views: 3
  • IMG_2805.jpeg
    IMG_2805.jpeg
    1.6 MB · Views: 3
  • IMG_2806.jpeg
    IMG_2806.jpeg
    2.4 MB · Views: 2
  • IMG_2807.jpeg
    IMG_2807.jpeg
    1.9 MB · Views: 2
  • IMG_2809.jpeg
    IMG_2809.jpeg
    1.8 MB · Views: 2
  • IMG_2810.jpeg
    IMG_2810.jpeg
    1.6 MB · Views: 3
  • IMG_2811.jpeg
    IMG_2811.jpeg
    2.4 MB · Views: 3
Personally - I don't do much sanding other that spot filling for defects/pits. I don't do that whole 'magic shell' of coating the entire thing approach. Some do and that's cool-just a different approach.

In the case of those rivets: Sand carefully. If you need to, you may end up sanding more than planned then have to re-engrave the rivet. Its just a circle so heating a circle punch or small diameter pipe and pressing it into the plastic will give you a new circle.

JustSandIt.png
 

Attachments

  • Snag_16dcee9.png
    Snag_16dcee9.png
    870.6 KB · Views: 2
  • IMG_8403.JPG
    IMG_8403.JPG
    123.9 KB · Views: 2
Personally - I don't do much sanding other that spot filling for defects/pits. I don't do that whole 'magic shell' of coating the entire thing approach. Some do and that's cool-just a different approach.

In the case of those rivets: Sand carefully. If you need to, you may end up sanding more than planned then have to re-engrave the rivet. Its just a circle so heating a circle punch or small diameter pipe and pressing it into the plastic will give you a new circle.

View attachment 361662
Awesome work mate!
That’s a great idea about heating a pipe. I bought the helmet from someone selling prints on eBay before I had a 3D printer, I think he had his settings to rough as I had to sand at with a mouse sander with 60 grit to help smooth it abit lol. I’ve had to pretty much coat the helmet and even abit inside. I’ll have to get a good playlist going when I start sanding to help pass the time lol.
Really appreciate the help matey
 
Hey all, I’m starting my Jorge helmet. I’ve had it for over 3 years and was put off with how rough it looked when it arrived. I have gave it a sand and now started filling. How do you all deal with rivits ect on the prints. There’s some on Jorges helmet near the visor but I don’t want to fill them in with filler. Any tips would be great!
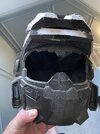
A good way I've found to sand out those little details and bolts is by using dental/model scrapers. They are a cheap
godsend for those pesky sunken lines and bolts but take some care with them as you can easily slip and scratch unwanted spots. They can also be used to bevel sharp and inconsistent edges pretty well. Another way to do it is to cut them out of the model pre print using software and glue or fasten real hardware in their places during the finishing steps. That's how I did my custom helmet attachments and it looks pretty sick plus has the added bonus of being removable.
1746892508247.png
1746892634830.png
 
Awesome work mate!
That’s a great idea about heating a pipe. I bought the helmet from someone selling prints on eBay before I had a 3D printer, I think he had his settings to rough as I had to sand at with a mouse sander with 60 grit to help smooth it abit lol. I’ve had to pretty much coat the helmet and even abit inside. I’ll have to get a good playlist going when I start sanding to help pass the time lol.
Really appreciate the help matey
A good tip for future builds is to sand to a higher grit prior to filling. Knocking down those layer lines creates less work for the filler and you don't need to add as much, which reduces the weight for the helmet.

I personally sand up to 150 (starting grit can vary on print quality), do a light coat of UV resin, sand that at ~300, and then spray a light/medium coat of filler primer. Or you can skip the UV resin step, go straight to 300 grit, and spray on a heavier coat of filler primer. With either method, you'd just need to do a light pass of wet sanding of about 600 on the filler primer and you should be left with maybe a few spots that just need to be filled in and wet sanded with spot putty. The results come out incredibly smooth and if your print quality is really good, you can start at the UV resin step and only have to do 2 full passes of sanding.
 

Your message may be considered spam for the following reasons:

If you wish to reply despite these issues, check the box below before replying.
Be aware that malicious compliance may result in more severe penalties.
Back
Top