itsmeitspb
New Member
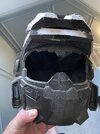
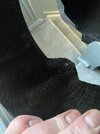
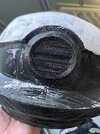
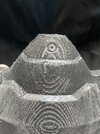
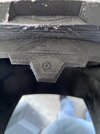
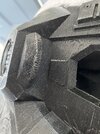
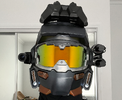
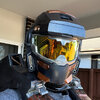
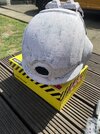
Hey all, I’m starting my Jorge helmet. I’ve had it for over 3 years and was put off with how rough it looked when it arrived. I have gave it a sand and now started filling. How do you all deal with rivits ect on the prints. There’s some on Jorges helmet near the visor but I don’t want to fill them in with filler. Any tips would be great!