SV's Reach MK. V Build!

Status
Not open for further replies.

S1l3nt V1p3r

Sr Member
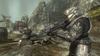
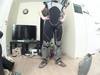
I've always wanted to make a Mk V suit, but it took a while before the really good Pep Files started to show up.

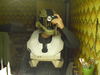
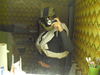
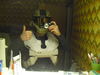
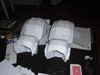
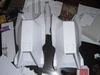
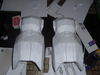
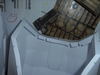
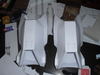
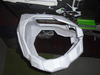
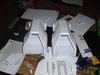
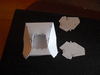
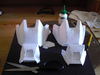
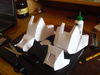
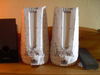
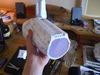
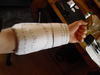
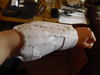
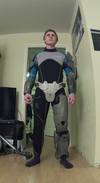
To begin with, I chose to use lganderson's MK. V Torso. Gotta say I love the work he did on it! Still have some details to do, but I'll soon be done with the assembly. :)

Enjoy!

027.jpg

028.jpg

030.jpg
 

Attachments

  • 027.jpg
    027.jpg
    56.6 KB · Views: 177
  • 028.jpg
    028.jpg
    48.7 KB · Views: 186
  • 030.jpg
    030.jpg
    69.6 KB · Views: 180
Looks clean and sharp. However, I suggest that you place a Noble 6 image sided by side to yours. You can tell that yours is a little too big. You probably need to reduce it by 15-20%. The lower side brace should be right below your ribcage, not on your hips.
 
It IS just below my Rib Cage, not at my hips. And if I were to reduce it, my head would not fit through the collar. I think it fits perfectly.
 
Here is an image and decide it yourself. Compare your second image to this image found on the web.
Noble6.jpg

My understanding is once the costumes are made, most of them are impossible to fit through your body without some type of adjusting. The chest piece for example may need to be separated in half and put it back together again. I did just that to my kids MC chest pieces.
 

Attachments

  • Noble6.jpg
    Noble6.jpg
    116.7 KB · Views: 173
Don't worry, it will fit. You have to remember that the underarmor I'll be making will have a lot of layers of foam, so it will be raised a little from my shoulders and front and back will be filled up with underarmor.
 
Looks good, dude.

The piece is at his rib cage. The pics that he posted aren't clear enough to see where his rib cage ends.

Can't wait to see some more progress, dude!

-Pony
 
Yeah, I took a few pictures showing where my hips are at, just to clear things up. My hand is right above my hips. :

Btw, Chest is completely assembled! (Aside from a few small detail pieces, I'll add those later.)
001.jpg

002.jpg

003.jpg

004.jpg
 

Attachments

  • 001.jpg
    001.jpg
    153.3 KB · Views: 182
  • 002.jpg
    002.jpg
    167.7 KB · Views: 189
  • 004.jpg
    004.jpg
    138.6 KB · Views: 176
  • 003.jpg
    003.jpg
    138.9 KB · Views: 178
Huzzah, I has an update! :D

cimg0579.jpg

cimg0580.jpg

cimg0581.jpg

cimg0582.jpg

cimg0583.jpg

cimg0584.jpg

cimg0586.jpg
 

Attachments

  • cimg0580.jpg
    cimg0580.jpg
    152.2 KB · Views: 166
  • cimg0581.jpg
    cimg0581.jpg
    184.9 KB · Views: 162
  • cimg0579.jpg
    cimg0579.jpg
    180.8 KB · Views: 164
  • cimg0583.jpg
    cimg0583.jpg
    81.4 KB · Views: 167
  • cimg0582.jpg
    cimg0582.jpg
    98.7 KB · Views: 163
  • cimg0584.jpg
    cimg0584.jpg
    101.5 KB · Views: 165
  • cimg0586.jpg
    cimg0586.jpg
    192.2 KB · Views: 165
CONGRADUSLATIONS!!! you sir are the first, that i've seen, to make those shins!!!
haha
Looking good dude!
 
Hmm, it's looking good! That's quite the sexy looking helmet...

Thanks Brandon!

Hey, I was gonna ask you... How is the Shotgun you got coming along? I've haven't seen or heard of it in a long time. :)

CONGRADUSLATIONS!!! you sir are the first, that i've seen, to make those shins!!!
haha
Looking good dude!


Thanks, Rhinoc! It's your model, right? I chose it because of the level of simplicity and detail I looked for. ;) Now, all I need are the Grenadier Knee Pads. :)
 
So yeah, here is the long overdue progress update. Just got finished assembling the Forearms by Ruze, which was splendidly unfolded by Brandon. Love them so far!

I also completed a set of FJ/Para Kneeguards that came along with the Shins I built earlier this year. Hopefully with the rising temperatures I'll be able to start resining these pieces soon.

Enjoy!

CIMG0588.jpg

CIMG0597.jpg

CIMG0598.jpg

CIMG0589.jpg

CIMG0595.jpg

CIMG0594.jpg

CIMG0593.jpg
 

Attachments

  • CIMG0588.jpg
    CIMG0588.jpg
    379.8 KB · Views: 176
  • CIMG0597.jpg
    CIMG0597.jpg
    461 KB · Views: 165
  • CIMG0598.jpg
    CIMG0598.jpg
    419.8 KB · Views: 163
  • CIMG0589.jpg
    CIMG0589.jpg
    468.1 KB · Views: 160
  • CIMG0595.jpg
    CIMG0595.jpg
    458.4 KB · Views: 167
  • CIMG0594.jpg
    CIMG0594.jpg
    393 KB · Views: 161
  • CIMG0593.jpg
    CIMG0593.jpg
    428.1 KB · Views: 169
Aaaaaaand we're rolling again!
GOPR0247.jpg

GOPR0246.jpg

GOPR0245.jpg
 

Attachments

  • GOPR0246.jpg
    GOPR0246.jpg
    451.4 KB · Views: 160
  • GOPR0247.jpg
    GOPR0247.jpg
    394.4 KB · Views: 171
  • GOPR0245.jpg
    GOPR0245.jpg
    393.1 KB · Views: 164
The Shins and Knees are now done! :)
GOPR4345_zpsc2d85757.jpg

GOPR4346_zps585114e4.jpg
 

Attachments

  • GOPR4346_zps585114e4.jpg
    GOPR4346_zps585114e4.jpg
    70.8 KB · Views: 178
  • GOPR4345_zpsc2d85757.jpg
    GOPR4345_zpsc2d85757.jpg
    81.3 KB · Views: 165
Thank you! The thighs still needs some adjustment, they're a little tight around the bottom and the top, but with a little filing here and there, they should fit snugly. :)
 
I decided to leave the biceps out until after the release of Halo 4, because I don't want to go through the hassle of figuring out how to put it in place, and how to attach the ODST shoulder to it. So there will only be ODST shoulders on on this build. :)

GOPR4348_zpsd8dbde8d.jpg

GOPR4349_zpsdd041f44.jpg

GOPR4350_zpse3c1203f.jpg
 

Attachments

  • GOPR4348_zpsd8dbde8d.jpg
    GOPR4348_zpsd8dbde8d.jpg
    58.2 KB · Views: 173
  • GOPR4350_zpse3c1203f.jpg
    GOPR4350_zpse3c1203f.jpg
    56.8 KB · Views: 158
  • GOPR4349_zpsdd041f44.jpg
    GOPR4349_zpsdd041f44.jpg
    59.9 KB · Views: 254
great progress so far i did O.D.S.T. shoulders on my armor as well they are hard to ad to biceps but the end result is definately worth it.
 
Status
Not open for further replies.
Back
Top