Trooper114
Well-Known Member
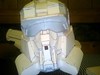
So I decided to drop my original build, i declare it a disaster. I rushed it and i tried to get my self to make it better, but i never felt that push, i guess because it was kind of a old idea for me. I decided to scrap it, but i keep the helmet and guantlets, since those where the best pieces that out of the whole suit, and also a reminder of how bad of a idea it is to procrastinate and not doing it right.
My new armor will be a major improvement to my last one. I am planing on resining and rondoing my helmet and my AR, as for the rest, it will be a foam build.
Armor Pieces
-EOD Helmet by IroniumCostuming
-Reach Torso V3 by L3X BLU3R1V3R
-Collar/Breacher attachment by IroniumCostuming
-Commando(Carter) helmet attachment by Ruze
-Cod piece by Rundown
-HU-RS Torch attachment by MissingSpartan7
-Reach Forearm by Rhinoc
-Reach bicep by Rhinoc
-Reach Shin by Rhinoc
-Reach Thigh by Rhinoc
-Boot Armor by Ruze
-Toe Piece by AceNat
-Assualt Shoulder by MissingSpartan7
-Grenedier Shoulder by MissingSpartan7
-Jorge Forearm add on by Rhinoc
-Ua tac pad by MissingSpartan7
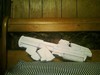
-Reach AR by fat-hi555
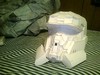
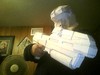
Progress: EOD :cool

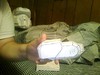
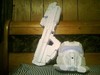
Carter Attachment


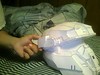
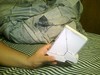
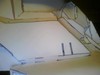
AR Clip

Stay Tuned") Please Correct me if i made a error on the parts list as far as modelers goes, thanks. and Unfolders please feel free to Pm if you want me to put you along with the modelers.
Please Correct me if i made a error on the parts list as far as modelers goes, thanks. and Unfolders please feel free to Pm if you want me to put you along with the modelers.
My new armor will be a major improvement to my last one. I am planing on resining and rondoing my helmet and my AR, as for the rest, it will be a foam build.
Armor Pieces
-EOD Helmet by IroniumCostuming
-Reach Torso V3 by L3X BLU3R1V3R
-Collar/Breacher attachment by IroniumCostuming
-Commando(Carter) helmet attachment by Ruze
-Cod piece by Rundown
-HU-RS Torch attachment by MissingSpartan7
-Reach Forearm by Rhinoc
-Reach bicep by Rhinoc
-Reach Shin by Rhinoc
-Reach Thigh by Rhinoc
-Boot Armor by Ruze
-Toe Piece by AceNat
-Assualt Shoulder by MissingSpartan7
-Grenedier Shoulder by MissingSpartan7
-Jorge Forearm add on by Rhinoc
-Ua tac pad by MissingSpartan7
-Reach AR by fat-hi555
Progress: EOD :cool
Carter Attachment
AR Clip
Stay Tuned
Please Correct me if i made a error on the parts list as far as modelers goes, thanks. and Unfolders please feel free to Pm if you want me to put you along with the modelers.