1st Build WandererTJ's Mjolnir Mk. V (Custom) - S-128 - [Hybrid Build] [Pic Heavy]

Status
Not open for further replies.

WandererTJ

Well-Known Member
Cover received_2268693590109555.jpeg

Hey everyone!
It certainly has been quite a long time since I've joined the 405th (5 years or so actually) and I have yet to build anything... until now!!!
So with this thread, I'd like to make it official that I am starting my build. :)

This thread will follow the creation of my armor, but it will also cover many other things; it is my goal to inspire and teach others as you all have inspired and taught me.
So with that, I will be doing my best to cover things as thoroughly as I possibly can.

First and foremost, I have used "Hybrid Build" as a decriptor in the Title of the thread because this build will likely incorporate both Foam and 3D-Printing.

Secondly, listed below are some images of the basics of this build. While what you are seeing are models from Reach, this build should not be considered entirely as such.
I will be taking inspirations from concept photos and artwork of many of the MJOLNIR Mk. V designs that I have seen, and I will be attempting to combine several of them. I may start with Reach components and models, but I have a feeling every piece may end up getting revisited eventually.


As I said, I will be doing my best to thoroughly cover every inch of my build, as much as I can, so starting it off is the Table of Contents, which will hopefully help you navigate to the information that you seek!

Table of Contents:
Post 0: Introduction
Post 1: Build Plan
• Current Progress / Current Status​
• Plan of Action​
• Build Updates & Links to Posts with Updates​
Post 2: Build Specifications
• Details of all Armor Components​
• Concepts & Designs​
Post 3: Spartan Identity
• Spartan Bio​
• Spartan Backstory​
• Spartan Profile Card​
Post 4: Becoming a Spartan-II
• Fitness, Diet, & Life Changes​
Post 5: Progress Photos
• Build Progress: Armor Pieces (Summarized)​
• Build Progress: Weapons & Props (Summarized)​
• Tips and other things I learned while building​
Post 6: Purchases
• Clothing Used​
• Tools Used​
• Materials & Costs​
Post 7: Credits
• 3D-Models Used​
• Information Resources​
• Inspirations & Special Thanks​
Post 8: Extras
• Convention Photos​
• Other Projects​
 
Last edited:
Build Plan

Build Plan
• Current Progress / Current Status
• Plan of Action
• Build Updates & Links to Posts with Updates​


Current Status
This build is mostly finished

Current Progress
. Armor Part .| Scaled |. Built .| Surfaced | Painted | Electronics | COMPLETE |
... Helmet ...|..N/A...|.Casting.|...N/A....|...DONE..|.....DONE....|.. True ..|
...Neck Seal..|. DONE .|.. DONE .|...DONE...|...DONE..|.....N/A.....|.. True ..|
... Torso ....|. DONE .|.. DONE .|...DONE...|...DONE..|.....DONE....|.. True ..|
.StomachPlate.| Scrtch |.. DONE .|...DONE...|...DONE..|.....DONE....|.. True ..|
.Spine Plates.| Scrtch |.. DONE .|...DONE...|...DONE..|.....N/A.....|.. True ..|
... Biceps ...|. DONE .|.. DONE .|...DONE...|...DONE..|.....DONE....|.. True ..|
.. Forearms ..|. DONE .|.. DONE .|...DONE...|...DONE..|.....N/A.....|.. True ..|
..Handplates .| Scrtch |.. DONE .|...DONE...|...DONE..|.....N/A.....|.. True ..|
....Gloves....|..N/A...|...N/A...|...N/A....|...DONE..|.....N/A.....|.. True ..|
.. Belt/Cod ..| Scrtch |.. DONE .|...DONE...|...DONE..|.....N/A.....|.. True ..|
... Thighs ...|. DONE .|.. DONE .|...DONE...|...DONE..|.....DONE....|.. True ..|
... Shins ....|. DONE .|.. DONE .|...DONE...|...DONE..|.....N/A.....|.. True ..|
... Boots ....| Scrtch |.. DONE .|...DONE...|...DONE..|.....N/A.....|.. True ..|
.. Undersuit .|. DONE .|.. DONE .|...DONE...|...DONE..|.....N/A.....|.. True ..|
.UpprUndrsuit.|. DONE .|.. DONE .|...DONE...|...DONE..|.....N/A.....|.. True ..|
.LowrUndrsuit.|. DONE .|.. DONE .|...DONE...|...DONE..|.....N/A.....|.. True ..|
..Knee Wraps..| Scrtch |.. DONE .|...DONE...|...DONE..|.....N/A.....|.. True ..|
..Ankle Wraps.| Scrtch |.. DONE .|...DONE...|...DONE..|.....N/A.....|.. True ..|

.. Upgrades ..| Scaled |. Built .| Surfaced | Painted | Electronics | COMPLETE |
....UA-MkV...|. DONE .|.. DONE .|...DONE...|...DONE..|.....N/A.....|.. True ..|
.HU/RS Module.|. DONE .|.........|..........|.........|...... ......|..False ..|
..CNM Module..|. DONE .|.........|..........|.........|...... ......|..False ..|
.CQC Shoulder.|. DONE .|.. DONE .|...DONE...|...DONE..|.....N/A.....|.. True ..|
.CmmandoShldr.|. DONE .|.. DONE .|...DONE...|...DONE..|.....N/A.....|.. True ..|
.GrenadrKnees.|. DONE .|.. DONE .|...DONE...|...DONE..|.....N/A.....|.. True ..|
.. UA-Tacpad .|........|.........|..........|.........|...... ......|..False ..|
..FJParaAmmo..|. DONE .|.........|..........|.........|.....N/A.....|..False ..|
.SmokeGrenade.|. DONE .|.. DONE .|...DONE...|...DONE..|.....N/A.....|.. True ..|
..CombatKnife.|. DONE .|.. DONE .|...DONE...|...DONE..|.....N/A.....|.. True ..|
UtilityModule.|. DONE .|.. DONE .|...DONE...|...DONE..|.....DONE....|.. True ..|


.Alternates.| Scaled | Built | Surfaced | Painted | Electronics | COMPLETE? |
FJParaKnees |........|.......|..........|.........|...... ......|.. False ..|
. H4 Torso .|........|.......|..........|.........|...... ......|.. False ..|


Plan of Action (To be Updated and Expanded on)
• Phase 1: ACTIVE
- - • Need to make sure there are foam template files for printing.
- - • Need to properly scale armor files.
- - - - • Make considerations to stretch designs for better fitting
- - • Need to print armor files onto paper.
- - • Need to cut templates out of paper. - Cutting Board, X-Acto Knife, Scalpels
- - • Need to use templates on foam and then cut out the foam. - Cutting Board, Scalpels, Hot Knife, Protractor, Straight Edge
- - • Assemble and shape the foam. - Heat Gun and Hot Glue Gun
• Phase 2:
- - • Fill gaps and clean up edges - Hot Glue
- - • Add details - Craft Foamies, Dremel, & Wood Burner (Hot Knife)
- - • Sealing the Foam - PVA (*Start with test piece*)
- - • Surfacing/Hardening the Foam - Polyurethane (*Start with test piece*)
• Phase 3:
- - • Prepping for Paint - Sanding/smoothing the Surfaces
- - • Painting: (*Start with test piece*)
- - - - • Primer
- - - - • Metallic Base coats
- - - - • Preparing the weathering details
- - - - • Top Level Coats (Primary and Secondary Armor Colors)
- - - - • Black washing the details to pop out and add grimey/worn look to armor
- - - - • Clear coat to protect paint layers
- - • Stencils, Decals, and Stickers


Build Updates & Links to Posts with Updates

Original Thread/Blog Posts: Halo Reach Custom Spartan-II
Update 1 - Forearm & Concept Sketch: 405th - Halo Costuming
Update 2 - Undersuit Pattern Testing: 405th - Halo Costuming
Update 3 - Mannequin: 405th - Halo Costuming
Update 4 - Forearms Built & Detailed + Model Used + Reference Images: 405th - Halo Costuming
Update 5 - Compression Clothing: 405th - Halo Costuming
Update 6 - Jackal Shield Design v1: 405th - Halo Costuming
Update 7 - Bicep Progress Pics: 405th - Halo Costuming
Update 8 - Biceps Built & Detailed + Model Used + Reference Images: 405th - Halo Costuming
Update 9 - Handplates Built & Detailed + Model Used + Reference Images: 405th - Halo Costuming
Update 10 - CQC Shoulder Built & Detailed + Model Used + Reference Images: 405th - Halo Costuming
Update 11 - Commando Shoulder Built & Detailed + Model Used + Reference Images: 405th - Halo Costuming
Update 12 - Shin Guards & Knees Built & Detailed + Model Used + Reference Images: 405th - Halo Costuming
Update 13 - Boots Built & Detailed + Model Used + Reference Images: 405th - Halo Costuming
Update 14 - THE RETURN!!! / Armorsmith / Mark V Reach/CE Hybrid Chest: 405th - Halo Costuming
Update 15 - CQC Shoulder, Version 2 - Rescaled: 405th - Halo Costuming
Update 16 - Undersuit Part 1: 405th - Halo Costuming
Update 17 - Undersuit Part 2: 405th - Halo Costuming
Update 18 - Grenadier Knees, Version 2: 405th - Halo Costuming
Update 19 - The Torso: 405th - Halo Costuming
Update 20 - Stomach Plate, Neck Seal, and Neck Gaskets: 405th - Halo Costuming
Update 21 - Belt/Cod/Tail Plate: 405th - Halo Costuming
Update 22 - Gloves and Paint Test: 405th - Halo Costuming
Update 23 - Thighs, Version 3: 405th - Halo Costuming
Update 24 - Initial Paint Pass and First Suit Up: 405th - Halo Costuming
Update 25 - Paint - Biceps & Shoulder Attachments (Unweathered): 405th - Halo Costuming
Update 26 - Paint - Forearms (Unweathered): 405th - Halo Costuming
Update 27 - Paint - Stomach Plate and the Belt/Cod/Tail Plate (Unweathered): 405th - Halo Costuming
Update 28 - Paint - Leg Armor (Unweatered): 405th - Halo Costuming
Update 29 - Paint - Torso Armor: 405th - Halo Costuming
Update 30 - Decals! Decals! Decals!: 405th - Halo Costuming
Update 31 - Accessory - Smoke Grenades: 405th - Halo Costuming
Update 32 - Accessory - Magnum: 405th - Halo Costuming
Update 33 - Electronics, Part 1: 405th - Halo Costuming
Update 34 - Finishing up the Paint: 405th - Halo Costuming
Update 35 - Undersuit Finalization + Cod/Belt Final Paint & Decals, A Story of Red Dots: 405th - Halo Costuming
Update 36 - Leg Armor Finalization: 405th - Halo Costuming
Update 37 - Arm Armor Finalization: 405th - Halo Costuming
Update 38 - Torso Armor Finalization: 405th - Halo Costuming
Update 39 - Electronics, Part 2 - The Armor Ability Module: 405th - Halo Costuming
Update 40 - Pre-Outpost Suit-Up 1: 405th - Halo Costuming
Update 41 - The Bucket: 405th - Halo Costuming
Update 42 - The Pattern Box: 405th - Halo Costuming
Update 43 - Pre-Outpost Suit-Up 2: 405th - Halo Costuming
Update 44 - Pre-Outpost Makeup Test: 405th - Halo Costuming
 
Last edited:
Build Specifications

I'm adding a big Dropdown here because a lot of this was time spent with anxiety rather than time spent building. I did too much planning and it made it much harder for me when I tried to get into action. But for the sake of archives, I'm not deleting anything I've posted.
Just like with armor parts that came out really wrong, I find it important to look back and see where you've come from.

Build Specifications
• Details of all Armor Components
• Concepts, Designs, & Drawings​


Build Details (These are somewhat outdated and will be updated in the near future)

Colors (Unless Otherwise Noted):
Primary: Olive Green
Secondary (Upper Body): Dark Grey/Black
Secondary (Lower Body): White
Under Armor / Undersuit: Black


Emblem/Insignia & Designations:
Spade: Red
Circle: Black
Star Point Tips x8: White
Call-Sign 1: W28
Call-Sign 2: AHNZ
Spartan Number: S-128 (Spartan-II)


Helmet 1: ODST UA/HESA-E w/Raised protrusions, Ridges and Vents
Model: Hugh Holder v2 Helmet with:
• Modifications:
- - • Halo-Reach ODST Upgrade
- - • Removed Side Vent Straps
- - • Dutch Stacked Double Side Vents
- - • Dutch Above-Visor Vents
- - • Dutch Raised Mohawk Ridge
- - • Dutch Raised Upper Side-Ridges (OPTIONAL)
- - - - (Dutch Raised Protrusions Modified to fit Attachments)
Material: Smooth Cast 320 plastic (Preferably)
Visor: Sharp Edges, 2-Piece Design or vacuformed
• Color: Black (Matte/Flat)
• Detachable or Retractable in some way
• Internal VISR Mode LEDs - Illuminate face (OPTIONAL)
- - • May use EL-wire around the visor's internal perimeter
• Secondary Screen with HUD details behind the Visor and the VISR LEDs
- - · use curved & etched piece of plastic that is edge-lit with LEDs (1/8'' Acrylic etched with small diamond dremel bit)
Attachments: UA/HESA-E
• UA = Up-Armored, forehead armor attachment
• HESA-E = Hardened External Sensor Array-External = HU/RS + CNM Combo =
- - • CNM = Command Network Module (Left Ear)
- - - - - • Working Camera in Front - Top Aperture (OPTIONAL)
- - - - - • LED (Green) on Front - Bottom Aperture (OPTIONAL)
- - - - - • LED (Cyan) on Side
- - - - - • No Connection Cables Visible, just the 2-Position Mount
- - • HU/RS-Torch = Hardened Uplink/Remote Sensor (ODST Flashlight - Above Right Ear)
- - - - - • Hardened Uplink LED (Cyan) next to connection cable
- - - - - • Working Torch (Flashlight)
Decals:
• Emblem/Insignia on the back side of the raised mohawk ridge or above the visor near one of the vents
• Designation: "W28-AHNZ-•-S128" located on rear/lower brim of helmet below the mohawk or up across the side
· Messy red "Omega" on the back side
• Stripes: Either Black or White - currently undecided
Extras & Internal Components:
• Padding (Motorcycle Helmet Liner)
• Multiple Ventilation Fans (Cooling/Defog) -- G&G turbo fans
· Mesh Grate at the air vents and have the air vents allow air to flow
• Motorcycle Breath Deflector
• LEDs in the Dutch Above-Visor Vents (OPTIONAL)
• Possible LEDs on the back of the helmet (OPTIONAL) - See Longshot-X's build
• Detachable CBRN Breather Attachment (using Magnets)
• Long Lasting Batteries w/ battery housings.
• On/Off switches for electronics
• AI Chip Helmet Port
• AI Chip: Metal
- - • Thin Profile; Non-illuminated - Use Clear-Blue Plastic across hole for looks
- - • Gold SIM Card Interface
• AI Chip: Wired so that it turns on the fans and LEDs in the helmet when plugged in


ReachHelmetAttachments-31.png

Helmet 2: Custom GEN 2 ODST UA/HESA-E
The following design is incomplete, however it is similar to what I would like to do:

HelmetInProgressTeaser.png


AI Chip Port:
th_AIChipPort.png


Something based on this:

halo_4__odst_helmet_by_tekka_croe-d5kz3ic.jpg

Credits: Tekka Croe

Under Armor/Undersuit: Custom Design
Still trying to think of how I want to approach this. I am a perfectionist, and the style of the undersuit is REALLY needed.
I might try to make rubber or foam pieces for the larger openings in the armor, especially for the stomach+lower back, inner thighs, neck-hole, and the arm-hole gaps around the chest.
I would consider getting a snowboard/skiing padded/protective suit to be used for the rest of the gaps in the armor.
Also, having something that will be able to cover the under side of my jaw/chin is a must.

Torso 1: Mjolnir Mk. V (Halo Reach) with Collar/Breacher
Specifications:
• Hardened Collar Plate - Hard Plastic, maybe w/ some metal
• Nylon Vertical Belt Strap w/ Metal Belt Buckle
• Shells Basket made w/ Metal & Plastic Components
• Need to find a way to mount M45 Shotgun to Back*** - Has anyone done this? - I think Longshot-X might have...
- - • Use Magnets
- - - - - • Make sure there is a thin piece of rubber on the external side of the armor to prevent the shotgun from scraping on the armor.
• Chest Base:
- - • Rigid/Hardened in most spots
- - • May do unhardened foam for stomach segment and under the arms
- - • Front separates from Back at the top via Lift Release Seat Belt Buckles
• Combat Knife: Mounted to Upper-Left Side of Chest
• Kukri Knife: Mounted Under-Left arm side of Chest
- - • Might Switch Placement of these knives with one-another
- - • Lower Knife might be eliminated
• Functional Hip Side Pocket Plates - These are hard pockets, right?
- - • I will keep bags of tea in one of the pockets... I don't drink tea.
- - • UNSC/ONI ID Card kept in opposite pocket.
• Secondary Colors of the belt will be white
Attachments:
• Type-3 Refraction Dissonance Modifier/Camouflage Module
- - - aka: Active Camo Armor Ability Module Back Attachment
- - - Cyan/Light Blue/White-ish LEDs
• Pistol Ammo Clips (x2) on Front Side of Belt (HP/Parafoil style)
- - • Removable Ammo Clips
- - - - - • Magazines will serve as storage compartments for extra batteries for the suit's electronics
- - • Functional Pockets in front of Ammo Clips
• Grenades (x2) on Back Side of Belt (Assault/Sapper style)
• Chest Pouch, Lower/Right Side Covering the Lower-Side LED (Tactical/Recon Style) (OPTIONAL)
• Custom detachable UA/Collar with upgraded collar.
Extras/Details:
• Separated Spine Plates
• Chest LEDs:
- - • Left Side of Breast (2, 1of2 is hidden when looking straight at chest)
- - • Either side of Breacher Shotgun Shells (1ea)
• Chest Decals:
- - • Personal Emblem/Insignia moved so the Collar does not cover it
- - • UNSC Emblem/Insignia moved so the Collar does not cover it
- - • 405th Decal (Left Shoulder Blade/Back)
- - • Call-Sign #1 "W28" on front/top of Collar
• Rear-Torso LEDs:
- - • Upper Side (1),
- - • Upper/Mid Sides (1ea),
- - • Lower/Outer Sides (1ea),
- - • Right-Side Spine (3)
- - • LEDs under the Separated Spine Plates for illuminated silhouettes
• Rear-Torso Decals:
- - • UNSC (Upper/Right)
- - • Red Caution Triangle (Upper/Right)
- - • Caution/Warning Label (Upper Middle Spine)
- - • "I Made This"
- - • "I <3 Sheila"
• Halo Reach Service Record Medals (OPTIONAL)
- - • Extermination (1)
- - • Perfections (3)
- - • Unfrigginbelievable (1)
- - • Skullamanjaro (1)

Tactical/Recon Torso Attachment - Pouch:
th_Halo_reach_chest_armor_recon-Copy.jpg


Grenades (x2) on Back Side of Belt (Assault/Sapper style):
th_Assault-SapparRearBeltGrenades.jpg


HP-Parafoil Torso Attachment - Belt Pouches for M6G Ammo Magazines:
HP-ParafoilTorsoAmmoMagBeltPouch.jpg

Torso 2: Mjolnir Mk. V (Scratch Build - Hybrid Design of Halo 2 Concepts, Reach Concepts, and the Halo 4 model)


Upper & Lower Arms 1:

Shoulders/Upper Arms:
• Base Upper Arm:
- - • Scaled properly, stretched if necessary
- - • Must hang at proper height on arm
- - • Will use upper garnish piece to attach armor to undersuit
- - • Reinforcements for the Shoulder Armor Mounts will likely mount through the Upper Arm Base
- - - - - • This way, the heavy shoulder pieces mount directly to the undersuit
- - • Outer Bicep LED (Cyan) (1ea)
• Right Shoulder: Commando
- - • Olive&Black w/white stripe
- - • Hidden Knife on Inner Side of the Large Shoulder Plate
- - - - - • Possibly a ballistic knife (appearance-wise anyways)
- - • LED inside shoulder to illuminate Inner Side of the Large Shoulder Plate
• Left Shoulder: CQC
Wrists/Lower Arms:
• Base Lower Arm:
- - • Must be proper size, stretched if necessary
- - • Must hang at proper height on arm
- - • May possibly be made of foam in order to handle muscle flexing
- - • LEDs (Cyan) on Lateral (Outer) Sides
- - • LED (Cyan) on Dorsal Side (by elbow)
• Right Wrist: Assault/Breacher (OR No Attachment)
• Left Wrist: Tactical/UGPS - Custom Up-Armored Variant
- - • If forearm's secondary color is black, use white (or vice versa)
- - • Opens so phone can be mounted within
- - • Modify: Use aspects from Tactical/Tacpad
- - - - - • LEDs (Green x2/x4?)
- - - - - • Display Screen: Blue tinted
Hands:
• Standard Hand Plates
• Might simply use fingerless ODST styled gloves
- - • May or may not add armor to the fingers

Legs/Greaves/Boots 1:
Upper Legs/Thighs:
• Right Thigh Attachment: Mount for Custom M6H Pistol (magnets)
- - • Add a rubber tip just above magnet on surface so pistol does not scrape on thigh
- - • Might possibly also try to fit a collapsed M7S attached as well
• Left Thigh Attachment: UA/NxRA Reactive, Non-Explosive Supplemental Armor
- - • LED (Green) at bottom
• Details:
- - • LEDs (Cyan x2ea) on Ventral/Front Side of thighs
- - • Decals:
- - - - - • Caution/Warning Label - Upper/Front Hip/Thigh (Right and Left)
- - - - - • Might do a stripe around the Right Thigh (see Emile) (OPTIONAL)
Knees Guards:
• FJ/Para (White)
Lower Legs/Shins:
• Standard Reach Style (White)
• Might do an ODST (Mickey) Breacher Shotgun Shell Wrap Attachment (OPTIONAL)
• Details:
- - • LED (x1ea) on Ventral/Front side of Shins at the bottom
- - • LED (x1ea) on Dorsal/Rear side of Shins near the bottom
- - • Decals: TBD
Boots/Feet Specifications:
• Divided into 3 Sections:
- - • Heel/Ankle-Rear Side Armor
- - - - - • Underfoot LED
- - • Foot Arch Front-Side Armor Plate
- - - - - • Caution Stripes Medial & Lateral Sides
- - - - - • LEDs Medial & Lateral Sides of each foot (See Vanity)
- - • Toe Boot Armor
• Will likely use a high-heeled or platformed design for height

Weapons for Custom Spartan Build:
Custom Halo 4 Pistol -- Model 6H Personal Defense Weapon System (M6H-PDWS, Magnum Sidearm)
Mounted on Right Thigh / Hip Holster

• Nickle Finish
• Black Rubber Grip
• Dark Grey/Off-Black Handle (Forms two-tone scheme with the Grip)
• Barrel Slightly Beyond Flush with front end (Chrome)
• Removed Iron Sights (They are not on the standard M6H, but should still be noted just in case)
• Modified handle at the bottom so M6G clips/magazines can be used and so they sit flush (Bottom of Handle made flat)
- - - Removable magazine
- - - - - Batteries for electronics/LEDs mounted in Magazine
• Movable Slide (Painted: UNSC Green, Shell Release left unpainted (Nickle))
- - - Yellow LEDs (x2) on back end of Slide
- - - Red LED on back end of Slide (OPTIONAL: Otherwise paint it Red)
• Movable Trigger
- - - Connected to movable Slide (OPTIONAL)
• Movable Safety On/Off Switch
• KFA-2 x2 Scope, Top Attachment (Detachable) (Painted: UNSC Green, with faded Yellow band across the top)
- - - Red LED on front
- - - Grooves in Screws on the sides painted Red
- - - NOTE: The M6H KFA-2 attachment is physically larger than its M6G counterpart
• KFA-2 x2 Smart Linked, Bottom Attachment (Detachable) (Painted: Black)
- - - M6G (Reach) Styled with Red Dots on the sides
- - - Yellow LED on front
- - - Red LEDs on the sides
• SOCOM Muzzle Attachment (Detachable)
- - - with Chrome Barrel Tip
- - - with VnSLS/V-6E Bottom Attachment (Detachable)
- - - - - - White LED/Flashlight in the bottom section of the attachment behind a Lens
- - - - - - Chrome Tip
- - - - - - with rotating Dial/tuning grip
- - - - - - Red details painted on
• Sound Effect when trigger is pulled (cheesy?)
• BONUS: Can fire nerf darts (Just 1 is okay)


Halo 3: ODST Submachine Gun -- Suppressed M7/Caseless Submachine Gun (M7S SMG)
Mounted/Connected to Shoulder Sling, (OR mounted with Magnum to right Thigh)

• Retractable butt
• Detachable Silencer/Suppressor
• Rotatable Forward Grip Handle
• Illuminated Red Reflex Sight
• Red LEDs on the side
• Flashlight under the barrel
• Shoulder Strap Attachment
• SMG Sound Effect when the trigger is pulled (cheesy?)
• BONUS: Ability to fire nerf darts. (Just 1 is okay)


Halo Reach Shotgun -- M45 (TS) Tactical Shotgun
Mounted on Back

• Special Extended Barrel Concept Model
• LEDs Galore
• Working Flashlight
• Working/Movable "Pump"


Jackal Plasma Shield -- Kig-Yar Point Defense Gauntlet
Carried... or left in the car >.>

• Probably a Vacuformed piece of Plexiglass (or acrylic plastic)
• Rather than using LEDs, will probably just try to paint bits of red and blue in. Someone on the forums made one a while back, I will try to do my best to emulate their build. I can't remember what the wrist mount looked like in their build, but I found an HD image I could base it off of. I will likely turn the wrist mount into a hand grip since the Jackal shields probably could not have ever been worn by the larger Spartans, but surely they could hold them in their hands. If for whatever reason people freak out on me and say that they could never be used by a spartan, I will create a severed limb of a Jackal and attach the shield to the wrist of it and then proceed to hold onto the severed limb.... Yep.


M6H-Custom.png

haloreach_equipment_unsc_weapons_firearms_m45_tactical_shotgun_by_isaac_hannaford.jpg

Props
Custom Transparent ONI ID Card with holographic image hidden within, that is viewable under blacklight


Concepts, Designs, & Drawings:

ArmorPermutationsTeaser.png

Custom Collar Upgrade:
1project_galilean_by_dutch02-d3hbdrt.jpg


Mjolnir Mark V Concept Thigh Design (Reach):
ReachConceptArt-ConceptThigh.jpg


Shoulder-Knife (Frederick-104):
Will try to incorporate a modified version of this, hidden within Commando shoulder guard
It does appear as though a Commando shoulder could support a downward facing knife just like Fred-104 uses.
This is also similar to how Jun's knife is attached to his shoulder, but it adds the armor piece over it
Shoulder-KnifeFred-HaloLegends-ThePackage.png

th_Shoulder-Knife-Fred-104-Halo-Legends-Frederic-104.jpg
 
Last edited:
Spartan Identity

Spartan Identity
• Spartan Bio
• Spartan Backstory
• Spartan Profile Card​

NOTE: I want it to be clear that I am accepting all criticism to my backstory. I've done my best to ensure that given what we know in the Halo Universe, that all dates should make sense in the timeline that I provide.


Spartan Bio & Backstory
S-128: Ansgeirr (WandererTJ) | Spartan-II Class-I || Special Projects: Operation-Ω | Rank: Team Leader || Oklahoma​

Character Bio:
Listed as one of the thirty candidates that died during surgical augmentation, SPARTAN-128 was enrolled into a side project of Dr. Halsey off of any record.

Primary Objective:
S-128's mission is to find all Spartans listed as MIA and recover any that are alive by any means necessary as according to Operation-Ω.
Operation-Ω:
- Determine the final status of any and all missing Spartans by any means necessary.
- Recover the bodies of any and all missing Spartans, live or dead, by any means necessary.
- Remain undiscovered by both human and covenant life by any means necessary.
- If a Spartan is missing, find them.
- If a Spartan is alive, recover them.
- If a Spartan is dead, avenge them.
- Do not let Mjolnir armor to be taken or used by the enemy.
- While behind enemy lines, research and obtain additional information about enemy home worlds and their sciences.
- Find your fallen brothers and sisters. Finish the fight. Spartans never die...


Squadron Details:
Under Operation-Ω (Omega), nicknamed as both "Operation End-Game" and "Operation End of Line_", SPARTAN-128 leads a squad of ODSTs that refer to themselves as the "End-Game" squadron.
They refer to themselves as such because of Omega's literal meaning to be "last" and because their mission is to determine the 'final' status of all Spartans whose whereabouts are unknown. To withhold the idea that Spartans never die, all Spartans discovered to be deceased are still listed as MIA. Due to this, the End Game Squadron consider their main objectives to be both retrieval and justice for their fallen warriors.
The never-ending and seemingly hopeless search for other possible surviving Spartans, is a fatiguing search both mentally and physically.
It does not help that this squad and operation are not officially listed on any records, meaning that a redundant instance of Operation-Ω can exist officially on record. If discovered by the enemy, UNSC forces will lay no claim to the knowledge of their existence.
While they do value all forms of life and operate in the dead of night to avoid detection, there is speculation that this squadron has been known to wipe out entire regions of indigenous life when they discover a fallen Spartan; only leaving behind an omega symbol in the blood of the creatures that inhabit that region.
--This is one of the few signs that the squadron may have deteriorated mentally due in part to the severity of the conditions that they must operate in.

Their secondary objective is to obtain all additional information that they can while they are located on Covenant home-worlds.
In an investigation of Eayn, the Kig-Yar home-world, S-128 dissected several of the species in order to discover how their point-defense-gauntlets functioned. He succeeded. The squadron's translator was also successful in recruiting two Kig-Yar siblings to join the quest. It wasn't hard to convince them after freeing them from the prison they were in..... The two Kig-Yar are currently outfitted with modified Sangheili Orbital Ranger armor.

Still in search of the Spartan Grey Team, the squadron's next target was the home world of one of the most devastating Covenant species. S-128 was determined to discover how the creatures fired "death" from their hands, and was determined to find a way to harness that power to be used in tandem with a point-defense-gauntlet.

Squadron's last known location: Te of the Svir system, home planet of the Mgalekgolo.
Due to the severe conditions of the planet, the standard ODST gear would not permit the squadron to operate on the surface of the planet; S-128 went alone.

Spartan Details:
SPARTAN-128 is a close combat expert, stealth expert, and an assault specialist. He is extremely proficient in hand-to-hand combat and is highly skilled behind a shotgun.
When not taking advantage of the Type-3 Refraction Dissonance Modifier/Camouflage Module his armor is equipped with, he finds use in flanking the enemy and serves as the aggro member of the squad, drawing fire when necessary. He also serves as a front man for defensive scenarios, in breaching scenarios, and other otherwise scenarios where small passageways are taken.
S-128's squadmates know him for the arsenal that he carries with him: a M45TS Tactical Shotgun, a Suppressed M7/Caseless Submachine Gun, a Custom Model 6H PDWS Magnum Sidearm, 3+ knives of various sizes, and during some occasions an Odachi Great Katana.
"A sword, by any other name, is simply a key... and when you stick it into your foe, it unlocks their death."
S-128 is also trained as an Engineer, in order to subvert, reconstitute, and/or operate any and all equipment and technology whether it be domestic or foreign. He always has a secondary objective to find ways to reverse engineer any and all newly discovered enemy ordinance.
While he typically uses a drop pod like his fellow ODST squadmates, S-128's armor, like that of other Spartan-IIs, is equipped with an orbital drop armor locking system. This allows his person to fall from space or from upper-atmosphere and survive the landing... though he needs to be assisted out of the armor lock after more severe impacts.
Although it is dissimilar to those in his squadron, S-128 also wears an ODST helmet. It is a highly upgraded Mjolnir variant of the helmet.
Full specs on the appearance of S-128's armor and weapons can be found in detail [here].

While active in his squadron, S-128 has also been referred to as "S-128-Ω", "Wanderer", which was a nickname given to him by his classmates while he was a trainee in the Spartan-II program, "W28", his HUD sign to his squadmates, which is a combination of the nickname and his Spartan number, "Omega", since he was the last of the original Spartans in the Spartan-II program to make it into active duty and because he leads Operation-Ω, and in battle he goes under the call-sign "AHNZ".

It is rumored that during his candidacy, it was discovered that he was afflicted with a condition known as ADHD, which had been removed from human genes in the 23rd century and was originally overlooked during the screening process; Halsey purged S-128 of his "condition".

Spartan Backstory Details
UNITED NATIONS SPACE COMMAND
0256, 15 June, 2558
CLASSIFIED: ONI DIRECTIVE
EYES ONLY​
FROM: //CLASSIFIED//
TO: █████████████
RE: File on subject believed to be alive in regards to Dr. Halsey's investigation.

This is everything we have on the individual known as S-128, birth-name Ansgeirr, who was one of the subjects in Dr. Halsey's initial Spartan-II program.​

://ONI Personnel File//:​
-->> BEGIN PERSONNEL FILE <<--
NAME | [REDACTED], ANSGEIRR
UNSCID | S-128
DOB | FEBRUARY 6, ████
BIRTH PLANET | //CLASSIFIED//
BLOOD TYPE | O-POSITIVE
HEIGHT | 6' 5" (EXPECTED TO BE 6'8" IN ARMOR)
WEIGHT | ███-lbs
RANK | //CLASSIFIED//
STATUS | UNKNOWN

-->> PERSONAL PROFILE <<--
S-128 was taken by Dr. Halsey at the age of 7. In his youth, this would-be spartan often followed and assisted Dr. Halsey with her experiments. The child's full name was Ansgeirr Y...̴.̶̤̹̹̪̤͓.͔͙̻͎͓̜͈..̧͉͎͔̗.̹̼̼͕͟.̠͖̹ͅ.̸͈͉̣̱͖̭̫͝.̷̴̯̥̣̪̼̰̻̘ͅ.̧̭̺̠̝̪̫̩͘.҉̢̛̳̖̦̖̩̥̞̯͓̣̜ͅ.̨̝̰̖͙͖͓̹̻́͜.̴̪̼͚̠͇͇̺̺̩̳͚͇͟͟͠.̷̡̜̺̦͖̜̟̲͖͓͟ͅ.̩͖͖̪͕͇̫̖͓̼͙̭͢͞ͅ
Ę͎̠̤R̮̰̙̬̮ͅͅR͚̥̺Ǫ̘̳͉͚̼͚R̬̜:͙̫̝̼̹͕́ ̲̯̙͢ͅFi̴l̵̻̜̻̱̼̟e̳̦͓͕ ͓̙R̲̱̦͖͍͕ͅe̵p̩͜o̫̠͔̠̖͇̕ͅr̡̜t̳̯̫̙̼e̱d͈̥ ̘̹͓̙͕̱̟a̜͚s̩͈̫͇͟ ͉͍͙̝ͅT͚͓̥̙̫a̢̹̝͕̦ḿ̫͉͕p҉̼̪e͖͓͞r͎̯͔̲̙̦ͅe̥̲͈͙͕̣͝d̸̘̫͓̭̟̳̘
\\̡̮̺͉*̡͔̪̟*̣̠͕̻̝̀D̠̙͎A̳͖̖̩TA͚̭͈.̮̖͓̙͈̥̥Ŗ͎͔͖͚͚͉̲E̘̭͈̼͡M̗͖̖̙̕O͓̜̩̜̺V͍E̗Ḏ̳.̣̬͚C̯͍͉ͅL̴̮̙̠̱̩̜A̴̙̳͕͖̭Ś̘̺͇͔̩̪S̖͢:͙͇͓͎̮͚͜O͉̯͔̭N͈̲̪̻͙̙͔Ḭ͔͎͕̝̹͇.̤̰͕TI̗̰̬͎͜ͅER̘̥̜̳͜.̵̖̫̮1*̼̼͕̫̀*͓̮̝͍̜/̧͈̜͉͙̫͍/̸̬̜̙
̪̗̻̺͍̀ͅE̖̝̪͖R̰͇̲̣̼R̡̼̻̦O̠̲̻̗̙͈̱͝R͓̼͎̮͓̺:̦̜̬̪̜̤̠͜ ̬̙D͍a̶̘ͅt͍̰͔̫͝ḁ̶͕̠̳ ̨̟͇̫͙l͕̻̰͚̬o̘̙͉͈̮̞̦s̯͍͜ͅs͕
͏͍̥͈͉̳ͅE̖͔̮̝͢R̥͈ͅṚ̹̺͙͍̣͘O͎͖̞̬͜R̺̜̺̣̜̖͝:̮ ̻͡ͅF̯̺̯̦̼͕̲͘i̩̻̖̬l̵̼ͅȩ͎̦̼̤ C̬͇͓̦͖̭o̞̼̞̺̝̰̘͘r͖͎̭̰̜ru̙͟p͕̲͓̬t̶̤̻͚̰͍e̝̲̠͎͢d͏͔̻̙
I̫̟̖̥ǹ̥̭̥̥̖̞f͉̥̩̻̯͝o̗̙͔̜̮̬ͅr̞͍͔͡ḿa̳̯̝̘̹ͅͅti̝͍͞o̸̰̗̤ṉ̷̠̩̱ ̧̱͙͚͚̜̦͈p̰̬̱u̻̩͉r̜̼̤͔̝͈g̭̫̝͎̙̰ͅe̛͉͔͖̮ḓ̺͚̻.̦̫͓͔̻̕

Information recovery: Final entry, Dr. Hals̪̱ey̹̳͎:
The pat̩̺̥́ient, coden͈͎̦amed S-128, was confirmȩ̼̣d d̦̲̬̱͍eceased. Age 15. Ca̞̯̕u̹̙͉͖̞̯s̵̹͚̠e: Sur̢̫gical Aug͉̖̰̺̣͉͞m̸͖͕͇ͅentation. Time o͘͏҉f death: 12:51͈̠PM 3͙͖͕ͅ1̜̣-AUG-2544. Di҉͉͍̖̺e̮͡ͅd̫͎̘̥̳̭̗ on a Monday.
The details above are only known remaining details about this individual that were recorded.
://END FILE//:​

Sorry that there isn't any more, Dr. Halsey was very thorough with this one.​
Yours,​
//CLASSIFIED//​

://END TRANSMISSION//:


Code:
://ONI Sector Zero Tier Zulu Restricted Access//:
ONI1:~> $ User Login: Zulu1
:/$ su root
:/# cd /P1S0TZ/Ω/S128
:/# S128
User Access Granted_
To access Full Profile and Uncorrupted profile entries, see the [sealed report].

Opening Report...

[sealed report]


Uncorrupted Details: Deleted Logs/Entries and Notes that were Undocumented in the System

Entry 2517, Aug 28th - Keyes:
Halsey and I met with candidate #128 for the program. He seems exceptionally gifted and easily passed all the tests that Halsey conducted, though I can't shake the feeling that when he looks at me, brief as it may be, it seems as though he is looking through me. I don't think we've seen a candidate yet with spatial awareness scores that can match his.

Trainee 128 Log 1:
S-128 was taken by Dr. Halsey at the age of 6. The child's full name was Ansgeirr Yngvirr, and he was born February of 2511.

NOTE: Name Details -
Literal Translation: Old Norse to English: Ansgeirr (AHNZ•GEER) - derived from Ans for 'god' and geirr for spear: "God-Spear". Yngvirr (ING•VEER) - derived from Yngvi a god, referring to either Freyr or Freya and varr as "VAR"/"HER" meaning warrior of/defender of.
- Ansgeirr Yngvirr: "God-Spear Warrior of the God/Goddess Freyr/Freya"

Trainee 128 Log 3:
Age 6: Some of the children have formed groups, while others have remained distant and closed off to one another. Though it would seem that S-128 is like the other youths that close themselves off, he's a bit more complex than that. It seems that Frederic-104 and S-128 do not get along, though they cope with being around one another. While some of the closed off children eat alone at lunch, S-128 can often be found sitting next to Sheila. The two seem to find comfort in each other even though they are never seen speaking with one another.

Trainee 128 Log 2:
Age 7: This would-be future Spartan often follows Dr. Halsey around and does what he can to assist her with her experiments. He does this in lieu of playing with the other kids. While there are certain concepts he is still unable to grasp, he seems to understand a great deal of what is going on.

Entry 2521, Jul 1st - Halsey:
Age 10: S-128 seems to have developed symptoms of condition that we have not seen in several generations. Shockingly, it seems as though I overlooked this during the gene-candidate pool stage.

Trainee 128 Log 4, 2521, Sep 23rd:
Age 10: S-128 has been purged of his condition.

Trainee 128 Log 5:
Age 11: S-128 has been given the nickname "Wanderer". During a small-squad SERE recon training mission against the rest of his fellow trainees, after becoming the only remaining "survivor" of his squad, S-128 managed to not only lose the other team, but disabled all the tracking sensors we had placed on his person. It wasn't until a week later that we picked him up; he seemed to just be wandering out further and further. He said that he was looking for a real enemy confrontation. We have listed this as a heat stroke even though it was not. It seems as though there is something that Halsey is not telling us about... She kept herself locked up the entire week, blaming herself for something; she seemed like she was about to break. Needless to say, the entire staff is on edge and we are jumping to her every move after that screw up.

//CLASSIFIED//
Trainee 128 Log 6.0
The procedure to cover up certain secret projects is commencing today post surgical augmentation. While some of the trainees might be listed as deceased, some of them 'should' actually very much alive and well...
We must not be discovered by ONI.
//CLASSIFIED//

//CLASSIFIED//
Trainee 128 Log 6.1
Sadly it would seem that there were actually some unexpected complications during some of the surgical augmentation procedures. Some of the trainees were actually lost... We are placing both those that have survived and those that have not into cryo-suspension. Halsey believes that we might actually be able to resuscitate some of those that were lost, but we just don't have those capabilities at this point in time... She has some of us convinced, I just think that between those who are actually deceased and those that are simply listed as deceased, keeping them all in cryo is a good way to hide the ones who are alive in plain sight. I think Halsey understands this too, perhaps she just simply wanted to give us hope that we didn't kill some of these kids.
//CLASSIFIED//


Trainee 128 Log 6.2, 2525, Mar 9th:
The patient, codenamed S-128, was confirmed deceased. Age 14. Cause Surgical Augmentation. Time of death: 10:51PM 9-MAR-2525. Died on a Tuesday.

Entry 2525, Mar 9th - Halsey:
I regret that I purged S-128 of his condition. The only time he spoke after the event was during his training missions. Today he has watched as 29 of his classmates have died from the surgical augmentation procedure. He did not hesitate when his number was called.
While I decided early on what would be of him after this, I hope he is still ready. He will be placed into cryo-suspension, he will not be in attendance for the graduation ceremony with his classmates that survived the procedure.

Entry 2543, Jun 22nd:
Although there have been several candidates for a 2nd class of Spartan-IIs, we have only been able to train a few. Nicole-458 has been training with standard instructors for 6 years in the program. She is doing well, but without being able to train with and against a fellow Spartan, in the end, she won't be nearly as good as any of the original class. Halsey is nearly done with S-128's secondary level of upgraded augmentations, and she is almost nearly done with his specialized armor. Operation-Ω is not due to begin for another few years, but Halsey agrees that S-128 needs to be brought up to speed before he jumps feet first into hell. Alive or dead, we've lost many spartans in these past few years. Due to these developments, S-128 is getting defrosted. A flash clone is being placed into S-128's cryo-chamber in order to keep up appearances. Age: 32, Cryo-Age: 14.

Entry 2543, Jul 15th:
Age: 32, Cryo-Age: 14; S-128 assists in the training of Nicole-458, a new Spartan-II, for whom the two of seem to share a bond.

2544:
Age: 33, Cryo-Age: 15; S-128 receives the report that Sheila has fallen in the Battle of Miridem and that Dr. Halsey has been captured by Thel 'Lodamee.
Hearing this news S-128 deploys himself, attaching himself to a F-98 Wombat Drone prototype that he has hacked into.
He approaches the space battle relatively unseen, as the covenant forces are focused on their efforts against Blue Team, led by John-117, who were already on their way to recover Halsey. While S-128 is unable to make it to the battle in time to help with their efforts, he was able to manage to connect with the upper side of the flagship just before it jumped into slipspace. S-128 was not heard from until a Covenant Phantom crash landed back at our facility. We feared the worst and had the ship fully surrounded within seconds, but it was S-128 that emerged, Thel's head in hand. S-128 confirms Sheila, Solomon-069, and Arthur-079 as KIA.

2544:
Age: 33, Cryo-Age: 15; Soon after the event and S-128's return, Halsey in hope to redeem herself to S-128, approached him about his AI chip; a chip for which it would seem that Halsey had preserved a sample of Sheila's brain tissue for the AI. This was the first time S-128 had shown any emotion in front of Halsey for a long time. He accepted the AI Chip. Even though Sheila died at the age of 33, her hologram appears as the youthful version that S-128 knew.

2544:
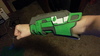
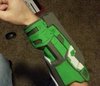
Age: 33, Cryo-Age: 15; Halsey completes the specialized armor for S-128. However, he cannot wear it without receiving his secondary level of augmentations. For now, he is still limited to standard Class-I Mjolnir armor.

2545, January:
Age: 33, Cryo-Age: 15; Halsey completes the final augmentation upgrades and applies them to S-128, who survives the procedure successfully. The next day, he suits up for the first time in his own personal armor.

2545:
Age: 16 (34); Nicole has successfully made it through the augmentation procedure and graduates due to the help she received from S-128. Although all information on S-128 is still to be left unrecorded, today also served as his graduation, since he was forced to not attend the graduation with his original class.

2545:
Age: 16 (34); Soon after Nicole's graduation from the Spartan II program, S-128 and S-458 form Fireteam Spartan Black II.

2547:
Age: 18 (36); Due to a jealousy of "Sheila", Nicole disbands FTS-Black-II and returns her armor to green. After Nicole disbands the squad, S-128 operates solo for a time, with only Sheila by his side. S-128 deploys in search of Spartan Grey Team, but is only met with failure. This year also marked the revealing of the Spartan-II program to the public but S-128 is still undisclosed to all outside of Operation- Ω.

2552, Jul-Aug:
Age: 23 (41); S-128 deploys to Reach, in order to assist in the front lines.

2553, January:
Age: 23 (41); S-128 begins searching for John-117. S-128 is assigned a full squad of ODST troopers to assist him in searching out fallen spartans. During down times, the
ship is led by JD, Private First Class ODST, while S-128 is put into cryo sleep.

2557:
Age: 24 (45); After receiving reports that Master Chief, John-117 is alive and well, the End-Game squadron goes back to searching for Spartan Grey Team.

2558:
Serin Osman, former classmate of Ansgeirr-128, becomes Commander in Chief of the Office of Naval Intelligence.
Serin had known about the existence of certain special projects and operations that Halsey had conducted/started with some of the other Class-Is. After discovering that the individual located in S-128's cryo-locker (on the facility holding all the spartans who were iced) was a flash clone, and even though Serin could not dig any deeper, SPARTAN-128 is now considered to officially be a Top Secret ONI Operative and Asset by issue of Section Zero priority class Zulu, and all files and archives pertaining to S-128 have been seized and sealed by Section Zero. Whereabouts of S-128 are unknown.


Spartan Profile Card
WandererHalo4Image-Final2-Black-1.png


Transparent (Original) Version:
th_WandererHalo4Image-Final2-1.png


I have written a tutorial for anyone else interested in making a Halo 4 Bio Card for themselves.
You can find the tutorial here: http://www.405th.com/showthread.php/41917-TUTORIAL-Personalized-Halo-4-UNSC-Bio-Cards-(Image-Editing)
 
Last edited:
Becoming a Spartan-II

Becoming a Spartan-II
• Fitness, Diet, & Life Changes​


Fitness, Diet, & Life Changes

I've wanted to be a Spartan since 2010, and once I got out of school and started work, I finally realized I had more time to do some things I wanted, but that I could probably only commit to one thing at a time.
Well, in March of 2014, I wasn't super happy with myself, and like I said, I've wanted to be a Spartan for quite some time, and not only that, but I've always wanted my build to be of the highest quality, so to start my costume, I ended up working on myself first, rather than what I'd be wearing.
This is especially important, because at the center of every costume is yourself, and if you aren't happy with yourself, then you probably won't be happy with your costume in the end.

Starting in March 2014, it took me about 3.5 months to lose 35 pounds. I went from 195-ish to 162, and this is all while being at 6'1".
I'll admit it, I definitely cut way harder than I should have, and suffered some muscle loss as a result.
But after a long period of maintaining my weight, I made a point to gain back some of the muscle I lost, so starting in January 2015, I went from being able to do a total of 0 pull ups, and by April I was able to do 10 pull ups in succession. As a result, in the end, I've gained at least 3 lbs of muscle.

Between over working my shoulder and hurting it as a result and starting my actual build, I've taken a break from hitting the gym hardcore 5 days/week, 2 hours/day. I should still try to hit the gym about twice a week, but my mind is strongly focused on trying to make my build the best it can be. As such, I've gone back to a cutting/maintaining diet rather than a bulking one.

In addition to all of this, in January, I decided to get some augmentations done like all Spartan-II's have to, and I got LASIK Eye Surgery, and I couldn't be happier!

Weight Loss Information & Tips (by me!): https://dl.dropboxusercontent.com/u/30077399/Losing Weight.docx
Original Workout Routine: https://dl.dropboxusercontent.com/u/30077399/Workout Routine.docx
Updated Workout Routine: Current Workout Routine | JEFIT - Best Android and iPhone Workout, Fitness, Exercise, Bodybuilding App | Best Workout Tracker

Please feel free to ask me any questions!!! :)

Weight Loss Chart -- Last Updated: 12/28/2014
Weight Progress Update (End of Year).png
 
Last edited:
Progress Photos

Progress Photos
Reserved for:
• Build Progress: Armor Pieces (Summarized)
• Build Progress: Weapons & Props (Summarized)
• Tips and other things I learned while building
 
Purchases

Purchases
• Materials & Supplies
• Tools Used
• Mannequin Cost
• Clothing Used
• Commissions Wishlist​


Please be sure to also check out these helpful Resource Guide Threads for materials and tools:
[FOAM] [GUIDE] List of Options for Supplies, Tools, and Methods Used for Foam Builds
Resource Thread - Gloves, Boots, Compression Shirts & Pants, and More
If you have anything to add to those threads, please feel free to! I will gladly add new information to them!​


Materials & Supplies
Foam:
3x Anti-Fatique Puzzle Mat Foam - 4 Piece Set (2' x 2' x 0.5'') -- Harbor Freight -- $7.00 (Sale Price, Originally $9.99)
6x Craft Foam, 5mm (White) -- Hobby Lobby -- $1.27
1x Craft Foam, 5mm (Black) -- Hobby Lobby -- $1.27
1x Craft Foam, 3mm (Red) -- Hobby Lobby -- $0.99
2x Craft Foam, 3mm (Black) -- Hobby Lobby -- $0.99
4x Craft Foam, 2mm (Green) -- Hobby Lobby -- $0.89
Current Total: $36.42 (Tax not included)
Last Updated: 2015, 7-11

Other:
1x 4" High Temp Craft Sticks Mini Glue Sticks (50-pack) -- Hobby Lobby -- $4.99 (Sale Price, Originally $5.99)
3x 4" High Temp Craft Sticks Mini Glue Sticks (50-pack) -- Hobby Lobby -- $5.99
1x Packing Tape, 3M Scotch -- Walmart -- $2.97
1x Invisible Tape, Scotch, 3-Pack -- Walmart -- $3.34
1x Parachute Buckles -- Hobby Lobby -- $2.99
1x Braided Elastic (Black, 1/2-in x 1-1/2 Yds) -- $0.64 (Sale Price, Originally $1.29)
1x Braided Elastic (Black, 1/2-in x 1-1/2 Yds) -- $1.29
Current Total: $34.19 (Tax not included)
Last Updated: 2015, 7-13


Tools Used
Current Total: $191.45 (Tax not included)
Last Updated: 2015, 7-11
The above price includes all of the following tools in this list. While the price is accurate, you must consider the fact that it is likely that you might already own rulers, scissors, hot glue guns and other various tools, so if you are trying to mimic what I do, your investment into tools will look different.
Additionally, you may find certain things in this list that you wouldn't use, which will trim down the things you buy.
I personally haven't ever used my Adjustable Drafting Triangle, so that's $22 you can save.

Cutting Tools:
1x Scalpel Handle #3 - Stainless Steel -- Amazon -- $4.00 -- Link
2x 100 Scalpel Blades # 11 with Free Handle -- Amazon -- $6.75 -- Link
1x Dremel T-100 Rotary Tool -- Walmart -- $36.88
1x Dremel Engraving Kit -- Walmart -- $15.97
1x Razor Blades (10-Pack) -- Harbor Freight -- $0.99
1x Scissors -- Walmart -- $6.88
1x Walnut Hollow Wood Burning Creative Versa-Tool (Hot Knife) -- Michaels -- $29.99
1x Self Healing Cutting Mat (Alvin) 18" × 24" Green/Black -- cutting-mats.net -- $20.00 -- Link

Measuring Tools:
1x USA PEC 12" Flexible Stainless 5R Machinist ruler/rule 1/64, 1/32, 1/10, 1/100 -- Ebay -- $12.00 -- Link
1x 12-in Stainless Steel Ruler -- Harbor Freight -- $1.89
1x Carpenter's Square 8'' x 12'' -- Harbor Freight -- $3.49 (Sale Price, Originally $3.99)
1x Fairgate TE12 Engineering Scale, Aluminum Engineers Drafting Scale -- cutting-mats.net -- $11.79 -- Link
1x Helix 6" Swing Arm Protractor -- artistsupplysource.com -- $1.95 -- Link
1x Adjustable Drafting Triangle -- Hobby Lobby -- $13.19 (Sale Price, Originally $21.99)

Other Tools:
1x High Temp Mini Glue Gun -- Hobby Lobby -- $2.99
1x Heat Gun (Dual-Temp) 1500W -- Harbor Freight -- $8.99

Misc:
1x Hexagon Papercraft Press Stencil -- Hobby Lobby -- $2.99
1x Hexagon HG Trivet Heating Pad -- Walmart -- $3.96


Mannequin Costs
5x Duck Tape 55YD -- Walmart -- $4.77
3x Fiber Stuffing x32oz -- Walmart -- $8.97 (Only used about 2-1/3 of the bags)
1x Brnt Wash Pullover (Female) -- Walmart -- $3.00
1x Knit Pants (Female) -- Walmart -- $3.00
2x PVC - 3/4'' x 10-FT SCH40 -- Lowes -- $1.46
6x PVC Fitting - 3/4'' SCH40 Tee -- Lowes -- $0.47
2x PVC Fitting - 3/4'' SCH80 90-Deg Elbow -- Lowes -- $0.67
Total: $63.84 (Tax not Included)


Clothing Used
1x Men's Under Armour HeatGear Sonic Compression Longsleeve T -- $34.99 -- Link
1x Men's Under Armour HeatGear Compression Leggings -- RoadRunnerSports -- $39.99 -- Link
Total: $74.98 (Tax not included)


Commissions Wishlist
 
Credits

Credits
Reserved for:
• 3D-Models Used
• Information Resources
• Inspirations & Special Thanks
 
Wow, your attention to detail is incredible and inspiring! You probably spent more time writing this than I will have spent building my armor. I'd like to try doing a write-up like this sometime for my character. With the amount of effort you've already put in, I will eagerly await seeing your build progress!
 
Hey, it's good to see another person who joined years ago and never built anything either! Good luck on your build!
 
Finished my first foam pieces ever! (Forearm)

Thanks all! :)
I've always loved Carpathia's, Satchmo III's, and GeekGuardianDee's build threads because they did a great job at organizing their first few posts, and I definitely wanted to follow their lead.


Okay, so first update!

Finished a few Forearm pieces, like I said, I'm completely new to building anything, so they aren't perfect, but I learned a lot.
It's amazing how you can have so much knowledge on things, yet it doesn't amount to much if you don't have any experience, so after years of reading, it has felt good to put the knowledge to use and make some mistakes along the way.

So far, I've built 2 versions of forearm pieces, neither of which are part of a set yet though. I think the next one I make will likely end up better than my 2nd one, but for now, I probably won't remake it, and I'll just have pieces that are slightly mismatched.

First Attempt:
Okay, so coming in with ZERO experience, I followed Evakura's Reach Forearm Tutorial, and well... it didn't turn out great.
The tutorial was great though, and I'm glad I followed it and learned from it.

When I first conducted my measurements, while referencing in-game images as well as the extracted game model I have for Reach, I figured out how long the piece needed to be on my forearm, and I scaled accordingly. The end result, was that I ended up with a piece that was in fact perfectly long, but it was almost large enough to fit both of my arms in.
th_20150428_224458.jpg th_20150428_224408.jpg th_20150428_013629.jpg


Second Attempt:
So for this one, I went back, looked at the game ripped model, and a lot of reference pictures of the forearm, and then went and looked through all the files for forearms that I had, and ended up choosing one with an unknown modeller that was unfolded for resin/glassing by ErMaC. It was the one that I felt most resembled how I thought the forearm should look. The details in the wrist were off, but other than that, it looked great.

I then proceeded to modify the model and split up parts of it in the source file so it would be easier to unfold. I also cut off some bits in the model I planned to make as foamies and tried to patch up the gap that was created by severing off that part of the model.

I also edited the model so that it would fit me better. The end result is that the details are slightly deformed (stretched) but I think it still turned out fine.
I went with:
Scale:
X = 0.925 (Thick)
Y = 0.975 (Width)
Z = 1.000 (Length)​

As for scaling the model for printing, I always make a text with measurements, and I use the "Measure Distance" tool in Pepakura Designer in order to refine the results that I want.
You can sort've see how I did my scaling in this spoiler below:
Actual:
Forearm Length (Ventral): 8.60in = 218.44mm
Forearm Length (Lateral): 9.70in (+-0.2) = 246.38mm
- - -
Wrist Diameter (Wide): 2.300in = 58.42mm
Wrist Diameter (Thick): 1.575in = 40.005mm
- - -
Forearm Diameter (Wide): 3.75in = 95.25mm
Forearm Diameter (Thick): 3.20in = 81.28mm


Model:
Forearm Length (Ventral): 209.79mm
Forearm Length (Lateral): 231.25mm
- - -
Wrist Diameter (Wide): 78.34mm
Wrist Diameter (Thick): 68.19mm
- - -
Forearm Diameter (Wide): 98.66mm
Forearm Diameter (Thick): 87.26mm


Original Scale: 27.731171
Scale Modifier = 1.041231707898375
New Scale: 28.87457454235188
- - -
Forearm Length (Ventral): 218.36
Forearm Length (Lateral): 240.78
- - -
Wrist Diameter (Wide): 84.37mm
Wrist Diameter (Thick): 71.00mm
- - -
Forearm Diameter (Wide): 103.70mm
Forearm Diameter (Thick): 90.86mm


Nomenclature:
Wide = Vetral to Dorsal
Thick = Lateral to Medial
Ventral = Front = Anterior
Dorsal = Back = Posterior
Lateral = Outside
Medial = Inside
Proximal = Area nearer to torso
Distal = Area further away from torso
20150504_005343.jpg

th_20150504_005400.jpg th_20150504_005459.jpg th_20150504_005436.jpg th_20150504_005625.jpg th_20150504_005704.jpg

The result: the piece fits A LOT better than the first attempt. You can definitely see how large the openings are compared to my arm in the last 2 images.
Also, I don't need to open up the piece or split it into two pieces in order to get my arm in, I totally have no issue.
Grey = Standard EVA (bought 1/2'', but I'd say it's more like 0.4-ish, so about 10mm)
White = 5mm Craft Foam
Green = 2mm Craft Foam

There are some spots I don't particularly like, especially on the inner side of the forearm.

I ended up scratch building a few of the pieces (and I traced templates for them before attaching most of them), and I kind've needed to assemble everything in order to figure out how to do the scratch pieces.
For the next piece, since I have my templates now, I'll be able to assemble the forearm as a top and bottom piece separately before attaching them, which will hopefully make it turn out a lot better.
I will also likely switch from the 2mm foam I used to either 3 or 5mm for the inner side of the forearm, since I have ample room to slide my hand through (I was worried about it at first), because it is slightly warping due to the other pieces and the fact that I kind've had to just stuff it in and pray... and burn myself a lot when attaching it.

In the middle thumbnail, I ended up testing out my Dremel after giving up on it. In my First Attempt, I tried to add the details with my dremel...and they just look butchered.
For that white piece though, before I attached it, I used the Dremel to clean up the edges and round them to an angle and I think it turned out great.
Previously, all the angled cuts I did, I did while in the cutting process of the foam, I tried to pre-plan the angle I needed to make so that each piece would fit together. It worked fairly well, but definitely could have been better, now I know what I can use the Dremel for!

Now I just need to figure out how to get cleaner detail lines, especially with the 2mm Foam. For the 3 pieces in the middle on the side, I split them up into 3 pieces, and then just used scissors to snip off the edges to make them look angled. Not the best strategy, but it sort of worked .

I also had issues with the all the Foamies. It was like they didn't want to be glued.
Most of them have some issues where they aren't perfectly flush around the edges and you can see a slight gap. Not sure what to do there.


Oh, and I've been doing some doodles of what my armor might look like on me (mostly I've been attempting undersuit designs), and I came up with the image shown below.
I just took a picture of it, I'll try to scan it at a later date.
WandererTJ%2020150503_230942.jpg
 

Attachments

  • 20150504_005343.jpg
    20150504_005343.jpg
    270.8 KB · Views: 391
  • th_20150428_013629.jpg
    th_20150428_013629.jpg
    4.9 KB · Views: 318
  • th_20150428_224408.jpg
    th_20150428_224408.jpg
    4.7 KB · Views: 294
  • th_20150428_224458.jpg
    th_20150428_224458.jpg
    3.5 KB · Views: 272
  • th_20150504_005459.jpg
    th_20150504_005459.jpg
    6.3 KB · Views: 342
  • th_20150504_005400.jpg
    th_20150504_005400.jpg
    4.1 KB · Views: 315
  • th_20150504_005436.jpg
    th_20150504_005436.jpg
    3.7 KB · Views: 331
  • th_20150504_005625.jpg
    th_20150504_005625.jpg
    4.7 KB · Views: 318
  • WandererTJ%2020150503_230942.jpg
    WandererTJ%2020150503_230942.jpg
    217.8 KB · Views: 291
Undersuit Pattern Testing

Today I've been playing around with how to do the pattern on the undersuit.
20150509_222009.jpg 20150510_145528.jpg
5mm Black Craft Foam
Method: Heat Pressed Stencil
I'm liking it so far, but it may have some issues on the strips that I'm planning because they are larger than the stencil I am using.

Unlike those that are doing a Halo 4 build, I've chosen to do a debossed (recessed) hexagon pattern rather than an embossed (raised) hexagon pattern.
My stencil can actually do both though, which is really cool.

I used a plastic papercraft "embossing folder" I found at Hobby Lobby, then I used my Harbor Freight Heat Gun to heat up the foam, and then I pressed the strencil into the foam. I wish the stencil was deeper, but I still think it looks good.
There is an issue when it comes to heating the foam though... reheating it will "wash" away the details of the stencil. The details just kinda vanish.

So for large pieces, you'll just have to plan for it and go back an inch or so and repress that area while pressing the next area. Alternatively, you could 3d print a piece larger than the stencil I am using, then you might be able to do large areas all at once by putting your foam in your over for a short time, then pulling it out and pressing a large stencil on it all at once. Then you just have to worry about making it all uniform; school textbooks might work, especially if you put weights on top of them.

Up next, will probably be my duct tape mannequin.
Then I should be able to start working on the custom pattern I've been trying to work out in my head.
 
Duct Tape Mannequin & More Undersuit

Update time! :)
First off, been continuing to try and improve the design for my undersuit's pattern, so I made some SolidWorks models that will hopefully work better than the random things I've found at stores to use as stencils. So once I get access to a 3D-Printer, then hopefully everything will start coming out awesome looking!!!
Hexagon Stencils - SolidWorks.png


Update Part 2: "Suit-Form" Duct Tape Mannequin
(I don't think "Suit Form" is a real thing, but it makes sense that a Suit Form = Dress Form + Arms + Legs)
I've been working hard on putting a Mannequin together to help me with the parts I want to scratch build.

First of all, I started with a PVC skeleton unlike what I've seen anyone else make. Since the only coupling options available at Lowes are 45 degrees and 90 degree elbows, I used my heat gun to apply gentle bends at specific locations so that things would work out better for the mannequin and it would suit me better.
Really, the only thing that I could do to improve the Mannequin is buy another length of PVC and 4x 90-degree elbows in order to connect the base of the legs together at the bottom, which I may eventually need to do, purely because I'm sure that due to bending the legs, that it weakened them, so the mannequin may eventually begin to sink slowly.
th_20150511_151105.jpg th_20150511_191000.jpg th_20150511_211543.jpg
As for throwaway clothes, I managed to only spend about $6 plus tax. Apparently it's Summer time, so finding long sleeve things was extremely difficult... until I went into the women's section, and ended up finding clothes that fit me perfectly without being super tight. Downside, I had a really large neck-hole opening, but that was fixed with some cling-wrap.

Fyi, make sure your scissors are sharp, I had all the supplies I possibly needed... except a decent pair of scissors, and it made cutting me out of the duct tape a literal pain. Seriously, it hurt!

As for the taxidermy, I came up with a few clever strategies to improve the outcome:
th_20150511_153022.jpg th_20150512_020631.jpg th_20150513_140115.jpg
The first image is attaching 2 hangers together with a piece of scrap PVC between them for spacing, and then attaching that to the rest of the skeleton. It would have been better if I used hangers that had a bottom member that went across from left to right, but it worked either way.
2nd, I used the puzzle strips of a few foam pieces that I probably would have tossed anyways, and I connected them together and stacked 3 of them over the hangers to be used as shoulder support.
3rd, is again some Puzzle strips that I used inside of the torso, wrapped around the PVC to ensure that the stuffing didn't turn my mannequin into just 1 big cylinder (which is actually a common issue). The mannequin may still be more-thick and less-wide than I am in certain places, but doing this definitely helped!

I ended up realizing that accidentally making the arms and legs extra-long was a blessing!
While I ended up making the lower half permanently attached to the upper half, I wanted to make the arms detachable so that I could get clothing onto the mannequin more easily.
The reason the extra length of PVC is a blessing, is it allows you to push down the Duct Tape & Stuffing around the arm so that you can connect the PVC more easily, and then you push the Duct Tape + Stuffing back up once it's connected. If the PVC wasn't long enough and you tried that, the wrist would come off the end and you'd have some issues trying to feed the PVC back through.
th_20150513_194007.jpg th_20150513_194022.jpg th_20150513_194034.jpg

End Result: Awesome Mannequin with Detachable Arms
20150513_194154.jpg
20150513_194219.jpg

Awesome Mannequin Sites/Threads/Pages:

I definitely recommend the tutorial by Volkodavcosplay, it's what I had my helpers follow, and I really like how my Mannequin turned out.
 

Attachments

  • th_20150511_151105.jpg
    th_20150511_151105.jpg
    4.6 KB · Views: 280
  • th_20150511_191000.jpg
    th_20150511_191000.jpg
    5.2 KB · Views: 288
  • th_20150513_140115.jpg
    th_20150513_140115.jpg
    5.6 KB · Views: 204
  • th_20150511_153022.jpg
    th_20150511_153022.jpg
    4.1 KB · Views: 268
  • th_20150511_211543.jpg
    th_20150511_211543.jpg
    5.2 KB · Views: 267
  • th_20150513_194022.jpg
    th_20150513_194022.jpg
    5 KB · Views: 219
  • th_20150513_194034.jpg
    th_20150513_194034.jpg
    4.8 KB · Views: 229
  • th_20150513_194007.jpg
    th_20150513_194007.jpg
    5.1 KB · Views: 203
  • th_20150512_020631.jpg
    th_20150512_020631.jpg
    5.1 KB · Views: 247
  • 20150513_194219.jpg
    20150513_194219.jpg
    925 KB · Views: 321
  • 20150513_194154.jpg
    20150513_194154.jpg
    908.3 KB · Views: 293
Here's a Low Detail Teaser of a little something I am working on:
Ab Plate Design.png

I think I've finally got the angles and proportions to where they are acceptable.
Now just to get everything scaled accordingly and make it.

Probably will need to finish my Torso first before I can start on this though, just so that I fill the gap in accordingly.
 
Re: Extras

The amount of backstory is simply amazing. One thing i noticed though: the dead candidates were not put in cryo sleep. They were cremated and their ashes were launched into space in Archer missile pods during the "graduation" of the other spartans. I am really looking forward to this build!
Also. . it has also inspired me a bit too. . mind if i copy a thing or two? xD
copy is a harsh word. . replicate. . eh. . . you could say it inspired me.
Again, really hoping for the best on this!
Cheers
 
Sword Breaker, thanks!
I'll have to revisit that part of the backstory at some point.

Glad to have inspired you, that's one of my goals :).
If you want to reserve posts, you have to wait 5 minutes between each post.
Be sure to check out Carpathia's, Satchmo III's, and GeekGuardianDee's build threads as well, they each do amazing jobs at laying details out in their first few posts. All of us have done it in different ways, so you may end up liking things from theirs.
 
Last edited by a moderator:
Status
Not open for further replies.
Back
Top