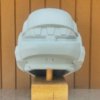
The Bucket
What is a helmet?A long time ago I was speaking with Brad of Impact Props, we were in his garage working separately on our own projects. He was working on Locke, and I was just starting.
What he told me, rung hard enough that I remember it today.
Your helmet is your centerpiece, your focal point of your entire armor. Your armor could be subpar, but if you have an amazing helmet, it will lift the entire build up. On the other hand, you could have the most amazing armor anyone's built, but if you have a slapped together helmet, it can ruin the entire suit.
Some people can make beautifully crafted foam helmets, but most struggle to. The helmet is where you pause and take your time. If you have to have to make it in cardstock, fiberglass, and bondo because you don't have a 3D printer, you do it.
Here's the thing... it's not a wrong mindset. It's very true.
So I've always wanted to have a perfect helmet. So much so that it gave me some anxiety and pain.
Helmet Choice:
The ODST Helmet. I'm not quite sure what drew me to it. It was the helmet of choice in Halo 3's Multiplayer and returned once again for me as my helmet of choice in Halo Reach. Something about the shapes to it has always been appealing to me. I absolutely adored Dutch's helmet in Halo ODST, the aggressive fins and vents were all superb. For the longest time I wanted to incorporate them into a unique helmet. Maybe not all of them, but some of them.
A long time ago on these forums, I learned a lot from Hugh Holder about stuff that wasn't even all armor related.
He had my favorite version of the helmet at the time. It was a sleek McFarlane design of The Rookie. The narrowed look was very appealing to the eye compared to others that I had seen for the time. Something about its appeal is probably why I was similarly always drawn to the Insurmountable Skullfort in Destiny as well.
I attempted some pepakura projects back then. I still have the cardstock from it somewhere. The first thing I ever tried piecing together was an EVA helmet. I started with the visor, and didn't make it much beyond that. It was a struggle for me.
When 3D Printing came around, I knew that's how I wanted to make my helmet. When BlueRealm uploaded their model freely, it made it all the more accessible too. Then later Dutch Props released his version for free as well. I loved it for a long time.
There was even a point where I had one of them altered to match a custom design I wanted, which was essentially the Gen2 AI Port in the back.
Stupidly I sent the wrong helmet file to get altered. So I got it.... but I didn't love it.
This is actually STILL something I want and would have preferred to have. It did exist, Styler's Workshop had made it, but at the time I was conducting all of this, they had decided to discontinue their castings and sell the master.
And as I tell this story, it doesn't help that I didn't have my own 3D Printer. I HAD one, but it gave me nothing but issues and I had to send it back.
After that, I got a job that didn't provide me time or the willpower for hobbies at home.
With only months until Halo Outpost and no capability to 3D Print the helmet for myself, the best I could do in such short of time, was commission one. (I do finally have a printer now, after all of this).
The Commission
After I originally posted this, I looked back and felt as though I may have rambled on a little too long. I wanted to switch gears and re-present my opinions. I want to make sure the good things about the commission are highlighted. I'm still going to include what I originally said following the P/C lists.
Pros & Cons - The Casting
Pros:
• The details are superb, everything is there, and looks precisely carved in
• One of the only Halo Reach specific versions of the ODST helmet that you can find.
• Holy crap the visor! The way it attaches on the outside is REVOLUTIONARY. Going forward, any ODST helmet that doesn't do this, is doing it wrong in my eyes.
Cons:• Some of the surfaces of the sculpt didn't seem as uniform as I thought I could expect, almost like the master was made from foam and the coating it to make the mold caused some things to dimple slightly.
• The visor's tinting is really only suitable in darker environments. It's too transparent.
• The size. The helmet isn't just big, it's massive in a really bad way. I know it's hard to bust your ass making something as beautiful as the casting is, but there's no other way around it. Too big is too big. I think there are ways to shrink a mold, I don't know how viable it is or how uniform it would be.
Pros & Cons - The Finishing/Paint
Pros:
• Communication - Every message and concern was addressed within 3 days.
• Time - It was delivered before my event, which is 100% a success.
• Quality - Bar none. It's pretty much perfection. It's going to take me a long long time to match the skill level.
• Price - For all the work that was put into the helmet, and to get something Good AND Fast, it's probably going to be quite expensive.
Cons:• UA Attachment Mounting - No one's perfect and no one knows everything about all the costumes, it was something I thought I specified, but ended up not being doable for the time. The most upsetting thing here is probably the off-centered screw hole.
• Possibly too many projects at once - I feel like maybe I had to remind Brian of minute details more than necessary, but AGAIN, he didn't know all the things I knew, and expecting that of someone is unfair. That said, there were things forgotten when it was originally shipped, Brian did however make good on everything, because he's a great guy.
I had been talking to Brian throughout the months, I had been following him for quite a few years by now, and I knew his work was the best I could ask for, and the two of us made an attempt to get Styler's master which he was selling at the time, but we were too late.
I wrote this off as it being fine and nothing to be upset about, because when looking closely at some of the photos, the finish on them simply just didn't hold up to my expectations. Something seemed off.
Not being able to use the preferred casting of choice, I went through all the ODST helmet makers and noticed some glaring issues with all of them.
They were all the Halo 3 variant, not the Halo Reach version.
I stumbled upon Lost Viking Props' version, which had the correct ear and cheek structures for Halo Reach, it was perfect, it was what I wanted.
I spoke to Brian about all the things I wanted with the helmet, at first it was beyond his capabilities, I had asked for too much. I dialed it back, and he gave me a quote that was more than I could afford, but my depression had me on a path that I didn't intend on looking back from...
I basically said screw it, let's do it!
I knew it would be cheaper and faster in the long run to have Brian buy the casting directly and get it shipped to him so he could work on it immediately when he received it.
Anyways, Brian was very communicative throughout the entire process, he was good about giving me updates, though I think his workload might have left him a little absent minded at times because there were times where he forgot something that I had to point out.
It did bother me that what I ordered was a Reach paintjob and I had to point out all the red dots, but I realize now that it's unreasonable to assume that even someone you regard as an expert could know everything.
But Brian delivered.
Brian was good to me the whole time.
There was even a decal that I thought was simply a red smear and he went above and beyond and taught me something. It was a red rectangle with triangle cutouts in it.
There is so much about his paint work that I presently know I can't possibly do. It's all the little things, there's little hues here and there, and it's just a masterpiece of a paint job.
When he shipped the helmet, he had forgotten to mount the electronics in the helmet, which he corrected by sending me a fan and battery box already wired up with some putty to mount it with.
I am going to 100% recommend JohnsonArmsProps to anyone wanting what will be the best painted bucket you'll ever see.
His work is great, he makes good on screw-ups, and he always gets back to you within a few days.
I wrote this off as it being fine and nothing to be upset about, because when looking closely at some of the photos, the finish on them simply just didn't hold up to my expectations. Something seemed off.
Not being able to use the preferred casting of choice, I went through all the ODST helmet makers and noticed some glaring issues with all of them.
They were all the Halo 3 variant, not the Halo Reach version.
I stumbled upon Lost Viking Props' version, which had the correct ear and cheek structures for Halo Reach, it was perfect, it was what I wanted.
I spoke to Brian about all the things I wanted with the helmet, at first it was beyond his capabilities, I had asked for too much. I dialed it back, and he gave me a quote that was more than I could afford, but my depression had me on a path that I didn't intend on looking back from...
I basically said screw it, let's do it!
I knew it would be cheaper and faster in the long run to have Brian buy the casting directly and get it shipped to him so he could work on it immediately when he received it.
I'm not here to blast other makers, that's the last thing I want, but I will be open and honest with what was great and what I think could have been done better.
I really thought for a long time that my last move was a mistake, but honestly, even if I had the time and money to receive the helmet myself to inspect before sending it to get finished and painted... I don't actually I think I would have noticed the issues of it at the time. I didn't have the experience or familiarity with other helmets to recognize the issue.
It upsets me a little that Brian didn't recognize it and give me a "hey, well there's something off about this helmet" but he gets no blame because he was commissioned to work on it.
I'm going to go ahead and say it here and get it out of the way. The casting is by far too big. To have spent $700 to get the casting and have it painted not knowing that it's as big as it is... I wish I could get my money back.
I've also had someone confront me and notify me that the maker knew it was too big, has denied it, and continued to sell anyways without any advisory to buyers. This bothers me greatly.
Brian sent the helmet with a 2" pad up front, the same pad he uses for all his Hyperballistic helmets. I'm not sure that he ever tried it on, as he was shocked that it did not fit me in any way. Brian is a great seller and offered me a padding kit that he mailed freely to me to try and fix it, but it wasn't until padding the top of the head 1" and the brow/forehead with a FOUR INCH pad that it finally sat okay. It still wobbles a bit, still too big, cheek pads helped, but the issue is still there.
It did bother me that what I ordered was a Reach paintjob and I had to point out all the red dots, but I realize now that it's unreasonable to assume that even someone you regard as an expert could know everything.
But Brian delivered.
Brian was good to me the whole time.
There was even a decal that I thought was simply a red smear and he went above and beyond and taught me something. It was a red rectangle with triangle cutouts in it.
There is so much about his paint work that I presently know I can't possibly do. It's all the little things, there's little hues here and there, and it's just a masterpiece of a paint job.
When he shipped the helmet, he had forgotten to mount the electronics in the helmet, which he corrected by sending me a fan and battery box already wired up with some putty to mount it with.
I am going to 100% recommend JohnsonArmsProps to anyone wanting what will be the best painted bucket you'll ever see.
His work is great, he makes good on screw-ups, and he always gets back to you within a few days.
This story starts off by saying that Brian was supposed to get the new Jim Mcrea/Stony Forehead Blast shield UA that has both the rear feet and the tongue. For those of you that don't know, the Mark V's UA attachment has little feet on the back that fix it at the right angle for mounting.
Jim was unable to deliver, had a lot of other stuff going on.
Brian offered me the best options he could and I got an amazing resin UA.
But it didn't have a standoff/feet behind it and Brian didn't provide one.
This meant that the angle it sat at was just...wrong.
I attempted to fix it myself. Taking it off I noticed that Brian had taped where it was sitting so that the paint underneath would not get scuffed. Very awesome.
And I think I had mentioned to him that I wanted the mounting to be as minimally intrusive/destructive as possible, so there's only a single mounting screw. I did not like that, but the worst thing was that it wasn't centered, meaning that even with the UA off and a plug to hide the hole, there would be a notably asymmetric plug head on top.
I created a standoff using some foam, it's not great, I actually really don't like it because I can feel it shift around too easily. Picking the helmet up by the UA I worry that I will break it off.
So... this is something I'm going to have to make a remedy for soon.
Despite the drawback with the UA, I'm not upset with Brian, I know he poured everything into this helmet.
Brian, if you read this, I freaking LOVE what you did for my helmet and your work.
I just want you to make a standoff for future builds that have it.
Pictures:
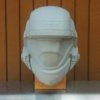
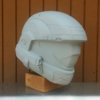
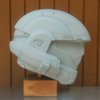
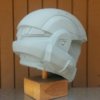
First up, is the casting
The sculpt is honestly breathtaking. There's a few spots, like in the chin where it could be smoother, it looks and feels a little lumpy, but all the seams and ridges are amazing.
Paint (by JohnsonArmsProps):
Mail Call: The Helmet After Delivery
The absolute astonishing thing about this helmet, is the visor and how it is mounted. It is beyond brilliant.
It isn't mounted on the inside, it's mounted on the OUTSIDE.
This allows for there to essentially be no visible seam from mounting the visor that plagues so many helmets, because it's the whole front plate.
The casting actually came with a tinted visor which was really cool, but I am disapointed at how visible my face is through it.
Also, unfortunately, as you can see when the visor is not on, how glaringly big the helmet is compared to my head. You can see straight back.
Brian knocked every detail and decal out of this world with this.
Last edited:

