x30ffx's Bondo Adventure

Status
Not open for further replies.

x30ffx

New Member
Alas, it's been my third day working with Bondo. The learning curve is steep, and I'm as frustrated much as I am learning things. I did find it quite interesting to see how the pro's do it, with their methods and strategies. As much as I'm learning myself, I now know better and better what bondo is good for. The curing time is a tricky thing to gauge, but if I stay and check on the tackiness, I can do some trimming and lump-removing

Anyway, here are some pics:

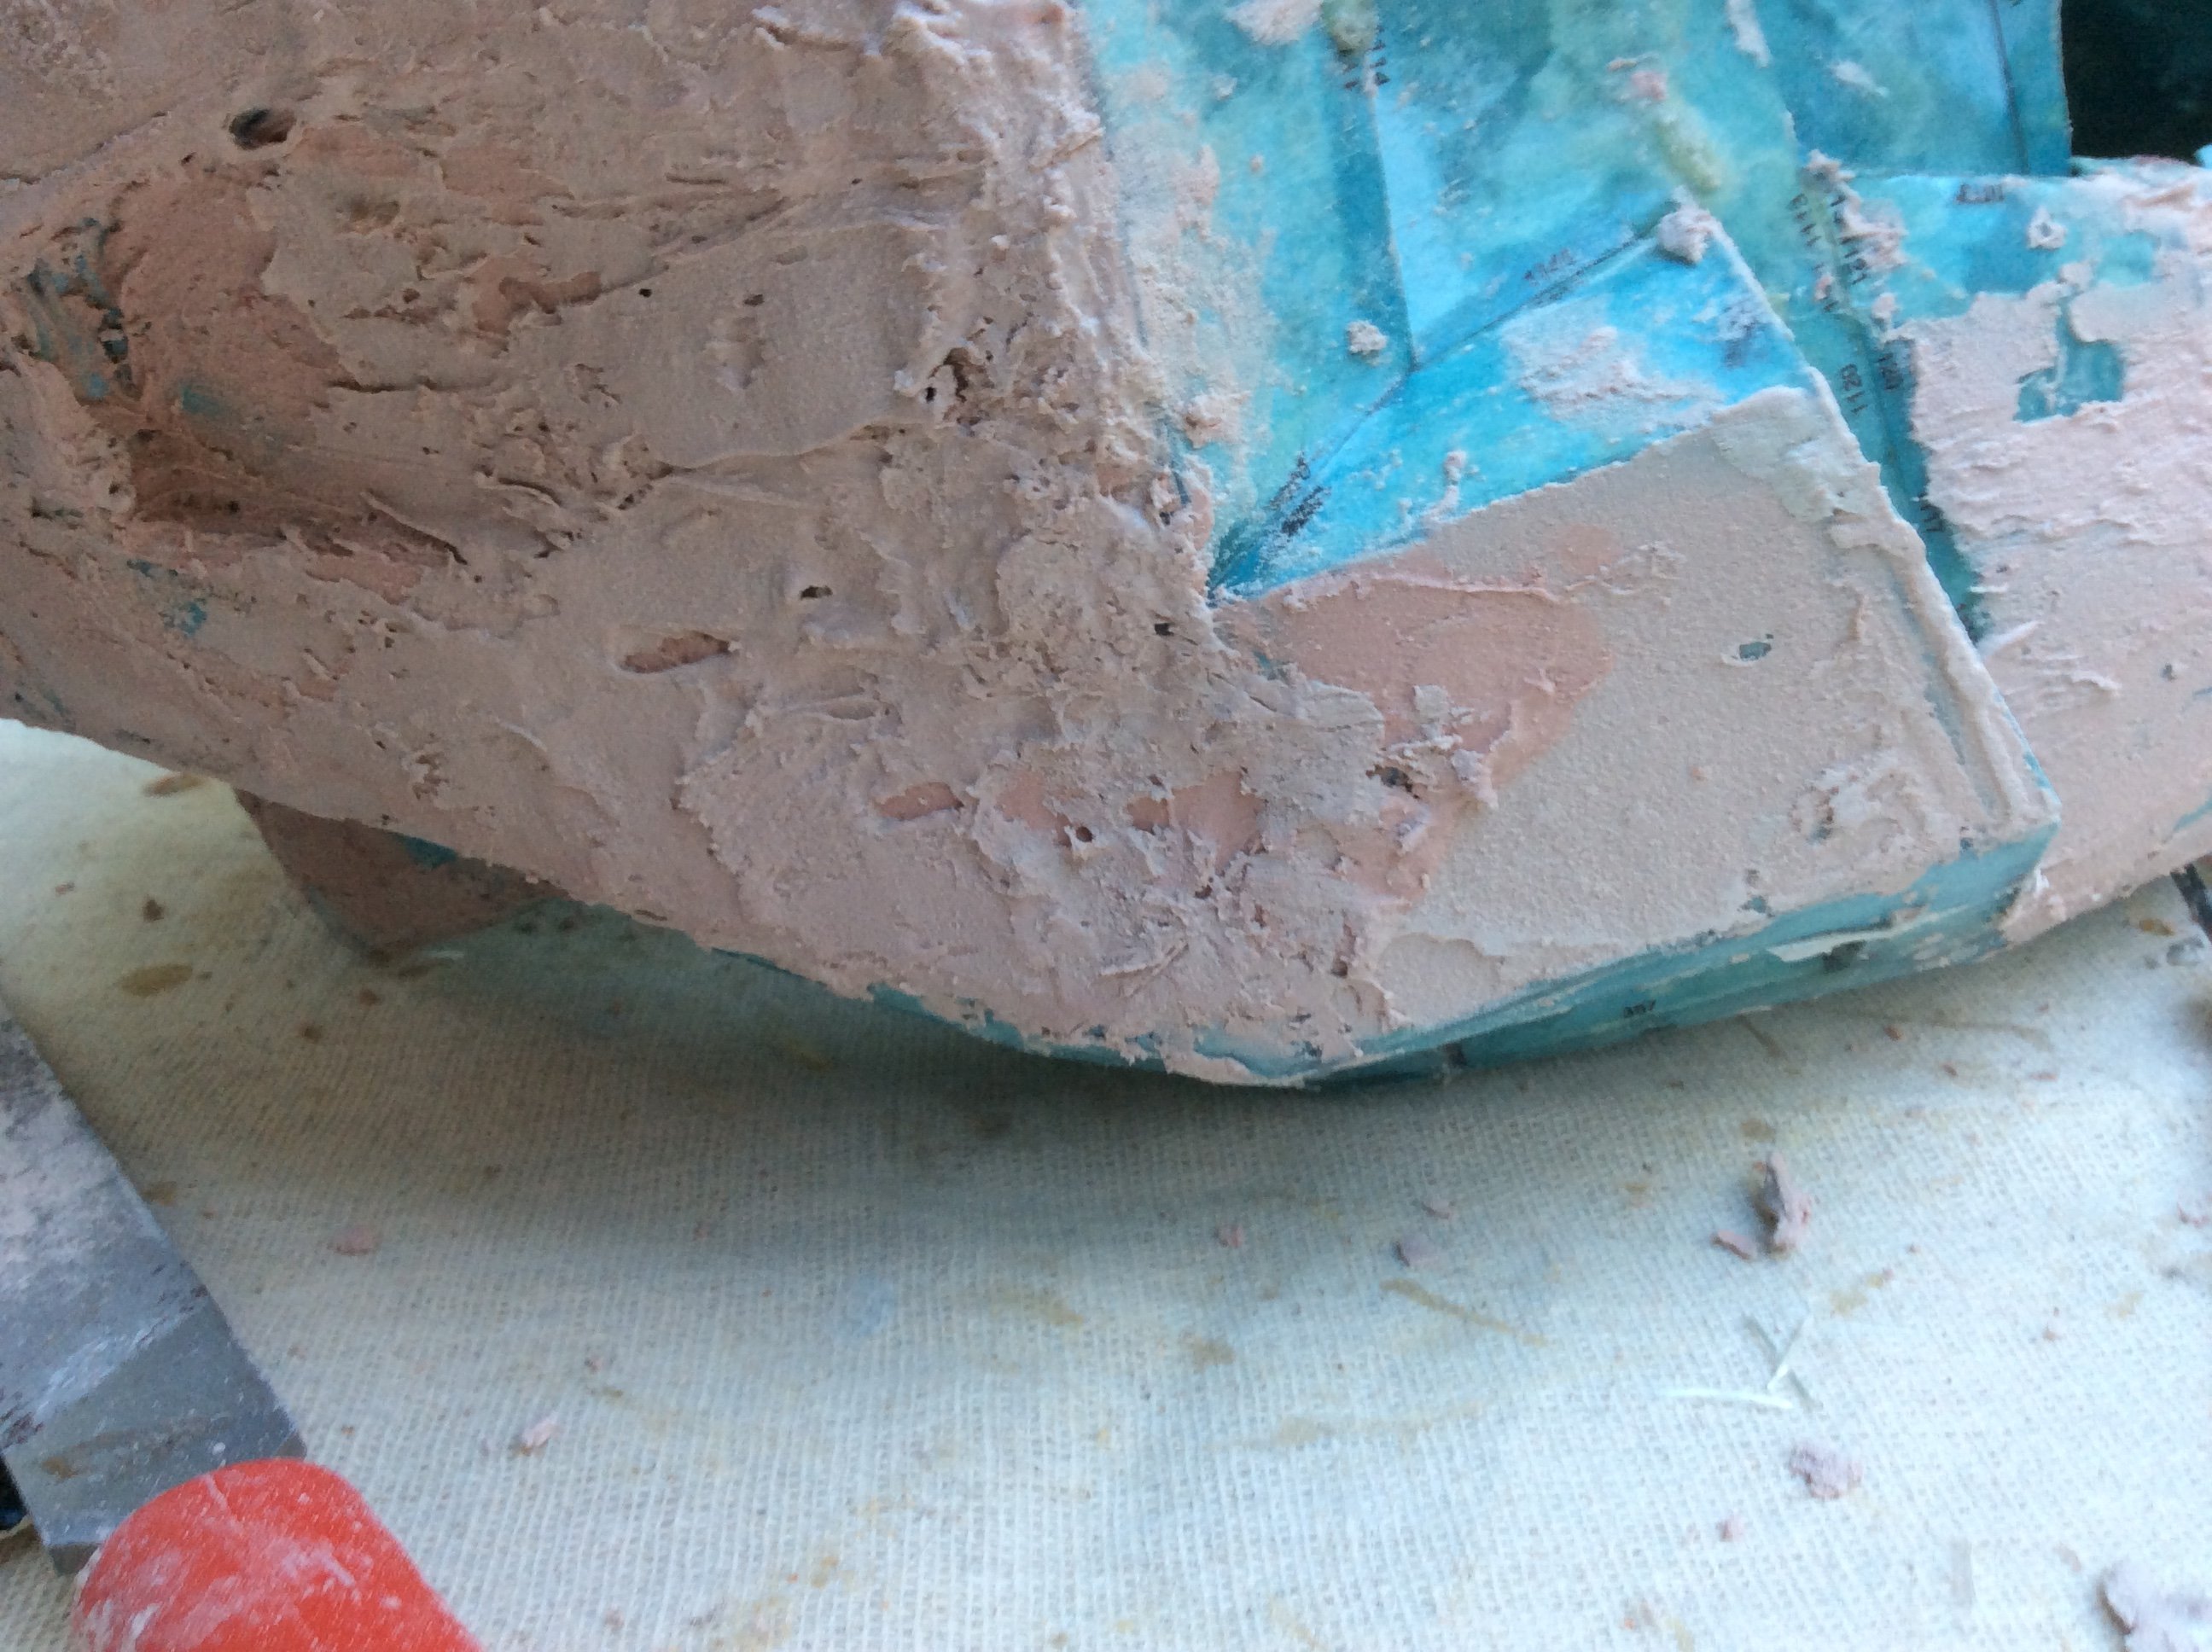
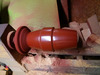
Used a fresh bondo spatula. Why have I never done that before?
attachment.php


I'm trying to fill in the depression caused by some resin-warp. I'll start it out rough, so that I can fill in more in small and smooth increments. I accidentally filled too much in the depression right behind the light fixture, Oops! I figure it'd be impossible to sand out, so i'll fill it in the other side. Who would notice when it's all smooth and symmetrical? (the pic is upside down... aghhh!!!)
attachment.php


What I've learned today:

-Use a fresh (or very clean) spatula. Applying with one makes it as smooth as it should be.
-Use a popsicle stick to fill very small bits of bondo in even more holes. It's easier that way!

What I need to do:

-I need to find out what makes that rough chunky consistency with a fresh and new chunk of bondo. It's not exactly like cake icing!
-A mouse sander would be good. I'll see what I can do with one.
-Primer? Any ideas for primer???

Some Questions:
How many hours of work, in total, have you guys gone through in this stage? I've dedicated a few weeks to this stage.
What do you do when you put too much bondo?
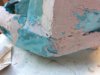
What would you do when you fill in an unwanted hole/edge/detail (like what happened in my second picture)? The edge is supposed to look like this:
IMG_0739.JPG

3 hours of applying and sanding straight got me exhausted. I wanted to keep going, but I was running out of sunlight and time. until next time!

I'll reply to this thread with updates!
 

Attachments

  • IMG_0735.JPG
    IMG_0735.JPG
    625.8 KB · Views: 910
  • IMG_0738.JPG
    IMG_0738.JPG
    1.4 MB · Views: 309
  • IMG_0737.JPG
    IMG_0737.JPG
    652.1 KB · Views: 654
I've tried using various objects to apply bondo but when it comes right down to it, I just like to use my fingers over anything
 
Props for the perseverance! Body work can be extremely tedious, especially when dealing with a warped part. I believe I spent 60-80 hours on my helmet doing body work, most of that trying to straighten and correct warping. I know for next time, though, it makes far more sense to scrap a part that warps in the resin stage, and use lots of supports to keep the part straight and square.

On to bondo methods! The number one thing I can suggest for bondo users is to lay it on thin. If your layer is more than 1-2mm thick, you are going to have a hard time with sanding and spreading. I also use bondo brand filler spreaders/spatulas to lay the bondo on smoothly, and I occasionally use a sharp blade to shape the bondo once it has become tacky/rubbery. Another thing that helps with keeping things smooth, is to lay the bondo on immediately after it has been mixed (has a very creamy and soft texture), and not to mess around with it once it becomes tacky. If you try to smooth it once it becomes tacky, it will just clump and crumble, leaving a lot more cleanup work.

For primer, I like to use a high build, sandable automotive primer. It lays on quite thick, filling in small scratches and the like.
 
I am not by any means promoting my build on your thread, but i have quite a few pictures of my bondo process on it. As Phil said, thin layers are key and use it the second is mixed. My bondo aeems to harden to a state where is unusable in no time at all. Once it starts to get rubbery, just trash it. Mix very small batches. This will help keep waste to a minimum. Also, not everything needs bondo. It's just to fill dips and low spots. If you need an electric sander, your probably putting too much on. Thin, even layers spread with a clean spreader are your friend.

Also, for primer, I'm using Plasticote filler primer. It's worked very well thus far.
 
i have never bondoed what is the benefits of doing it?

It's only for use with pepakura armor. It smooths out the geometrical parts, and low spots caused when resining. It is not used with foam as it is brittle and will crack and crumble away.
 
How many hours of work, in total, have you guys gone through in this stage? I've dedicated a few weeks to this stage.

Depends on the size of the piece. As long as it takes, honestly - keep at it until it's done. Don't rush it, it'll look better for you applying some patience to your work.

What do you do when you put too much bondo?

Simple: don't put on too much bondo. I know, that sounds sarcastic, but it's the honest truth - if you're working slowly, and with smaller amounts of bondo, there'll never be an instance where you find yourself having put 'too much' on. Mix up smaller batches to prevent waste and encourage yourself to apply your bondo in thin batches. It's far, far easier to apply it than it is to remove it without ruining your work.

To answer your question directly, however: if you're finding that your batches are curing before it's all applied, you're using too much. If you're applying your bondo like icing on a cake, you're using too much. Use a good, flat spatula with a clean, unbroken edge and, as above: work with smaller batches. I'd suggest mixing up a batch roughly the size of a ping pong ball, perhaps a golf ball if you're certain you can apply it all efficiently and cleanly. The 'lumps' you're getting are caused by your bondo curing as you're applying it - it's losing the creamy consistency and starting to harden, which means it won't spread as well. As I've said above: if it's hardening as you're using it, you've used too much bondo (or, too much hardener). Once it begins to harden, the batch is useless for basic smoothing, and you may as well discard the remnants.

What would you do when you fill in an unwanted hole/edge/detail?

It's more than possible you'll be able to just spread a clean batch over such holes. Apply a batch, sand it over, check for small holes. You can fill smaller imperfections with spot putty later on down the road, but for what I'd call a 'structural imperfection' (a warped piece, or a minor hole), spreading a layer of bondo over the top will do the job.
 
For primer, I like to use a high build, sandable automotive primer. It lays on quite thick, filling in small scratches and the like.

Sounds good! I'll get one at the next opportunity.

I'll post here to show how it goes!

- - - Updated - - -

I am not by any means promoting my build on your thread, but i have quite a few pictures of my bondo process on it. As Phil said, thin layers are key and use it the second is mixed. My bondo aeems to harden to a state where is unusable in no time at all. Once it starts to get rubbery, just trash it. Mix very small batches. This will help keep waste to a minimum. Also, not everything needs bondo. It's just to fill dips and low spots. If you need an electric sander, your probably putting too much on. Thin, even layers spread with a clean spreader are your friend.

Also, for primer, I'm using Plasticote filler primer. It's worked very well thus far.

I've been swaying back and forth between thinking about what to fill, and what doesn't need filling. I'm still wondering what exactly would need filling, but I know that the pep work also creates surfaces that are smooth enough for my liking. For some reason, I see others filling their entire piece. I'll figure something out!
 
I'm barely putting any bondo on my biceps and shoulder attachments. If you think a surface is smooyh and your happy with the shape, then there's no reason for bondo.
 
Day four. I was only able to spend an hour on my piece today, but I can feel the progress. It's not going half as fast as I'd like, but that's primarily due to my ineptitude in the medium. How frustrating!

I was rigorously sanding down those hideous lumps from my past picture. Sand, fill, repeat. I'll prime it when the piece is rid of all those egregious lumps. I'm very concerned however, about the little rogue pieces of bondo that make its way into the seams of my piece, whether the needle file can actually reach into it. I've already invested quite a bit into materials, and I shouldn't mooch off my parents either, haha.

Anyway, here are some pictures

Here's a straight(ish) popsicle stick against a surface that (ideally) should be flat. Since ideal is not too possible, what would you guys go for? Straightness or smoothness?
I'm concerned to be too smooth but not straight, as that would produce noticeably wavy and warped-looking edges.
attachment.php


Is it even possible to use a stencil or a guide? What if I had a rigid straight edge at one side and I can fill up the bondo on the other? I can imagine that would work. Have any of y'all tried it?
attachment.php


On another note, i found out what is causing some of those lumps. When I apply a fresh glob, it often stays on the spatula and falls onto my piece in some unwanted globby fold of bondo. I'll stick to keeping it small.

I'll keep sanding down those side parts, let's get it BOTH smooth and straight. As much as I'm sanding down the layers, those valleys in between the lumps are probably crying out for some spot putty to make it smooth! I have never used spot putty, so anyone got advice?

Well, those are my questions I'll leave for today. Happy friday!
 

Attachments

  • IMG_0949.JPG
    IMG_0949.JPG
    1.6 MB · Views: 679
  • IMG_0950.JPG
    IMG_0950.JPG
    973 KB · Views: 715
That is a lot of bondo. Ideally there should not be that much. I think if you sanded it down really well it may be flatter. In the world if bondo, less is better.

When i bondo, i typically see my paper through it in some spots. When you apply it, use very thin layers only where needed.

When using spot putty, it is only for tiny crevices and holes. Very very small ones. Just apply thinly as you would bondo where needed.

That's what I know spot putty would be good for. My primary reasoning for putting that bondo on was to fill in a deep depression that was caused by some warping. I wanted to get it back to symmetrical, so I thought that filling it up with "filler" would suffice.
 
I feel your pain. Bondo is definitely something you have to learn how to work with. I still have issues with it. I wish you the best though and if i can help in any way, I'd be happy to.

My #1 suggestion is to sand it as smooth and strait as possible.
 
I feel your pain. Bondo is definitely something you have to learn how to work with. I still have issues with it. I wish you the best though and if i can help in any way, I'd be happy to.

My #1 suggestion is to sand it as smooth and strait as possible.

Thanks for the support! Out of curiosity, how long have you worked with bondo?
 
Not terribly long, I only started my build a little over a month ago, but I would consider myself sufficient with it. My helmet is very round and smooth and my other pieces are shaping up nicely.
 
Don't try to fill or cover rough Bondo with another layer because it will only get worse. Small batches, thin layers, sand until smooth. Spot putty is great for small holes and bubbles, but it looks like you still need to stick with Bondo. The spot putty is a lot more brittle and will crack and break a lot easier than Bondo if you try to cover large areas with it.

Palm sanders are great for the first few layers, but after that you really just need to rely on sanding by hand.

As for primer, Krylon 'Red Oxide' and 'Gray' are my top picks. They dry quickly and can easily be brought to a glassy finish with a little wet-sanding.
15746364736_c47c16516c_z.jpg
 

Attachments

  • 15746364736_c47c16516c_z.jpg
    15746364736_c47c16516c_z.jpg
    125.5 KB · Views: 260
To answer your question directly, however: if you're finding that your batches are curing before it's all applied, you're using too much. If you're applying your bondo like icing on a cake, you're using too much. Use a good, flat spatula with a clean, unbroken edge and, as above: work with smaller batches. I'd suggest mixing up a batch roughly the size of a ping pong ball, perhaps a golf ball if you're certain you can apply it all efficiently and cleanly. The 'lumps' you're getting are caused by your bondo curing as you're applying it - it's losing the creamy consistency and starting to harden, which means it won't spread as well. As I've said above: if it's hardening as you're using it, you've used too much bondo (or, too much hardener). Once it begins to harden, the batch is useless for basic smoothing, and you may as well discard the remnants.

I agree, though I think some of the other lumps are also caused by fresh bondo falling off the spatula in a foldy lap that I can never seem to be able to smooth out while it's still soft. I might have too much on my spatula, but even the smallest amount I can pick up still gives me that problem. But, as the days go by, I can feel myself even getting more able to manage it.
 
Day five. I'm learning as many things as before; the learning curve's rate of change is staying at a nice straight line. Hopefully the inflection point will come soon :)

Anyway, onto what i've learned today. Sanding with 80 grit is best when stripping much of those large wavy bumps. Even though I put a lot on, it comes off rather easily (Only with a fresh piece of sandpaper). I bought only two sheets, but on a full day of sanding I could eat through one a day. Good thing they're cheap!

Here's that awfully annoying side. I mainly attribute my over-bondoing to the fact that I messed up the pep pretty badly. I will definitely devote many days to that side. I have good faith in it.
IMG_0959.JPG

I'm glad that it's smoothing out after such messing up with gluing the cardstock together. Here's what it looked like before the resin:
12033392_843907779058609_1403180111_n.jpg

For primer, I like to use a high build, sandable automotive primer. It lays on quite thick, filling in small scratches and the like.
As for primer, Krylon 'Red Oxide' and 'Gray' are my top picks. They dry quickly and can easily be brought to a glassy finish with a little wet-sanding.
Thanks for the suggestions! I'll get primer next monday after school.

Aside from that, all the other surfaces are progressing. Slowly, but surely.
 
Something you should invest in (if you already haven't) is a set of rasps and files. They'll save you so much time breaking down those rough spots and you have a lot more control than you would if you just used a palm/mouse sander. When you rough out your shapes with the rasps, you can move on to the files to really get your edges crisp and your surfaces smooth.

Here's a cheap set as an example.
 
Status
Not open for further replies.
Back
Top