I didn't actually! I'm pretty happy with how the measurements I took translated into the mannequin actually. I have a fair bit of experience measuring myself from years in costume on stage

so I think I got pretty lucky with an accurate virtual "me".
Mostly, I just spent time tinkering with the scale on individual pieces and moving them around until I could just barely see gaps when I rotated around-- like for example I was perplexed by the fact that my bicep fit at 95% but that my forearm seemed like it was still too small at 100%... using Armorsmith it looked like I needed to go all the way up to 110%?! I printed some "size rings" from the ends of the piece and confirmed I actually did need to go that high. Printing the forearm in full confirmed that, so it does seem like my avatar in Armorsmith is true to life for now.
I feel like it's going to be harder once I get to printing the chest, because obviously there's going to be some space inside it unless I print it REALLY small, just because the chest sticks out a bit. So I think I will lean on what I can see in Armorsmith and go with something around 95% for the chest and see how it feels. I'll try to see what kinds of edges I can print to test size, maybe the neck area?
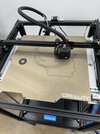
I did get my left arm somewhat finished, so I wanted to see what that looked like together. The Security shoulder I'm using on the left side friction fit with my left bicep PERFECTLY which I'm super happy about. I borrowed the forearm piece I already printed, I'm waiting for another roll of filament so I can print the second one. Also ripped the silicon sock on my hot end while cleaning it last night, so I have a few more of those arriving tomorrow so I can keep printing. At this rate I may get all the pieces printed before the end of the year? I know that might seem slow in comparison to some people's builds, but I have been so busy at work that I feel like I'm keeping a good pace.
View attachment 338497