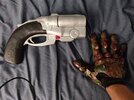
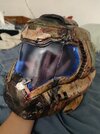
Doom 2016 Praetor suit

Great to hear that this has been at least a little bit informative. I've tried to cover the biggest of the many, many problem areas I've encountered so far, haha.
 
Also, if you weren't planning on it, I'd recommend sewing a jumpsuit sort of thing to go under the armor, you could use very thin fabric, but just so the joints and such are accurate. You already went to all this trouble to make it look accurate, why not go the extra mile and do the underlayer? Just a suggestion, but, assuming you know how to sew or have a friend who does and could teach you, it wouldn't be particularly hard.
 
I have a cheapo synthetic leather jacket I'm using as an undersuit, It bunches up a bit and makes the soft sections look padded. There's some skulduggery going on in the videogame model at the joints so I don't really see another way to make those sections look quite thick enough. The wrists may require a bit of seamster-ing, but I haven't quite gotten there yet
 
Thank you for your detailed step by step creation. I'm going to be building this suit for my son so have been doing a load of research. Could I get a copy of the helmet design and a list of the materials you've used please?
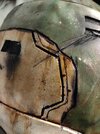
 
That looks really good, and really sick, the weathering, and battle damage is on point! I actually havent seen a doom armor set up before, and this does not disappoint at all!
 
Hello all,
I've been collecting long-term projects recently and this has fallen by the wayside somewhat. I figure by updating this thread I can hopefully get some momentum going and put this thing back in the rotation.

I don't have the upper body completely done, but the arms are 90% there and I've gotten everything else pretty decent. The bits I rushed through are now requiring a bunch of effort to fix up a year down the line, funny how that works...

Ex: helmet detail lines I thought I could eyeball with perfect symmetricity. Whoops, guess not. Kwik seal over the old indents and a small respray+weathering to match got it decent again. Not 100% mirror image, but that's a bit of a reach with foam anyway.
IMG_20210223_221143 (1).jpg


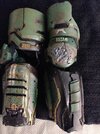
Here are the arms, mostly through the weathering process. I just need to put the wrist plates on and get the elbow pads to stay centered.
IMG_20210223_205124.jpg

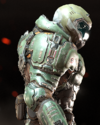
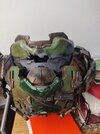
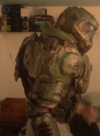
And the pièce de résistance, grainy screenshots ripped from test fitting videos. What can I say, I strive for quality. Ignore the clutter, visual noise, my distorted face peeking through the warped acrylic... I will have better pics soon, for sure. I need to get the arms done and then I'll do some photos from the beltline-up, this stuff was really just to see if it actually fits together correctly, which it does seem to. As always with a home scratch build (or mine anyway), some shapes aren't faithful to the model. The bit that's nagging at me most is the backplate, it is a bit "flat" for my eye... maybe I will push it outwards near the bottom to get a bit more of an angle out of it. It doesn't help that Doomguy seems to have a pretty serious forwards hunch under that armor, so the proportions are hard to match IRL.

Screenshot_20210521-001214.jpg

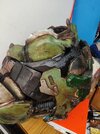
Aside from that, the shoulderpads are a bit asymmetrical in size, but I don't really mind that since the shapes are distinctly at odds as well.

Screenshot_20210521-001112.jpg
IMG_20210223_212500.jpg

And the back. As you can see, the symmetricity isn't quite there. Part of it is the lighting, but for sure the back and chest are not quite parallel. I tweaked a bunch after this, but the spine is still maybe 3/4 inch off center at the bottom. Not enough to stand out, but just enough to drive me nuts when I really look at it, yay. The elbow pads are killing me as well, I might just sew velcro to the leather jacket. The whole thing is honestly much better than I expected at this point, but that just makes the screwiness more annoying, if anything. Plenty of mistakes to learn from, I guess.


I have some ideas on an appropriate gun, but that will be for later. Something big and stupid, and I want it to have some chunky mechanical functionality.

I think my rambling has finally puttered out, peace
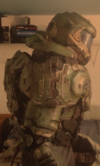
 
Thanks, I've recently passed through the honeymoon phase with this thing so I get to complain about all the shortcuts I took. It's about 30% of the fun!
 
I know, but the last costume I tried to make out of foam was a total disaster. It's currently buried in the city's landfill now slowly decomposing for the next 200 years...
Hah, I've got a fair few of those rotting away too, but I don't put them on the internet. Depending on how you work, this can be a pretty brutal hobby. The only saving grace seems to be that every time you goof up you learn something, except apparently that hot glue is hot. I've gotten that lesson a thousand times and I just keep poking at it.
 
Hello all,
I've been collecting long-term projects recently and this has fallen by the wayside somewhat. I figure by updating this thread I can hopefully get some momentum going and put this thing back in the rotation.

I don't have the upper body completely done, but the arms are 90% there and I've gotten everything else pretty decent. The bits I rushed through are now requiring a bunch of effort to fix up a year down the line, funny how that works...

Ex: helmet detail lines I thought I could eyeball with perfect symmetricity. Whoops, guess not. Kwik seal over the old indents and a small respray+weathering to match got it decent again. Not 100% mirror image, but that's a bit of a reach with foam anyway.
View attachment 306269


Here are the arms, mostly through the weathering process. I just need to put the wrist plates on and get the elbow pads to stay centered.
View attachment 306268

And the pièce de résistance, grainy screenshots ripped from test fitting videos. What can I say, I strive for quality. Ignore the clutter, visual noise, my distorted face peeking through the warped acrylic... I will have better pics soon, for sure. I need to get the arms done and then I'll do some photos from the beltline-up, this stuff was really just to see if it actually fits together correctly, which it does seem to. As always with a home scratch build (or mine anyway), some shapes aren't faithful to the model. The bit that's nagging at me most is the backplate, it is a bit "flat" for my eye... maybe I will push it outwards near the bottom to get a bit more of an angle out of it. It doesn't help that Doomguy seems to have a pretty serious forwards hunch under that armor, so the proportions are hard to match IRL.

View attachment 306265
Aside from that, the shoulderpads are a bit asymmetrical in size, but I don't really mind that since the shapes are distinctly at odds as well.

View attachment 306266View attachment 306267
And the back. As you can see, the symmetricity isn't quite there. Part of it is the lighting, but for sure the back and chest are not quite parallel. I tweaked a bunch after this, but the spine is still maybe 3/4 inch off center at the bottom. Not enough to stand out, but just enough to drive me nuts when I really look at it, yay. The elbow pads are killing me as well, I might just sew velcro to the leather jacket. The whole thing is honestly much better than I expected at this point, but that just makes the screwiness more annoying, if anything. Plenty of mistakes to learn from, I guess.


I have some ideas on an appropriate gun, but that will be for later. Something big and stupid, and I want it to have some chunky mechanical functionality.

I think my rambling has finally puttered out, peace
This is the most beautiful thing I have ever seen in my entire life!
 
Salutations, colleagues.

Yet more tweaks to the back, first one is the before shot:
comparison_b4.PNGcomparison_after.PNGcomparison_game.PNG

I built up the upper back "leather" bits and shifted the panel up and outwards a bit to match the game's profile better. The interior padding structure got changed too, so now it sits a bit different and is a lot more comfortable. my posture is nearly identically in both pictures, so I'm quite happy with how much closer the modifications got it to the in-game reference. The work to correct asymmetry continues, but it's not very exciting so I didn't take pictures.

Here are more shots of the back section, it's all just foam pieces built up over the existing structure.
IMG_20210707_235937.jpgIMG_20210707_235950.jpg

I still need to do weathering on the new pieces, but that can wait until this thing is ready for it too...


Right now it's a bit too sawed off, at least until I print the rest of the fore and barrels. I was going to try a heavy assault rifle until I found this model by Lilykill, and I couldn't pass up a full sized 4 bore super shogun with working break action. My ender 3 is having its bi-monthly meltdown right now, so hopefully I can get it back running soon and finish it up. It's already ridiculously massive, at full length I can imagine how doomguy got so ripped for Eternal. Seriously a high quality model though, and the guy has a lot of equally cool stuff on his store. Well worth the money for sure.

IMG_20210708_000541.jpg


Lastly, I finally figured out how to get a reliable tint on formed acrylic: stained glass spray paint. I've never been able to lay down any kind of spray without orange peel, so sure enough this required 1500 grit wet sanding and polish. I just used some headlight stuff and then glass compound I had lying around after the paper, and it worked quite nicely. There's a noticeable blue-tinted hue, maybe not quite as much as in-game but I can add to it later if I want to. Again, my phone camera's lens fisheyes out the subject...
IMG_20210708_000119_Bokeh.jpg

I got a kick out of the idea that the praetor suit helmet would have a ray-bans style logo in the corner of the lens, so I put in a little slayer's mark with a paint sharpie. I didn't bother to check which side they put it on and ended up guessing wrong, but I'm not too torn up about it.

Thanks for reading
 
This thread is more than 3 months old.

Your message may be considered spam for the following reasons:

  1. This thread hasn't been active in some time. A new post in this thread might not contribute constructively to this discussion after so long.
If you wish to reply despite these issues, check the box below before replying.
Be aware that malicious compliance may result in more severe penalties.
Back
Top