Halo 2 Anniversary ODST - A return to form

Status
Not open for further replies.

Dagger06

Well-Known Member
Discovery19_20190831-DSC_0758.jpg

Photo by PostConBlues

So after a long absence, I've decided to return to the world of Halo costuming. A combination of meeting some local Halo cosplayers as well as Halo: Outpost Discovery reignited my interest. I debated between doing Vale or the Halo 2 ODST, but after various commitments severely limited my timetable, I decided to go with the H2A (aka Insurrection era) ODST, which has been a dream build since the design first appeared.

70154093_1547141215420100_5090348230802145280_n.jpg

An updated version of my very first costume (left) with my latest one (right)

As much as I love the classic H3 design, there's always been something lean and mean about the H2 look.

The initial starting point was Sierra 107's commissioned model and files. It would have been incredibly difficult to finish without these, and I certainly wouldn't have had the time to polish things up as nicely without them so thank you very much for that.

the chest is unfolded, while the shoulder and shinguards are not - the helmet is also too hi-res for Pep, so I would recommend 3d printing it.

The chest is hard to scale, so I would recommend that yourself or your partner don't use the standard measuring method for pep files, instead use the "measure distance between two points" tool in Pep to measure the length from the highest point on the neck collar to the lower back piece (where the knife sheath is placed), and from the lowest point on one shoulder guard to the opposite shoulder guard.

Lastly, I've included the disruptive camouflage pattern that is on the uniform in the event you want to create a custom undersuit/custom uniform based on the base layer.

Happy building!
Jack's Files

Being the Luddite that I am, I decided to forgo 3d printing the helmet and do it with good 'ol fashioned fiberglass (c). I'll be uploading my own unfolds eventually (and a reduced polgyon helmet), but the way I approached the unfolds is somewhat unconventional. I'm an experienced enough builder that I felt comfortable tackling a lot of the details by hand.

PepSnipHelmet.JPG
PepSnipChest.JPG


A lot of the details were intentionally left off,especially stuff like ridges and tubes, as those could be done with carving or styrene later. If anyone has ever sat in on any construction panels with me, this is part of the reason I'm a huge advocate for learning traditional building techniques, as you can apply them to fiberglass, foam, and even 3d printing to create details.

I specifically opted to plan for working in fiberglass because I like the strength and feel, as well as the ability to get a nice finish.

Scaling was eyeballed with the pepakura measuring tools and using various references. For example, the helmet scaling is specifically based off of the size of a MICH military helmet that fits me well, as I wanted to have a similar fit.

2019-07-10 23.29.31.jpg

Testing to see how it fits on my head. You can see how it resembles a low profile military helmet at this point in terms of dimensions.

2019-07-11 18.30.48.jpg


Pep process. Note how I'm intentionally leaving some details off, such as the cutouts in the rear. Where there are supposed to be grooves, I merely extended out the pep file by the distance of the groove.

2019-07-11 18.30.57.jpg


Another shot. You can see my low poly Vale tester helmet, as well as more of how I skipped doing certain details in the pep stage.

2019-07-22 18.40.43.jpg

Moved on downstairs to watch some movies while I worked. Started with Rush Hour, but by the end I was just binge watching She-Ra

2019-07-22 20.58.25.jpg


Getting a feel for how the helmet looks with the closest thing to the H2A vest I had lying around: an old PASGT flak. I place a huge emphasis on the overall "feel" of a costume, and it dictates a lot of my approach to scale and finish.

2019-08-10 22.02.05.jpg
2019-08-11 02.38.24.jpg

I probably got a little too lax with pepping. The helmet was done over the course of 14 days. The chest would be quicker, being completed in about 2 days.

2019-08-11 02.44.41-1.jpg


Another "feel" test. I only pepped the bottom portion of the shoulders. Since the top was mostly flat, I would be doing it in wood.

2019-08-12 21.09.43.jpg

Cheated at the end and used masking tape to block some pieces in place. I mlade the mistake of not remembering to remove the tape after glassing/reinforcement though, which really hurt me when it came to bondo, as it could lift off, taking the bondo with it. Great for doing some neat bondo tricks, but not great if you didn't plan for it.

2019-08-14 21.24.15-1.jpg

2019-08-14 22.05.23.jpg

Brushing on resin. I opted to use more expensive epoxy for several reasons: less toxic, convenient pumps for smooth-on brand epoxy, low shrinkage, increased strength.

2019-08-14 22.05.20.jpg

Here's where i made a mistake. I should have put the masking tape on the inside, and I should have peeled it off when I finished. Also, the center piece is actually off center, which I failed to notice.

2019-08-14 22.05.31.jpg

Resin on the shoulders and visor. I planned to make quick bucks out of them for vacuumforming.

2019-08-15 17.31.03.jpg

I brushed in a layer of rondo aka polyester/fiberglass resin and bondo mixture. Bondo is polyester resin with filler, so mixing the two makes a runnier bondo. This helps to ensure that tight corners are filled, reducing the chance of bubbles when laying glass. However, I cheaped out and only did one layer. I should have done more, but my schedule was getting severely truncated, and I was probably overly concerned about weight (which ended up being a non-issue). Cutting corners always costs in the end though.

2019-08-15 19.30.41.jpg


Nobody likes fiberglass. Nobody.
Note the use of skewers to help ensure the chestpiece doesn't warp. I did two coats of epoxy mat. Three probably would be ideal, but like I said, nobody likes glass.

2019-08-15 23.10.20-1.jpg


In the interim, I built some framesso that I could backfill these with expanding foam. However, in my laziness I did not glass these, which ended up being a mistake as they did not hold their shape properly when foam filled. But I feel kind of itchy even just thinking about fiberglass.

2019-08-16 17.46.00-1.jpg

Basic trimming of glass parts was done and then I rinsed out the parts to try and wash away excess glass dust. There was minimal warping on the helmet. The chest piece was "stretched" with mixing stick braces so to make sure it didn't shrink as the epoxy hardened.

2019-08-16 17.49.57.jpg

Making sure I can still fit everything. It's snug, but it fits and the silhouette looks good!

2019-08-17 08.19.57.jpg

Foam filled vacform bucks. I used loctite expanding foam at the recommendation of another builder as it's a bit denser. However, as you can see it bulged out the pieces a bit, since they weren't reinforced with glass. Additionally, some of the foam didn't cure fully since it needs to be exposed to moisture, so I had to poke holes with a skewer to get it to finish. In the future I should take the time to spritz water on the interior, as well as glass for rigidity.

2019-08-17 08.31.10.jpg


Test fitting the visor. Close fit!

2019-08-18 09.51.55.jpg

Body work on the chest. Note I added some shapes with bondo that weren't in the original model on the upper chest. The chest ended up taking longer than the helmet for body work because I went really thin with the glass in some parts.

Look, no one actually likes working with fiberglass. People just like the end result.

You can see how off center that middle piece is now.

2019-08-18 10.23.53.jpg

Sanding for days! But not too many because it's crunch time. You can see where I'm down to my second layer of glass in the black spots. I really should have put in more rondo.

2019-08-18 15.19.55.jpg

Vacform buck of the shoulders! Not perfect, but good enough, as it was primarily done to save me time.

2019-08-18 15.21.45-1.jpg

Lots of body work. Some good power sanders and a steady system to ensure you're always working on something (and subsequently zero rest) keeps things rolling. Also made progress on the visor buck.

2019-08-19 19.40.07.jpg

I had promised Anvil station folks I would make them a turret,but with my timetable, I had to look for a shortcut. So I dug up an old resin cast of an AndrewDFT styorofam carved M247 I had lying around. They were both broken in the center, so I used a metal plate to join them and then did a lot of body shop work. Because I really wanted it to look more like the Halo2A variant, and to add my own touch to it. In hindsight I should have used wood rather than bondo, but oh well. I'll remake this entirely at some point from scratch.

2019-08-19 23.15.21.jpg

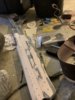
Cutting out the other portion of the shoulders in MDF wood. Wanted to vacform them, but couldn't quite figure out the best way to tackle that, and knocking two out by hand ended up being the faster option.

2019-08-20 18.16.20.jpg


Squished some bondo to ensure a tight fit. Normally you'd put some kind of release barrier like cling wrap or vaseline, but I was in a rush. Not the best idea, but oh well. It worked, and the visor ended up being a pretty good fit! Also around this point I realized I should have been drawing the detail lines with sharpie or something, because most of them are no longer visible.

2019-08-20 18.37.56.jpg
2019-08-20 18.38.35.jpg

2019-08-20 18.38.41.jpg

A side by side with my first helmet.

For those curious, here's my old old thread:

Odst - Trooper's Thread Of Stuff

Going to pause here for the night and get ready for work in the morning! Will finish up this thread tomorrow.

2019-08-29 17.46.40.jpg

New hat vs Oldhat
 
The initial starting point was Sierra 107's commissioned model and files. It would have been incredibly difficult to finish without these, and I certainly wouldn't have had the time to polish things up as nicely without them so thank you very much for that.

Jack's Files

I'm always happy to help, especially considering how much you've done for the 405th! My efforts are a drop in the pond compared to yours :)

Hopefully we can sort out our unfolds and push out a variant to the Armory files that everyone can have access to! (instead of just using my inefficient way of sharing thanks to Dropbox)
 
wow that was great job....!!!
and also thanks for the file, the detail that i seek was clear now

good lord now i'm confuse to decide making airsoft gear between marines and H2 odst (lol) :lol: :lol:
 
So......let me ask you a question Dagger06.......you don't like fiberglassing? Great job BTW, As for the center chest piece.....you could add a bit of bondo to the off side to beef it up a bit and then it kind of centers a little better.
 
So......let me ask you a question Dagger06.......you don't like fiberglassing? Great job BTW, As for the center chest piece.....you could add a bit of bondo to the off side to beef it up a bit and then it kind of centers a little better.

Fiberglass is just a really itchy, nasty mess to deal with. I’m used to it but still approach it like ripping off a band aid. XD

I’m debating if I should try building up the center to adjust it or alternatively I could cut it out and rebuild it, that way the middle section stays slim.

Wowzers! This might be the first Halo 2 anniversary ODST build I've seen

Watches thread

I know there’s been one or two before me, but they’re definitely rare! Hopefully we can change that because I’d love to gather a whole squad for a day at the beach. :3

One of the more recent builds is by OTSDerpy ! Check out their thread below!


wow that was great job....!!!
and also thanks for the file, the detail that i seek was clear now

good lord now i'm confuse to decide making airsoft gear between marines and H2 odst (lol) :lol: :lol:

Glad we could help!

Just as a reminder, we do need to keep airsoft discussion off the 405th forums since there’s a lot of safety and liability’s issues associated with it. Please make sure to use proper safety equipment when playing!
 
Okay, back from work, and on to the rest of the write up!


2019-08-20 21.08.58.jpg


After a lot of sanding and cleanup, the M247 was ready for detailing. This was largely done with a dremel, drill, and a tiny saw for scribing lines.

2019-08-20 21.56.24.jpg
2019-08-20 22.27.25.jpg


Detailing was similarly done on the vents. The insets were mostly done by just dumping some bondo and drilling in the right shape, after which styrene tubes were glued in place.


2019-08-20 22.28.06-1.jpg


General progress pic. Details are slowly being etched in. Note I ended up having to draw in a lot of them with a sharpie since I had sanded off the pep lines by this point, which sucks because they made for handy reference.

2019-08-21 18.36.52.jpg


Additional details were cut out of styrene with a knife.

2019-08-21 21.45.59.jpg
2019-08-21 21.46.05.jpg


Probably 90% of the way there, and pretty much ready for primer.

2019-08-21 21.47.59.jpg


Primer brings it together but also highlights deficiencies.

2019-08-23 23.55.34.jpg
2019-08-23 23.55.41.jpg


Detailing and find cleanup being similarly done on the chest piece.

2019-08-24 00.04.01.jpg


Eventually hit the point where cleanup could be done with spot putty.

2019-08-24 00.32.02.jpg


Shoulder pieces got worked on while layers of primer and spot putty cured.

2019-08-24 23.13.27.jpg


Vacuumforming a buck in PETG. There's a few things off with the size of the buck, but it worked at least.

2019-08-25 00.18.27.jpg


Vacuum forming what i hoped would be used for buckle bits and a sheath (and a random half sphere because why not). I ended up dropping the buckles because of time. The sheath worked well, but i wish I had dremeled in some indents to help hold the knife in place.

2019-08-25 00.53.16-1.jpg


Sheath ended up working after a fashion. For time's sake, and to be a little unique, I used a prop I had made for a Tokyo Ghoul cosplay.

2019-08-25 09.56.19-1.jpg


Everything more or less laid out and ready for paint. Yeah, my shop is a mess.

2019-08-26 16.59.52.jpg


Instead of painting, Idecided to spend more time on cleanup and refinement. Also I like how my H3 helmet lines resemble the H2 helmet.

2019-08-26 18.50.09.jpg


Ended up doing way more touch up on the chest piece than I probably should have. The glass layers being thin and the masking tape I used worked against me a lot here.

2019-08-26 23.33.52.jpg


Staged and taking inventory before the final week's crunch.

2019-08-27 18.35.22.jpg
2019-08-27 18.35.25-1.jpg
2019-08-27 18.35.39-1.jpg
2019-08-27 18.35.42.jpg


Spraying on colors. Base colors used are:
Rustoleum Satin Granite acrylic (Halo 3 ODSTs; Marines)
Krylon Colormaxx satin black and some Fusion machine silver (M247)
Rustoleum enamel Charcoal Gray (Halo 2 ODST)

2019-08-28 00.06.30-1.jpg


For a brief moment I convinced myself i wasn't going to build the full turret and I'd use an old bipod I found lying around instead. It actually fits really well with the MG, visually.

2019-08-28 06.22.17-1.jpg


All the base coats painted.

2019-08-28 21.32.18.jpg
2019-08-28 22.14.41.jpg
2019-08-28 22.15.05.jpg


Since I was on schedule, of course the sensible thing was to try and make an approximation of the turret at the 11th hour. Because I hate myself.

2019-08-29 02.38.30.jpg


A lot of weathering. I moved away from the auto-primer/wipe method and used the more subtle and controlled acrylic wash/wipe.

2019-08-29 02.58.14-1.jpg

Applied some waterslide decals. Most were ONI symbols, but I also made a set to commemorate a friend who's a huge Halo fan that passed away many years ago but would have absolutely loved Outpost Discovery. It's my way making sure he was a part of this milestone in spirit.

2019-08-29 05.05.36.jpg
2019-08-29 05.05.39.jpg


A lot of matte clear coat, and then on to dry brushing. (running a dry silver-paint covered brush lightly to highlight raised surfaces)

2019-08-29 05.58.59-1.jpg
2019-08-29 06.01.42.jpg


All done with painting! All that's really done is installing the visor, strapping, and uhm....driving to Anaheim.

2019-08-29 23.37.53.jpg


Dragged in six costumes to work on when I got in to Anaheim because two trips are for the weak.

2019-08-30 00.46.52.jpg


Turns out these handcuff pouches are way too big, so I used gaff tape to squish them down. I'll custom make some pouches when I get time.

For the waist belt, I used AC145 Ape brand camera cases. Not the cheapest solution, but they look the part and I needed time more than money.

2019-08-30 00.55.09.jpg
2019-08-28 09.07.22-1.jpg


Finally able to get some sleep. To get an idea of how tight the timetable was, here's my schedule book where the vast majority of the work was done over a little more than two weeks. (I drove down on Thursday)

2019-08-30 10.54.56-1.jpg


Everything staged! I ended up bringing 6 costumes and the machine gun. A lot of corners and shortcuts were taken (for example, I completely dropped making shins), but overall I'm happy with how it came out.

IMG-3771.JPG

IMG-3807.JPG
5DC86962-1C97-4679-B398-B0C762020945-29315-0000102531ADA49E.JPG


But the absolutely best moment?

IMG-3974.JPG


Finding out they sold mini Halo 2 ODST plushes at the event!

Anyways, thanks for reading through! I still have a lot of stuff I want to fix up (sew custom shoulder and thigh bits, make the shins and extra details, etc. But I'm overall quite happy with the final look and was thrilled to meet so many fellow H2 ODST fans. I know I probably skipped over a lot, especially at the end, so feel free to ask any questions and I'll be happy to answer! Let's get some more ODSTs out there. :)
 

Attachments

  • 2019-08-20 21.08.58.jpg
    2019-08-20 21.08.58.jpg
    1.7 MB · Views: 324
  • 2019-08-25 00.18.28.jpg
    2019-08-25 00.18.28.jpg
    1.4 MB · Views: 315
Fiberglass is just a really itchy, nasty mess to deal with. I’m used to it but still approach it like ripping off a band aid. XD

I’m debating if I should try building up the center to adjust it or alternatively I could cut it out and rebuild it, that way the middle section stays slim.


I know there’s been one or two before me, but they’re definitely rare! Hopefully we can change that because I’d love to gather a whole squad for a day at the beach. :3

One of the more recent builds is by OTSDerpy ! Check out their thread below!


Glad we could help!

Just as a reminder, we do need to keep airsoft discussion off the 405th forums since there’s a lot of safety and liability’s issues associated with it. Please make sure to use proper safety equipment when playing!


*Happy Cosplayer Noises* I’ve been noticed! Btw this suite is much more advanced than what I could make in my timeframe. I’ll give it look over once I completed a few more suites and create my “MK IV.” See what I can do for inspiration.
 
Glad we could help!

Just as a reminder, we do need to keep airsoft discussion off the 405th forums since there’s a lot of safety and liability’s issues associated with it. Please make sure to use proper safety equipment when playing!
sir, yes sir....!!!!
understood
'-')7
 
Status
Not open for further replies.
Back
Top