PRESSURE!!!!

Isn't it strange how when you go to work it is drudgery, but when you apply it to something non- work related, it becomes fun?
I've always found that interesting.
Under preshah, pressein dowwwn on you, pressin dowwwn on me!

And yeah I've always found that interesting too. I enjoy reading, but in school when they forced me to read a book, even if I could tell it was a book I would normally enjoy, it wasn't the same.
 
Awesome work bro, I'm trying so hard to get my Chief to philly to meet you in person. Im starting to feel the pressure a little bit!!
I've got one of your SMGs finished, the other has just gone through the first sanding passes and is approaching the painting stage! Don't let me down Chief!

Wow! I loved reading through this thread, especially about the reflection on a years worth of work. I really like the amount of detail you go into with your build. Definitely some good stuff to refer back to such as the visors. I wonder if it would be possible to use the Aclad II lacquer without an airbrush?
I posted this and am still looking how there's stuff I missed. There's too much going on!

I've heard good things from others about the spraycan Alclad II, I just haven't used it because it's kind of stupid expensive to order in and I can make the airbrush lacquer go pretty far.

Isn't it strange how when you go to work it is drudgery, but when you apply it to something non- work related, it becomes fun?

I've always found that interesting.
I call it my Boring Every Day Job, it's pretty far from being boring though, that title is just something that Rider Break Cosplay coined and I really liked the sound of to describe the split between career and hobby work :p
 
I've got one of your SMGs finished, the other has just gone through the first sanding passes and is approaching the painting stage! Don't let me down Chief!


I posted this and am still looking how there's stuff I missed. There's too much going on!

I've heard good things from others about the spraycan Alclad II, I just haven't used it because it's kind of stupid expensive to order in and I can make the airbrush lacquer go pretty far.


I call it my Boring Every Day Job, it's pretty far from being boring though, that title is just something that Rider Break Cosplay coined and I really liked the sound of to describe the split between career and hobby work :p
Thanks man I'm working hard on it.. I can't wait to see the SMGs!! While we're on the topic of fun work.. still a long ways to go but coming along..
20190626_162527.jpg20190626_162855.jpg
 
Jeeze ExCeLLuR8, tone it down you're gonna make the rest us look back with that armor! xD
Jk, it's looking real good!
Haha thanks man, wait till the detail weathering is done. I've got one forearm and both hand plates completely done and they are almost an identical match to the game. Scratch direction and all. I'm just trying to bring H3 Chief to life! I just wish TurboCharizard could bring spartan Daisy to Philly to get both MK VI suits together!
 
Haha thanks man, wait till the detail weathering is done. I've got one forearm and both hand plates completely done and they are almost an identical match to the game. Scratch direction and all. I'm just trying to bring H3 Chief to life! I just wish TurboCharizard could bring spartan Daisy to Philly to get both MK VI suits together!
 
I just wish TurboCharizard could bring spartan Daisy to Philly to get both MK VI suits together!
Same. I just can't pull the shipping costs for bringing her safely across continent. Maybe one day one of us will be cos-famous enough to get a guest invite on the opposite coast.
 
Hey all, my convention season is over and that means I've had a week of doing as little as humanly possible. I've collected as many photos and files and organized them as best I could so that I can share them with you fine folks.

The most important part of the Daisy suit was the signature CQB U/A components and the helmet and you've seen my modelling process in earlier posts. As promised the files made for clanging onto the base Mk VI that's available in the Free 3D Model Index are now uploaded here for everyone to use as they see fit. If you do use them at any point, give me a wave and let me know if you found them helpful.


Shoulders
CQB Shoulders v10 1.pngCQB Shoulders v10 2.pngCQB Shoulders v10.png

The shoulder sections are split into two sections which easily fit on a mid-sized printer and with some creative slicing can be printed all at once. I've included the right shoulder with the Misriah Armory emblem etched in as a manufacturer mark, the left shoulder on my suit has a different etch of my personal cosplay logo. If you'd like a plain shoulder without any etch I can be easily bribed with promise of internet points and fun.

Chest U/A
Chest v44 1.pngChest v44 2.pngChest v44.png
The chest section is rather large and is split into two primary sections for the U/A, two sheath parts, two buckles, two for the cannister and four for the knife. The U/A section is the largest by far and fits easily on a printbed of 300mmx300mm for a TurboCharizard sized person, if you're smaller it could fit on a 200mmx200mm with clever alignment. If you're larger than one standard TurboCharizard you may have to split the Left and Right U/A sections to accommodate the size to your printer. This section slots onto the Mk VI chest that was uploaded by MoeSizzlac in the Free 3D Model Index at a scale of 1:1 so adjust this file accordingly to your chest section if you use both. For the lights in the lower section of the right pectoral I drilled a section through the lower Mk VI plate for a wire run and did all the electronics for the lighting before sealing them in permanently.

I'll be working on a vector image for the tech suit next so that you can see roughly what process I used. Images from the sewing process may have been lost in a phone reset but I'm hunting to find as many as possible in my backups. For now please enjoy a photo of PerniciousDuke and CplYapFlip hanging out at the most recent Daisy-023 sighting.
20190616_115839.jpg


CQB Chest UA
CQB Shoulder
 
Last edited:
xXDashIVXx I'm not seeing it. Are you saying I look like Ewan McGregor? :lol:


_ it, I'm in.
View attachment 276356
Jedi Jesus here I come.
I am sorry, but I would never say something like that! Ewan is a God!

It was llieutenanjaku :b

I also think you loolokindof like Ryan from rooster teeth, but I cant place my finger on the REAL lookalike. This is going to drive me crazy...
maxresdefault (5).jpg
 
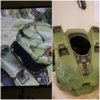
Welcome to thread revival due to the power of cloning. Daisy's first lid had a mysterious accident that left a crack along the right side of the helmet following from the visor to the ear. I wasn't happy with it and basically let Daisy sit in her storage bin for the course of six months.

Fast forward to November when I had some downtime on my large format printers and redid the helmet at a slightly larger scale to help with comfort. Over the past two weeks I finally found the gumption to assemble, sand, prime, sand, fill, sand and prime some more until we got to here. A nice smooth helmet.
DSC_6821.JPG


Thanks to this build thread I had written down exactly what pain I had used previously so I could colour match to the rest of the suit. It also reminded me to test paints beforehand for any ill effects and bad interactions on test pieces.
DSC_6823.JPG


Also today in the mail as I was installing one of the spare visors from last spring a present came in the mail from CplYapFlip. A tiny Daisy! PerniciousDuke was kind enough to point out that it looked like my helmets had a baby.
83048577_225952925084310_5441979917744996352_n.jpg


Now with the new lid I can get back to JoJo posing as a SPARTAN-II and take some deployment photos while I'm at it!
 
Welcome to thread revival due to the power of cloning. Daisy's first lid had a mysterious accident that left a crack along the right side of the helmet following from the visor to the ear. I wasn't happy with it and basically let Daisy sit in her storage bin for the course of six months.

Fast forward to November when I had some downtime on my large format printers and redid the helmet at a slightly larger scale to help with comfort. Over the past two weeks I finally found the gumption to assemble, sand, prime, sand, fill, sand and prime some more until we got to here. A nice smooth helmet.
View attachment 283422

Thanks to this build thread I had written down exactly what pain I had used previously so I could colour match to the rest of the suit. It also reminded me to test paints beforehand for any ill effects and bad interactions on test pieces.
View attachment 283423

Also today in the mail as I was installing one of the spare visors from last spring a present came in the mail from CplYapFlip. A tiny Daisy! PerniciousDuke was kind enough to point out that it looked like my helmets had a baby.
View attachment 283421

Now with the new lid I can get back to JoJo posing as a SPARTAN-II and take some deployment photos while I'm at it!
Yessss, I've been wondering what happened to daisy! Looking great!
 
Welcome to thread revival due to the power of cloning. Daisy's first lid had a mysterious accident that left a crack along the right side of the helmet following from the visor to the ear. I wasn't happy with it and basically let Daisy sit in her storage bin for the course of six months.

Fast forward to November when I had some downtime on my large format printers and redid the helmet at a slightly larger scale to help with comfort. Over the past two weeks I finally found the gumption to assemble, sand, prime, sand, fill, sand and prime some more until we got to here. A nice smooth helmet.
View attachment 283422

Thanks to this build thread I had written down exactly what pain I had used previously so I could colour match to the rest of the suit. It also reminded me to test paints beforehand for any ill effects and bad interactions on test pieces.
View attachment 283423

Also today in the mail as I was installing one of the spare visors from last spring a present came in the mail from CplYapFlip. A tiny Daisy! PerniciousDuke was kind enough to point out that it looked like my helmets had a baby.
View attachment 283421

Now with the new lid I can get back to JoJo posing as a SPARTAN-II and take some deployment photos while I'm at it!
so is the tiny daisy gonna jojo pose too now?
 
Welcome to thread revival due to the power of cloning. Daisy's first lid had a mysterious accident that left a crack along the right side of the helmet following from the visor to the ear. I wasn't happy with it and basically let Daisy sit in her storage bin for the course of six months.

Fast forward to November when I had some downtime on my large format printers and redid the helmet at a slightly larger scale to help with comfort. Over the past two weeks I finally found the gumption to assemble, sand, prime, sand, fill, sand and prime some more until we got to here. A nice smooth helmet.
View attachment 283422

Thanks to this build thread I had written down exactly what pain I had used previously so I could colour match to the rest of the suit. It also reminded me to test paints beforehand for any ill effects and bad interactions on test pieces.
View attachment 283423

Also today in the mail as I was installing one of the spare visors from last spring a present came in the mail from CplYapFlip. A tiny Daisy! PerniciousDuke was kind enough to point out that it looked like my helmets had a baby.
View attachment 283421

Now with the new lid I can get back to JoJo posing as a SPARTAN-II and take some deployment photos while I'm at it!

Gimme gimme gimme the broken one! Impeccable work as always! Did you do something to the visor? I know you said you changed the coating a little in the discord, but the shape of it looks cleaner too
 
About the crack:

Aircraft and the space shuttle have long since steered away from having square corners in the windows for precisely that same reason, to avoid cracks. Instead, the windows are rounded, which prevents the stresses and "torque" of wear and tear from building up in the corners and causing damage like this. I know it isn't game accurate, but a little bit of curve would help prevent that from happening again.
 
Does anyone know what the undersuit is made of, how it was bound together, and how many hours did it take to build it? I noticed when the undersuit was brought up in the first post along with all the part's build time, the build time wasn't included for the undersuit.
 

Your message may be considered spam for the following reasons:

If you wish to reply despite these issues, check the box below before replying.
Be aware that malicious compliance may result in more severe penalties.
Back
Top