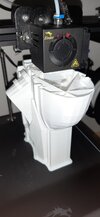
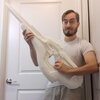
how long your prints usually take? im at 20hrs printing a forarm and i didnt think it would take so long.. wowee. I cant imagine how many hours your printer has been running for.
You are using an out of date browser. It may not display this or other websites correctly.
You should upgrade or use an alternative browser.
You should upgrade or use an alternative browser.
Halo Reach Spartan Build
- Thread starter S225
- Start date
- Status
- Not open for further replies.
how long your prints usually take? im at 20hrs printing a forarm and i didnt think it would take so long.. wowee. I cant imagine how many hours your printer has been running for.
I usually shoot for 12-20 hour prints. .2mm layers have been working very well to save on time while still putting out great results.
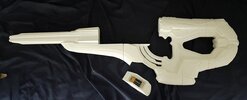
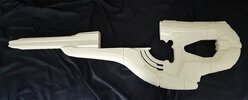
The carbine hand guard that just finished is about 26cm tall and took 18 hours. Printer is probably overdue for a cleaning as I have been running it 4-5 times a week since last December!
Quick edit: I've not commented on your work yet but the amount of skill and effort that has gone into your build is unbelievable! It's like you just willed your suit into existence!
Last edited:
- Member DIN
- S822
Truly looking forward to this prop. I love the carbine. Looking good!Not worried about it being too small now XD
View attachment 309424
The majority of the armor has very little hollow space between the inner and outer shell. Most of the time the shell layers meet and support each other but I have found that adding 5-15% infill helps keep layers from separating and fills in any dead space inside of the model. The armor is super lightweight, I'd be surprised if everything is more than 10 pounds. Priming and paint will add a bit of mass but everything is so light I shouldn't notice.When these printers are doing the thicker parts, is it printing them solid, hollow, or some sort of honeycomb fill, etc? What's the typical weight of a full printed armor suit?
Same for the props. All have been printed with two .5mm thick walls and minimal support.
The M6 weighs about 220g, the carbine will be just over a kilo when it's all done, and the plasma rifle is about 650g.
I've started using the cubic infill in the cura slicer for props as it uses the same amount of filament and I feel the integrity of the parts is much better.
For props/ low stress parts 20% infill is as high as I would ever consider. More practical/ mechanical parts like gears or support pegs are what I would use more infill for.
Last edited:
Thanks!Truly looking forward to this prop. I love the carbine. Looking good!
Definitely one of my top 3 favorites. The Halo 4/5 carbine was one of the few redesigns I thought worked very well. Not too worried about it "fitting" the Reach aesthetic.
- Member DIN
- S068
I've done three printed suits and it all depends on the file design as well as the scale. All of them weigh in between six and ten kilograms after adding fasteners and fiberglass and resin layers.When these printers are doing the thicker parts, is it printing them solid, hollow, or some sort of honeycomb fill, etc? What's the typical weight of a full printed armor suit?
After almost giving up on getting a system in place to eject the magazine, I'm going to attempt on last design.
Excuse the low quality ( drew this on my phone while at work)
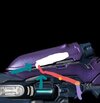
White=Ejection rod
Red=Ejector release rod
Purple=Fun button
Yellow=Pivot points
Teal=springs and which way they push
Now if I can get this into the model I will be very happy. Only issue is how small some of these parts might be. I can likely hollow out the under side of the mag well to be able to insert the prices and also make it so the ejection rod is captive.
Relatively simple with only small movements needed out of the moving pieces. I have a few days off after today so if this works we should have it printed by Saturday!
Excuse the low quality ( drew this on my phone while at work)

White=Ejection rod
Red=Ejector release rod
Purple=Fun button
Yellow=Pivot points
Teal=springs and which way they push
Now if I can get this into the model I will be very happy. Only issue is how small some of these parts might be. I can likely hollow out the under side of the mag well to be able to insert the prices and also make it so the ejection rod is captive.
Relatively simple with only small movements needed out of the moving pieces. I have a few days off after today so if this works we should have it printed by Saturday!
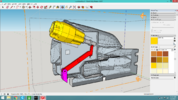
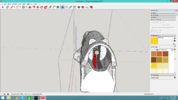
I think this will work? Still a few things to add but here's the final plan
The opening down the mag tube will be closed off by a plate that will do hopefully do a few things
1: Add a guide tube for the ejector (now gray) along with a collar to keep it from coming out too far
2: Add a top cover for the red lever pivot to prevent it from coming out of place
3: Add an anchor point for a rubber band that will also attach to the bottom right of the lever, pulling it up into the cut out on the ejector
4: Seal off the almost 2cm wide gash I have cut out of this poor model
The little white section on the first photo is exactly 1cm squared
At least I can say I tried. If this fails any left over space can easily be hidden and it should also print faster now.
FIXED: Please ignore!
One stray line on a face was the issue
Hit a snag, if anyone knows about this please feel free to respond.
I've been using CURA to slice and print for about 10 months now and have had no issue with the program that wasn't related to a model issue that I caused. I imported the carbine ejection components and only one out of the three parts is slicing. The rest of the carbine slices as well.
I've checked that the parts are sealed, hollow, and that the faces are oriented the right way as I normally do.
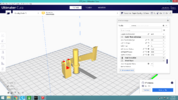
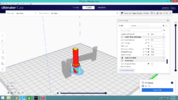
same issue in the creality slicer too. so something wrong with the model? I've not done anything different that i can think of.
Currently running CURA 4.8.0, same version and print settings that I've been using without this issue.
I'll keep trying to fix this and maybe update CURA? Was trying to avoid that as everything had been fine on the older version.
One stray line on a face was the issue
Hit a snag, if anyone knows about this please feel free to respond.
I've been using CURA to slice and print for about 10 months now and have had no issue with the program that wasn't related to a model issue that I caused. I imported the carbine ejection components and only one out of the three parts is slicing. The rest of the carbine slices as well.
I've checked that the parts are sealed, hollow, and that the faces are oriented the right way as I normally do.


same issue in the creality slicer too. so something wrong with the model? I've not done anything different that i can think of.
Currently running CURA 4.8.0, same version and print settings that I've been using without this issue.
I'll keep trying to fix this and maybe update CURA? Was trying to avoid that as everything had been fine on the older version.
Last edited:
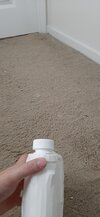
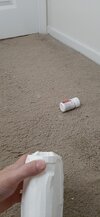
So this little spring I put together can launch the ejector rod about 6 feet into the air... if the whole thing functions I have a good feeling thstmags will get kicked out pretty well! One more piece of the mechanism to print and then it's on to the rest of the model!
Last edited:
- Member DIN
- S018
Wait, it actually shoots stuff?
Yep! I have a magazine printing now to see how that fairs. The bottle is just about the same size, maybe a bit heavier.Wait, it actually shoots stuff?
The ejector resets when you insert something as well! It then readys the button for ejection each time. I can't believe it's working, I might have a way to streamline it just a little more before everything gets glued together.
Pretty sure I have everything seated properly so as soon as this glue dries and I figure out how to post a short video I'll do a few reloads so yall can see!
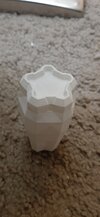
Drew up a new magazine too. Not sure if I'll add lights, I can always try later. Only 10g of filament for these so I'll print a bunch at some point.

Drew up a new magazine too. Not sure if I'll add lights, I can always try later. Only 10g of filament for these so I'll print a bunch at some point.
I said I was going to do this months ago and here it is! While it's a little finicky (the ejector rod can sometimes rotate and not catch the release lever, improved with some scrap but could have been prevented) I'm glad I decided to see this through. Maybe not as powerful as I thought it'd be but I'm happy with what two push pen springs and some rubber bands can do!
Last edited:
- Status
- Not open for further replies.
Similar threads
- Replies
- 2
- Views
- 1,417
- Replies
- 3
- Views
- 462
- Replies
- 15
- Views
- 990
- Replies
- 8
- Views
- 653

