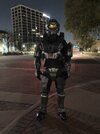
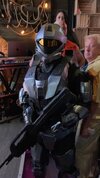
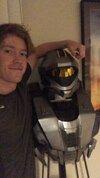
MJOLNIR Mark VI Recon (Halo 3)

If I pull this off, is this reaching the cosplay equivalent of level 50?

  • Yes

    Votes: 5 41.7%
  • No

    Votes: 1 8.3%
  • Trick question. Level 50 is an urban legend. It's 2020 and can't be obtained.

    Votes: 6 50.0%

  • Total voters
    12
My two biggest engineering hurdles in finishing this suit up;

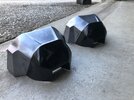
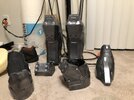
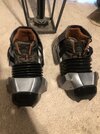
1) Attaching the 3 pieces of the spartan boot to my shoes
2) Attaching the two halves of the torso, chest piece to the back piece, after I cut it down the middle.

I'm basically looking for tutorials or other posts where either of these challenges are explained. Please link them for me if there are some good solutions out there. I'm not having a ton of luck with the forums search function. (I swear there used to be a "search this thread" function, but now I can't find it. Instead having to click page by page on some threads that are like 20 pages long).

Flexible glue or Shoe Goo might be a good option for the boots, but there is only so much surface area on each of the plastic parts touching the boot that I'm not sure will hold them securely.

Magnets would be a good idea for connecting the chest and back pieces, but I'm at a loss for how to mount them to the inside of the torso pieces and get them to line up well.

Thanks for the help and advice.
 
reconslicedview2.JPG
reconslicedview1.JPG

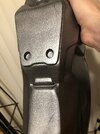
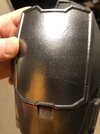
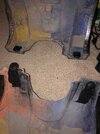
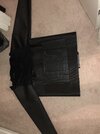
The shell of the model is only 1.2mm thick. So there is a lot of empty space at the connection point. I need magnets parallel to the plane of the cut. Maybe as simple as plastic buckles. But will that create a smooth seam? Just brainstorming.
 
My two biggest engineering hurdles in finishing this suit up;

1) Attaching the 3 pieces of the spartan boot to my shoes
2) Attaching the two halves of the torso, chest piece to the back piece, after I cut it down the middle.
The search function sometimes does not work perfectly when you are searching for very specific topic. I will occasionally just go to Google myself and search "405th (Topic)".

In this case I googled "405th Separate Chest and Back" and "405th Attach Boot Armor" and found afew threads that might be helpful.


Just sharing some more of my process.
Used the spoon test as well to check out some paint / base coat combinations til I found the one I liked.
D99402AB-DBD0-487B-8B35-93E6E1BC36C0.jpeg

Additionally to help me picture the final look, made a “Spartan on a stick.” Just a scaled down model of my armor to throw some paint on it. Pictured is “shark grey metallic” a dark grey I really like on the C7 corvettes. But it was too dark for this project.
856B4753-13C7-4C95-99BD-9CFA6AAF8AEF.jpeg

The final color I went with (shown on the spoons) was “Billet Silver” and it’s a paint on several Dodge vehicles like this challenger. I love the way this color takes on shadows.
1666104229768.png
 
Last edited:
We’ve got boots on the ground! (Literally)
A96D859E-EE2E-4A32-9E21-F75D98878A30.jpeg
There are 22 pieces that make up the whole armor set, I’ve got about 1/3 painted. Expect to finish the rest by Saturday.

Couldn’t be happier with the color. I like it a lot better than the rustoleum metallic I started out with.

9139E97C-B58E-4627-AAC0-26194075FAF6.jpeg
Now, it seems counterproductive to the insane amount of sanding we all do to get our 3D printed parts smooth before painting, but I actually added physical weathering to the parts before paint. I made various scrapes with needle files, and then finer scratches with very course sandpaper (like 80 or 100 grit). But this adds some nice realism and depth before drybrushing with silver.

Plus, if you look at reference images from Halo 3, Spartans actually have these scrapes and scratches present all over the armor. As well as on weapons. Game has held up incredibly well after 15 years. Bungie really paid a lot of attention to detail.

F249EB27-F0E8-4FD0-80B0-6227E94932C5.jpegD82E5A51-61EF-4F24-96B9-38A6A9DB879B.jpeg
 
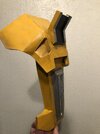
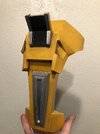
I’ve got a recon shoulder painted and weathered. About a 7/10 satisfied with the color. Might be a little too mustard-y. Considering going with a more orange metallic, but love how the weathering turned out!
View attachment 324679View attachment 324680

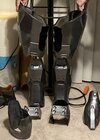
Legs completed. Can’t wait to see it all assembled in full
View attachment 324682
I honestly love that shade of yellow. I would be extremely happy to achieve that with my deep blue colour scheme, if I ever made my own armour!
 
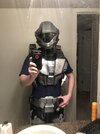
First time being able to wear the chest piece! I’m so stoked how this turned out. (Disregard mismatched helmet this was version 1).

8E96356D-2ABD-4B17-A2EE-D41AF7779565.jpeg

Working on fitment now of pieces and foam padding. Used a combo of stretch fabric (stretch rite) and a buckle system to add tension from the chest plate to the back plate. This is what’s keeping the pieces locked together.
F8E262EA-6D27-49EE-8A39-924A9F76DF25.jpeg

Whole thing is finally coming together!! Some more progress pics;
9CD1D13A-9AC6-4969-9266-F07B00D3898D.jpeg5BD75DB8-39F4-448E-93CE-D944CD1647DE.jpeg7DAED207-9F94-44D4-88CB-24A208E5F7F8.jpeg
 
This is turning out fantastic! Are there any plans on adding lights? Also, what paints did you use on the TPU? Any time I tried that, it never works quite right.
 
This is turning out fantastic! Are there any plans on adding lights? Also, what paints did you use on the TPU? Any time I tried that, it never works quite right.
Lights maybe at a later date. Didn’t wanna bother with battery packs and soldering.

TPU is not painted, purely plasti dip and I was happy with the finish. Dulled it down.
 
Lights maybe at a later date. Didn’t wanna bother with battery packs and soldering.

TPU is not painted, purely plasti dip and I was happy with the finish. Dulled it down.
Huh, I'll have to try that. I used ninjaflex for some of my undersuit parts and the shoulders. Looking forward to seeing what you make, man! Good work so far
 
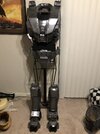
My fellow 405th members. I couldn't be happier to present my first suit up; Halo 3 Recon!

367DDA39-3502-4BCB-AC8A-C8027096437A.jpeg
0CF58578-73B8-44F2-A481-0C30B02C6F89.jpeg
Quite literally a dream come true. I worked all day long on Saturday up until midnight just to make it barely wearable for a 1am costume contest! Here are some other shots.
7A918163-5525-4FA3-926F-50189129B877.jpeg
A kinda obscured view of the back and shoulder;
5784B3CE-F357-40FB-9E22-B222528FBB42.jpeg
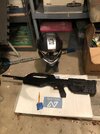
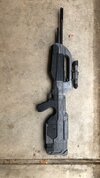
The battle rifle
B5AC6059-3208-4E64-8456-3646E0EBB27B.jpeg
Undersuit design (used a pretty thick vinyl-like fabric with some texture on it from Jo Ann to sort of emulate a rubbery space suit)
12673A44-6677-4113-BF46-10D10DEC4518.jpeg
Boot assembly
F917B1DC-E11B-4718-B92C-78AA858D5167.jpeg
And one of my favorites, this weird flash effect that happened, adding some faint “Halos” hovering above the helmet!

C899F842-88D7-402A-9596-79254182A481.jpeg
As it exists now, it’s about 90% done. I was not able to paint in a few more details, do any washes or weathering, and I didn’t have time for the midsection wrap. Once it really got down to the wire I realized I wasn’t going to have it perfect, but I’m just amazed I was able to get the whole thing wearable. Interior of the parts are basically stuffed with upholstery foam with hot glue. No I didn’t win the contest (lost to a group of four dudes dressed as Kiss one of which had a guitar shooting literal flames out the tip haha) but the W for me was just being able to wear it out this year. This has been a 2 year project so being able to finish it was an amazing feeling. The suit got a lot of complements.

Huge thanks again to MoeSizzlac for designing the chest and shoulder pieces for me, as well as to everyone else on the site who helped with all the various aspects of this build.

I will be posting the truly 100% finished build soon! Happy Halloween!
24543DC2-38D2-4E2E-B9E6-C8E360546B7E.jpeg
 
Hey I'm curious, how did you end up attaching the boot pieces to your shoes? Looking at the photos it looks like there might be some kind of strap on the back portion, but I'm not super clear on how they come together or how they are secured and keep the 3D printed part on. I'm working though much of the same files myself right now and running in to many of the same questions it looks like you were successful in navigating. Your suit looks very slick, love the color scheme!
 
This thread is more than 9 months old.

Your message may be considered spam for the following reasons:

  1. This thread hasn't been active in some time. A new post in this thread might not contribute constructively to this discussion after so long.
If you wish to reply despite these issues, check the box below before replying.
Be aware that malicious compliance may result in more severe penalties.
Back
Top