Today is a very fun update, and a big one to boot!! I've made a fair bit of progress and I'm excited to update y'all about it.
So first and foremost, waiting for the weather to dry enough so that I could clear coat
sucked. I waited about a week and a half for the humidity to get anywhere near below 60%-70%, which is what the spray can required. Thankfully, after waiting forever, the clear coat went on and looked great right away. It did kind of darken the color further but nonetheless, it looks good. I'll show some photos further down as I didn't take any specific photos of the clear coat since it was fairly dark by the time I finished it.
While I had been waiting for that week and a half, I got started on a render of my Spartan and my planned colors (Shout out
Jeffw773 and their Spartan Blender Render tutorial, which I'll link at the end of my post) so that I could be fully prepared come painting time for my armor. Here's what I'm currently planning on:
Since the purple was such a pain to use, I decided to use it as a highlight color instead of the main color, and I think it still will work pretty well. I think all together it really looks pretty dope! Not quite a proper 'canon' color combo, but cool nonetheless.
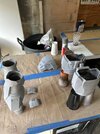
Now that the render was done, the clear coat had cured, and I had tweaked my scaling again (more on that later), it was time to work on visor, electronics, and padding installation! Now at first for the padding I was trying to use a generic helmet padding insert thing, but it really wasn't working well. It wasn't super comfortable, and any time I moved even a little bit I was like a bobble head. Not good. So I bought a non-toxic, etc etc, egg crate mattress topper, and began to cut out pieces to line my helmet. With some decent planning, a sharpie, the sticky velcro dots that came with the original helmet padding, some random velcro I found in my house, and a boatload of hot glue, I set out to installing everything.
I focused on the visor first, as I needed to see the dimensions of how it would sit inside the helmet to figure out padding, wiring, etc. To install the visor I decided to use hot glue. Now, it's definitely not the best way to go for removability, but I hadn't preplanned any Chicago screws or anything, so I just went with what I had. After heating up some hot glue and placing a few beads around the front, I gently pressed the visor into place, doing my best to line everything up and keep it flush with as many parts of the front as I could. I then put some securing bits of hot glue on the sides, and voila, it was installed! (Photos below)
After that was done, worked out the electronics, namely the two 40mm Noctua fans that I put in the front-most vents. With some delicate hot glue work, they attached smoothly and sat flush with the interior area of the vents, and they pull in a pretty good amount of air. I'm very pleased with how they turned out, and they de-fog my visor incredibly well even without any air deflectors, etc. (I had originally printed a mini air deflector, but it was just tall enough that I couldn't get my head into the helmet with it attached). They are very necessary, as I run warm and without the fans on, the helmet heats up immediately. After those were glued, I ran the wires to the back of the helmet where I then glued down the on/off switch that controls the fans, then ran the USB wire out the back of the helmet. I plan to hide the cable in my neck seal, and have the battery pack attached to the interior of the back plate, as the battery I bought is too big to go into my helmet.
With all of that wiring done and delicately glued down, it was padding time. After measuring out some pieces of the egg crate foam I began to place them into the helmet to create a nice comfortable interior that would hold my head securely without being too tight. This was the final result:


It may seem like a ton of padding, but it's necessary as I had to make my helmet a bit big so that I could get my head through the neck hole, so it bobbled pretty freely without the padding. I placed padding at the back of my head, along my jaw, at my cheeks, and at my chin. This continuous pressure all around my head means that even though the helmet is a smidgen big, and a bit heavy, it's pretty comfortable to wear and doesn't bobble. I also used part of the generic padding as I needed something comfortable for the top of my head that wouldn't have my head sticking too far out of the bottom of my helmet. With egg crate padding on the top, my chin was almost all the way out of the bottom of the helmet, so I decided against doing that.
I also made sure that all of the foam is removable. Each piece has a strip of velcro hot glued onto it so that it can attach to the round velcro tabs on the interior, so that it can be removed for cleaning. I'm naturally a pretty sweaty person, so being able to clean and disinfect the interior of my helmet was incredibly important to me.
My current only issue with the padding is the chin. It's too close to the fans for my taste, but it needs to stick out like that to assist with holding my head in place. I'm going to continue brainstorming this issue to figure out how I could mitigate the amount of foam I'm using for better airflow, while keeping my head secure.
The only other thing that this helmet needs is the microphone for my voice amplifier. I'll be purchasing one a little closer to the end of my project so that I can be heard through my helmet, so I preplanned a little spot where I can velcro in the mic (again, focusing on an emphasis of removability with just about everything). I plan to use a wireless mic, so being able to take it out to charge or swap batteries is a must.
With all that together, I officially declare my helmet done! While I inevitably will tweak some things, and add some things, for now I'd say it's complete. Here it is in all it's glory:
It really was a ton of fun for me to build this helmet, and I'm very pleased with the results. I'm very eager to get working on the rest now, which I am glad to say that I'm making progress on!! I worked quite a bit on the scaling of my suit, with assistance from
KaeSpoon and
Fallen for advice on how to scale pieces for my body type, and I think I've now got it to where I want it. I plan to start my first few tests tonight, so expect more posts from me soon!
Hope you enjoyed this Chonky update, and I'll see you soon with more stuff!
Arcane signing off.
Spartan Blender Render Tutorial:
[Tutorial] How to make/view/export your own Halo Spartans in Blender